Schedule data pipeline
Scheduling a data pipeline allows us to run the pipeline automatically at specific intervals. For instance, we can define a pipeline to run at 2 pm every day or 8 am every Monday.
To schedule a pipeline, go to the Load view and click Schedule pipeline.
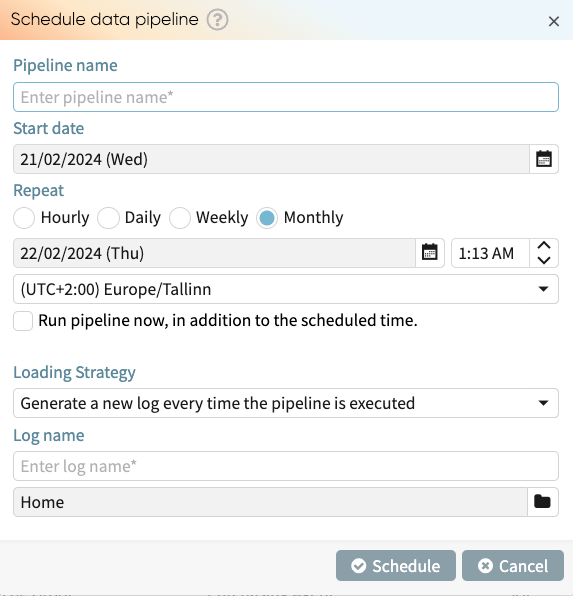
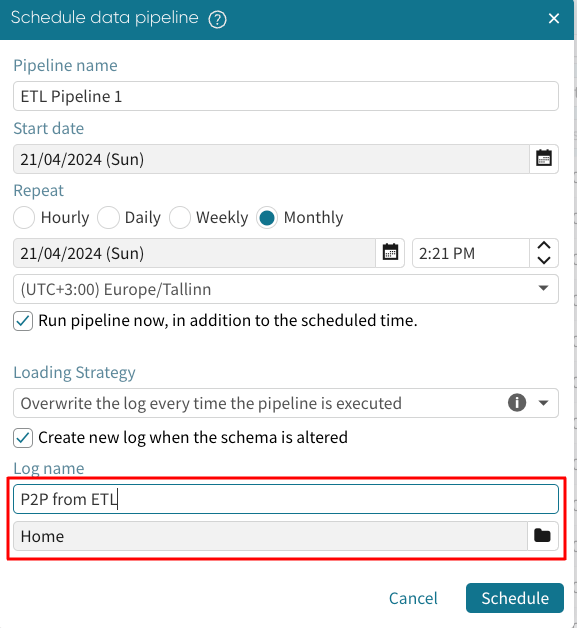
The Schedule data pipeline window appears.
Enter the pipeline name.
We can also choose the start date of the pipeline.
Click the calendar icon 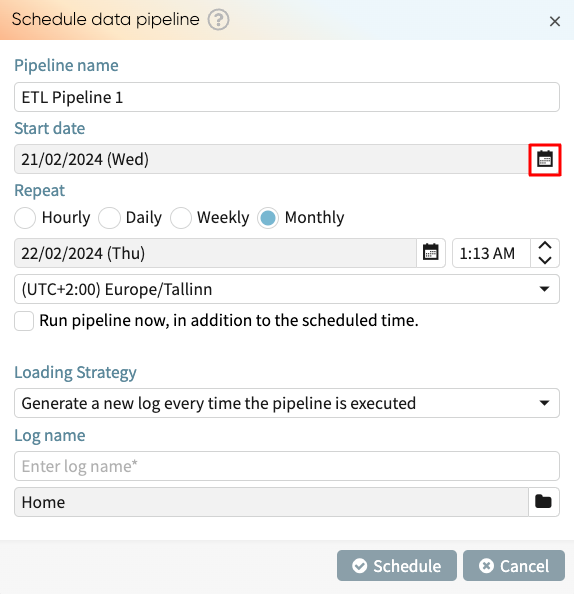 to select a start date.
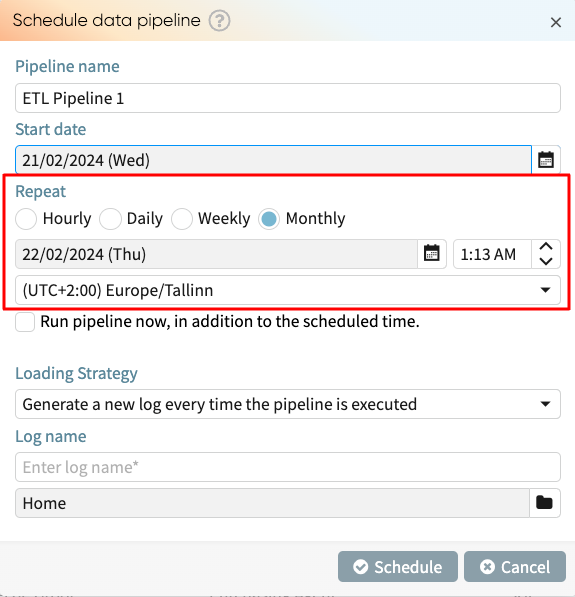
We can choose the frequency of the pipeline runs. It could be hourly, daily, weekly, or monthly. We can also specify the time in which the pipeline will be run.
Note
When scheduling a pipeline from a S3 folder, the schedule frequency of the pipeline should be consistent with the frequency of arrival of new micro-batches to the S3 folder. For instance, if an external extraction process automatically uploads a micro-batch every hour, we can set the pipeline schedule to run hourly. To learn more about ETL pipeline from an S3 folder, see Extract micro-batches from an S3 folder.
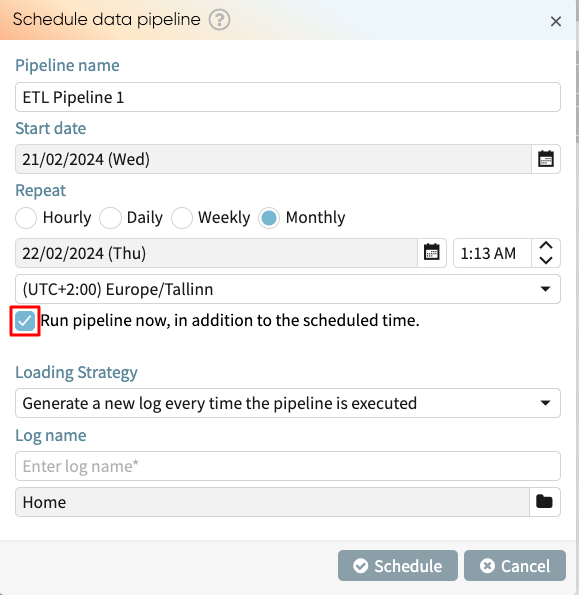
If we want the pipeline to be run right after scheduling it, tick Run pipeline now in addition to the scheduled time.
Loading strategies and eviction periods
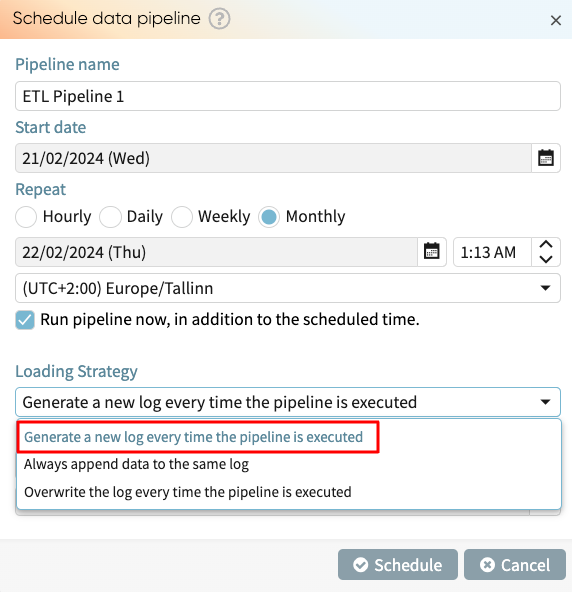
The loading strategy is an important parameter when scheduling a pipeline. There are three loading strategies.
Generate a new log every time the pipeline is executed creates a new log without overwriting the existing ones. When we choose this option, we will be required to enter the log name for the new files.
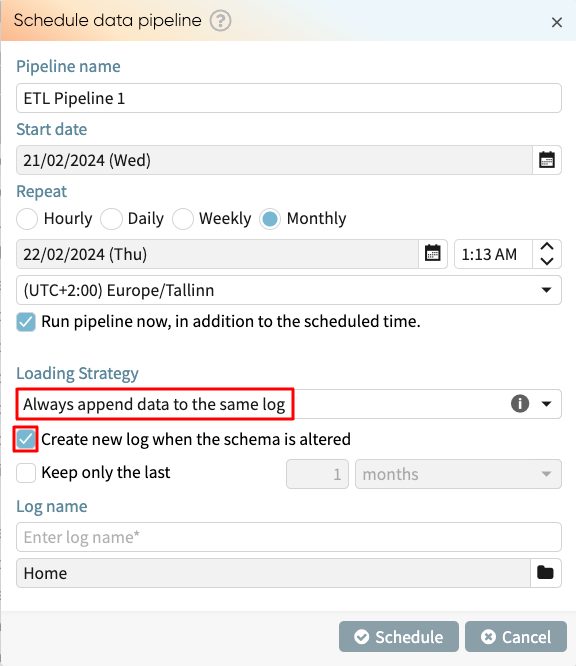
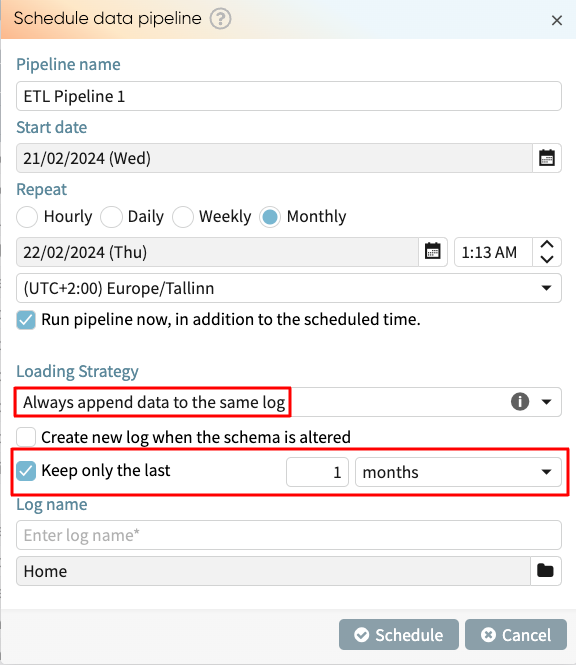
Always append data to the same log add the new rows to the existing log file. Effectively, when the pipeline triggers, it appends data to the initial log file.
If the schema of the appended log changes at any time, the pipeline run will fail. To prevent this, we can tick Create new log when the schema is altered. Apromore will instead create another log when it notices a change in the log schema.
To prevent the resulting log file from becoming extremely huge, we can optionally specify the data range to retain.
If one month is selected, data older than one month in the previous dataset will be discarded.
Note
If we delete the log file created from previous pipeline runs, a new log file will be created in the following pipeline run.
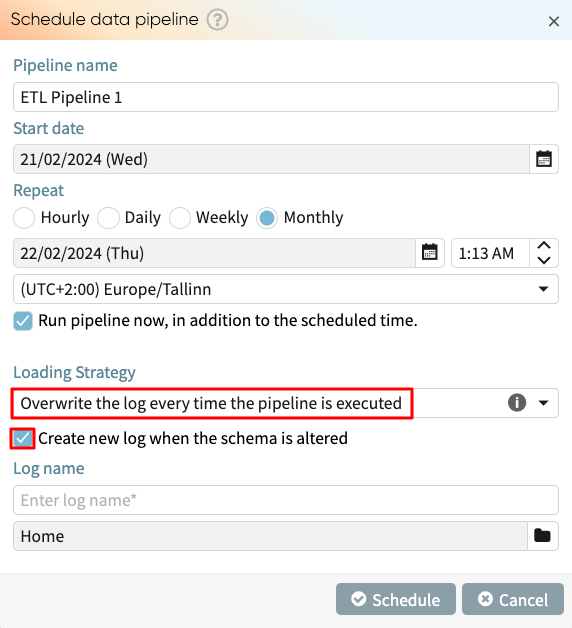
Overwrite the log everytime the pipeline is executed always replaces the existing log file with the output of the pipeline execution. To prevent pipeline run failure due to a change in the schema, we can tick Create new log when the schema is altered.
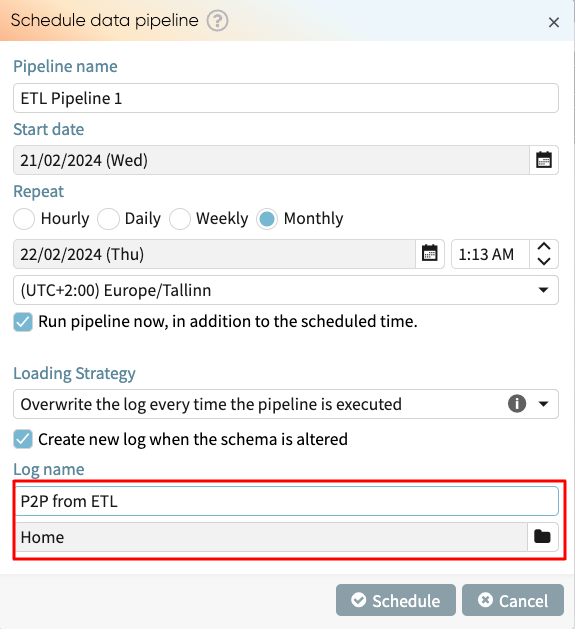
Lastly, enter the log file’s name created from the pipeline and specify its path.
Click Schedule to schedule the pipeline. The pipeline will be successfully scheduled and can be managed in the Data pipeline management window.
Merge rows with duplicate values
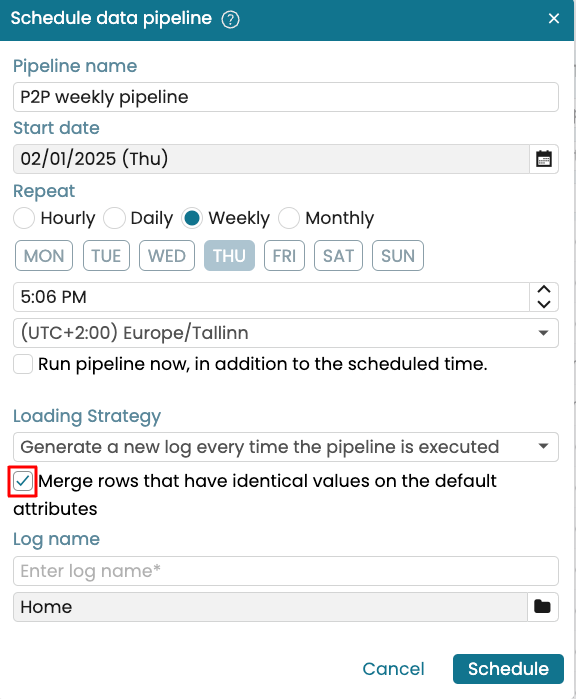
When scheduling a data pipeline, Apromore automatically removes duplicate rows. Duplicate rows are rows that have identical values across ALL attributes in the event log. However, there are scenarios where rows should be considered duplicates even if only their default attributes are identical. These default attributes are:
Case ID.
Activity.
End timestamp.
Start timestamp (if it exists).
Resource (if it exists) and,
Role (if it exists).
Other columns are non-default attributes. We can specify that rows with identical values on the default attributes should be treated as duplicates and therefore merged, even if these rows differ on some of the non-default attributes. When this option is selected, Apromore will perform the following steps every time the data pipeline is executed:
Identify duplicate groups: A duplicate group consists of rows that have identical values on the default attributes, but different values on some or all of the non-default attributes. For instance, if three rows have the same case ID, activity and end timestamp but have different Country, Status and System attribute values, the three rows form a single duplicate group.
Merge each duplicate group into a single row: For each column in the duplicate group, Apromore determines which value to retain in the merged row, as follows:
For an event attribute: We retain the value that we see in this column in the last row of the duplicate group.
For a case attribute: We retain the smallest non-null value of this column associated with the case ID of the duplicate group. This ensures that in the resulting event log, all rows that share the same case identifier will also share the same value for this case attribute. In other words, the value of the case attribute will be constant across all rows that share the same case identifier.
For example, assume we wish to schedule the following event log and merge duplicate values based on matching default attributes.
CaseID |
Activity |
End timestamp |
Resource |
Document state |
Approval result |
Amount |
INC004 |
Review Document |
3/01/2024 10:00 |
Alice |
Draft |
||
INC004 |
Review Document |
3/01/2024 10:00 |
Alice |
In Progress |
500 |
|
INC004 |
Review Document |
3/01/2024 10:00 |
Alice |
Final |
Approved |
|
INC004 |
Approve Payment |
3/01/2024 9:00 |
Bob |
200 |
||
INC004 |
Approve Payment |
3/01/2024 9:00 |
Bob |
Pending |
Approved |
200 |
INC004 |
Approve Payment |
3/01/2024 9:00 |
Bob |
Completed |
Let’s say that the attributes “Document state” and “Approval result” are event attributes while “Amount” is a case attribute. Since the first three rows have the same case ID, activity and end timestamp, they form a duplicate group. Then the last three rows form another duplicate group.
Note that the smallest non-null value of the case attribute “Amount”, for case identifier INC004 is equal to 200.
Here are the two duplicate groups and the resulting output.
Duplicate group 1
CaseID |
Activity |
End timestamp |
Resource |
Document state |
Approval result |
Amount |
INC004 |
Review Document |
3/01/2024 10:00 |
Alice |
Draft |
||
INC004 |
Review Document |
3/01/2024 10:00 |
Alice |
In Progress |
500 |
|
INC004 |
Review Document |
3/01/2024 10:00 |
Alice |
Final |
Approved |
For the “Document state” event attribute, we retain the value “Final” since this is the value of this column for the last row of the duplicate group.
For the “Approval result” event attribute, we retain the value “Approved” since this is the value of this column for the last row of the duplicate group.
For the “Amount” case attribute, we retain the value of 200 because this is the smallest non-null value associated with case identifier INC004.
Thus the merged row for this duplicate group will be:
CaseID |
Activity |
End timestamp |
Resource |
Document state |
Approval result |
Amount |
INC004 |
Review Document |
3/01/2024 10:00 |
Alice |
Final |
Approved |
200 |
Duplicate group 2
CaseID |
Activity |
End timestamp |
Resource |
Document state |
Approval result |
Amount |
INC004 |
Approve Payment |
3/01/2024 9:00 |
Bob |
200 |
||
INC004 |
Approve Payment |
3/01/2024 9:00 |
Bob |
Pending |
Approved |
200 |
INC004 |
Approve Payment |
3/01/2024 9:00 |
Bob |
Completed |
For the “Document state” attribute, we retain the value “Completed” in the output row, since this is the value of this column for the last row of the duplicate group.
For the “Approval result” attribute, we retain a null value, since this is the value of this column for the last row of the duplicate group.
For the “Amount” attribute, we retain the value of 200 because this is the smallest non-null value associated with case identifier INC004.
Thus, the merged row for this duplicate group will be:
CaseID |
Activity |
End timestamp |
Resource |
Document state |
Approval result |
Amount |
INC004 |
Approve Payment |
3/01/2024 9:00 |
Bob |
Completed |
200 |
The final output after removing duplicates is therefore:
CaseID |
Activity |
End timestamp |
Resource |
Document state |
Approval result |
Amount |
INC004 |
Review Document |
3/01/2024 10:00 |
Alice |
Final |
Approved |
200 |
INC004 |
Approve Payment |
3/01/2024 9:00 |
Bob |
Completed |
200 |
To specify that rows should be merged as described above, create a data pipeline, as usual. In the Schedule data pipeline window, tick Merge rows that have identical values on the default attributes. This option is available regardless of the selected loading strategy. Then enter a log name and click Schedule.

