Manage properties
Capturing precise information about a BPMN process model, its elements, or associated process views is essential for effective process management.
For instance, in a payment processing workflow, the model may define properties such as the account manager’s name, the compliance status, or the required audit types to ensure that the process complies with regulatory standards. A task like “Approve Payment” might include a property called “Maximum Amount” to specify the upper limit that can be approved. Similarly, a saved process view may include a property such as “Next Review Date” to indicate when the process should be re-evaluated.
To define such properties in Apromore, we follow this two-step process:
Create and manage properties in the Properties Manager.
Assign property values in the appropriate location:
Use the BPMN Editor for process models and elements.
Use the Process Views Inventory for process views.
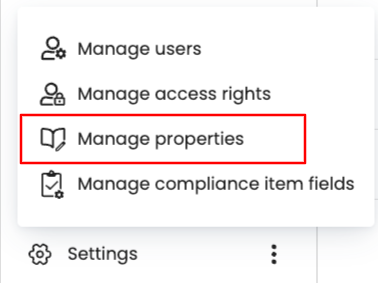
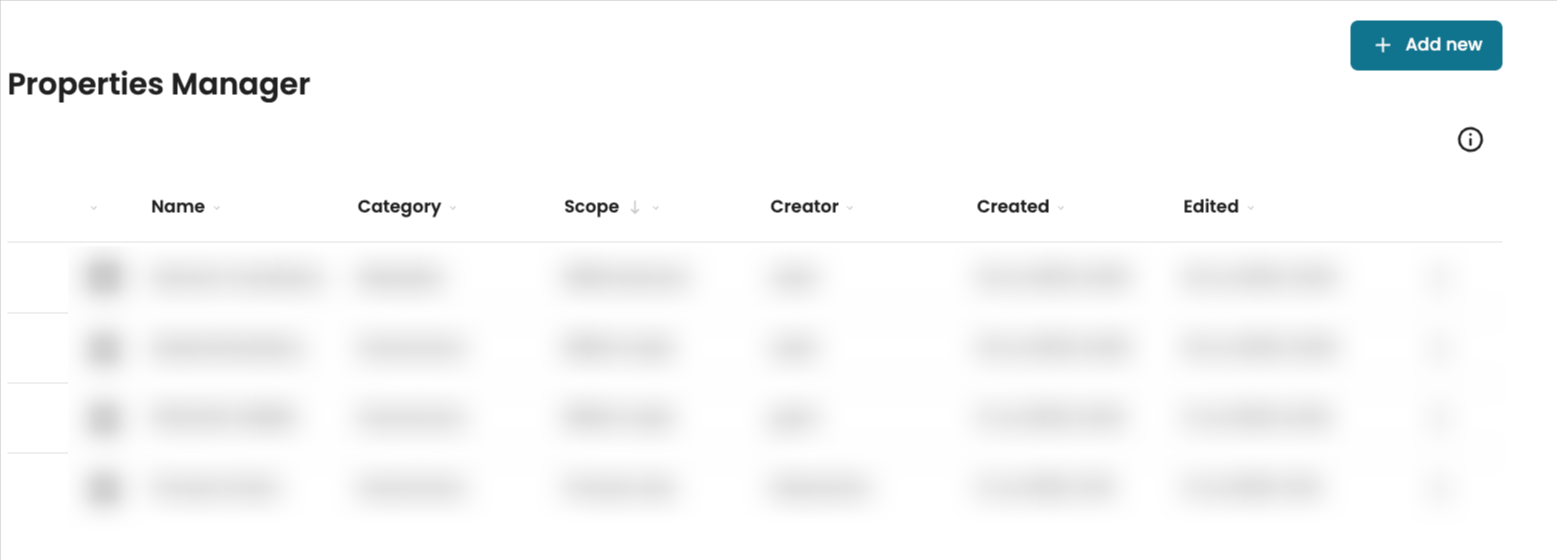
To create or manage a new property in Apromore, from Portal, go to Settings > Properties Manager.
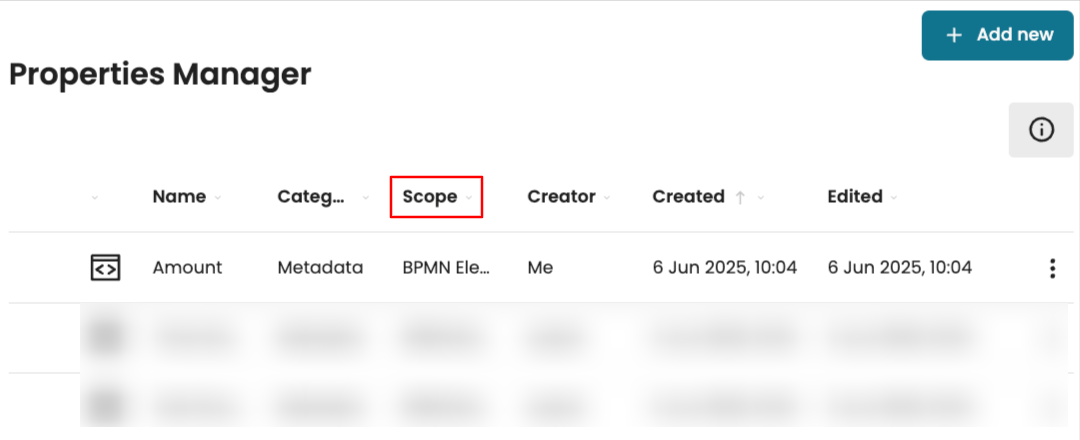
We see a list of existing properties.
To add a new property, click Add new.
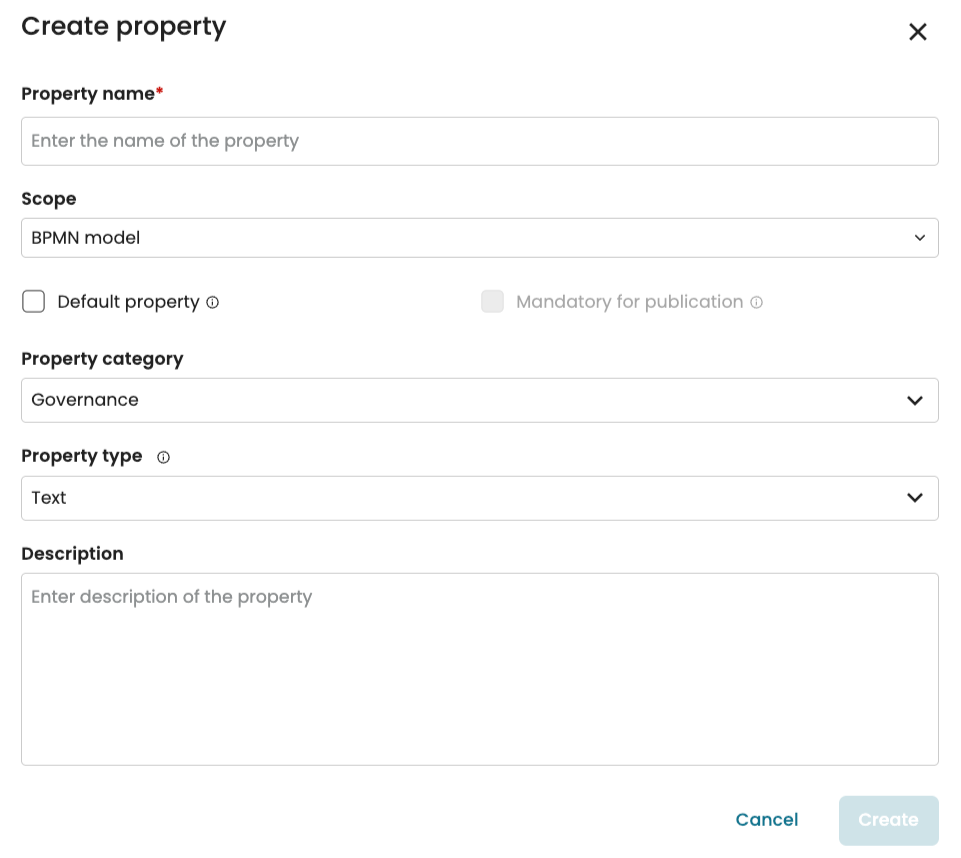
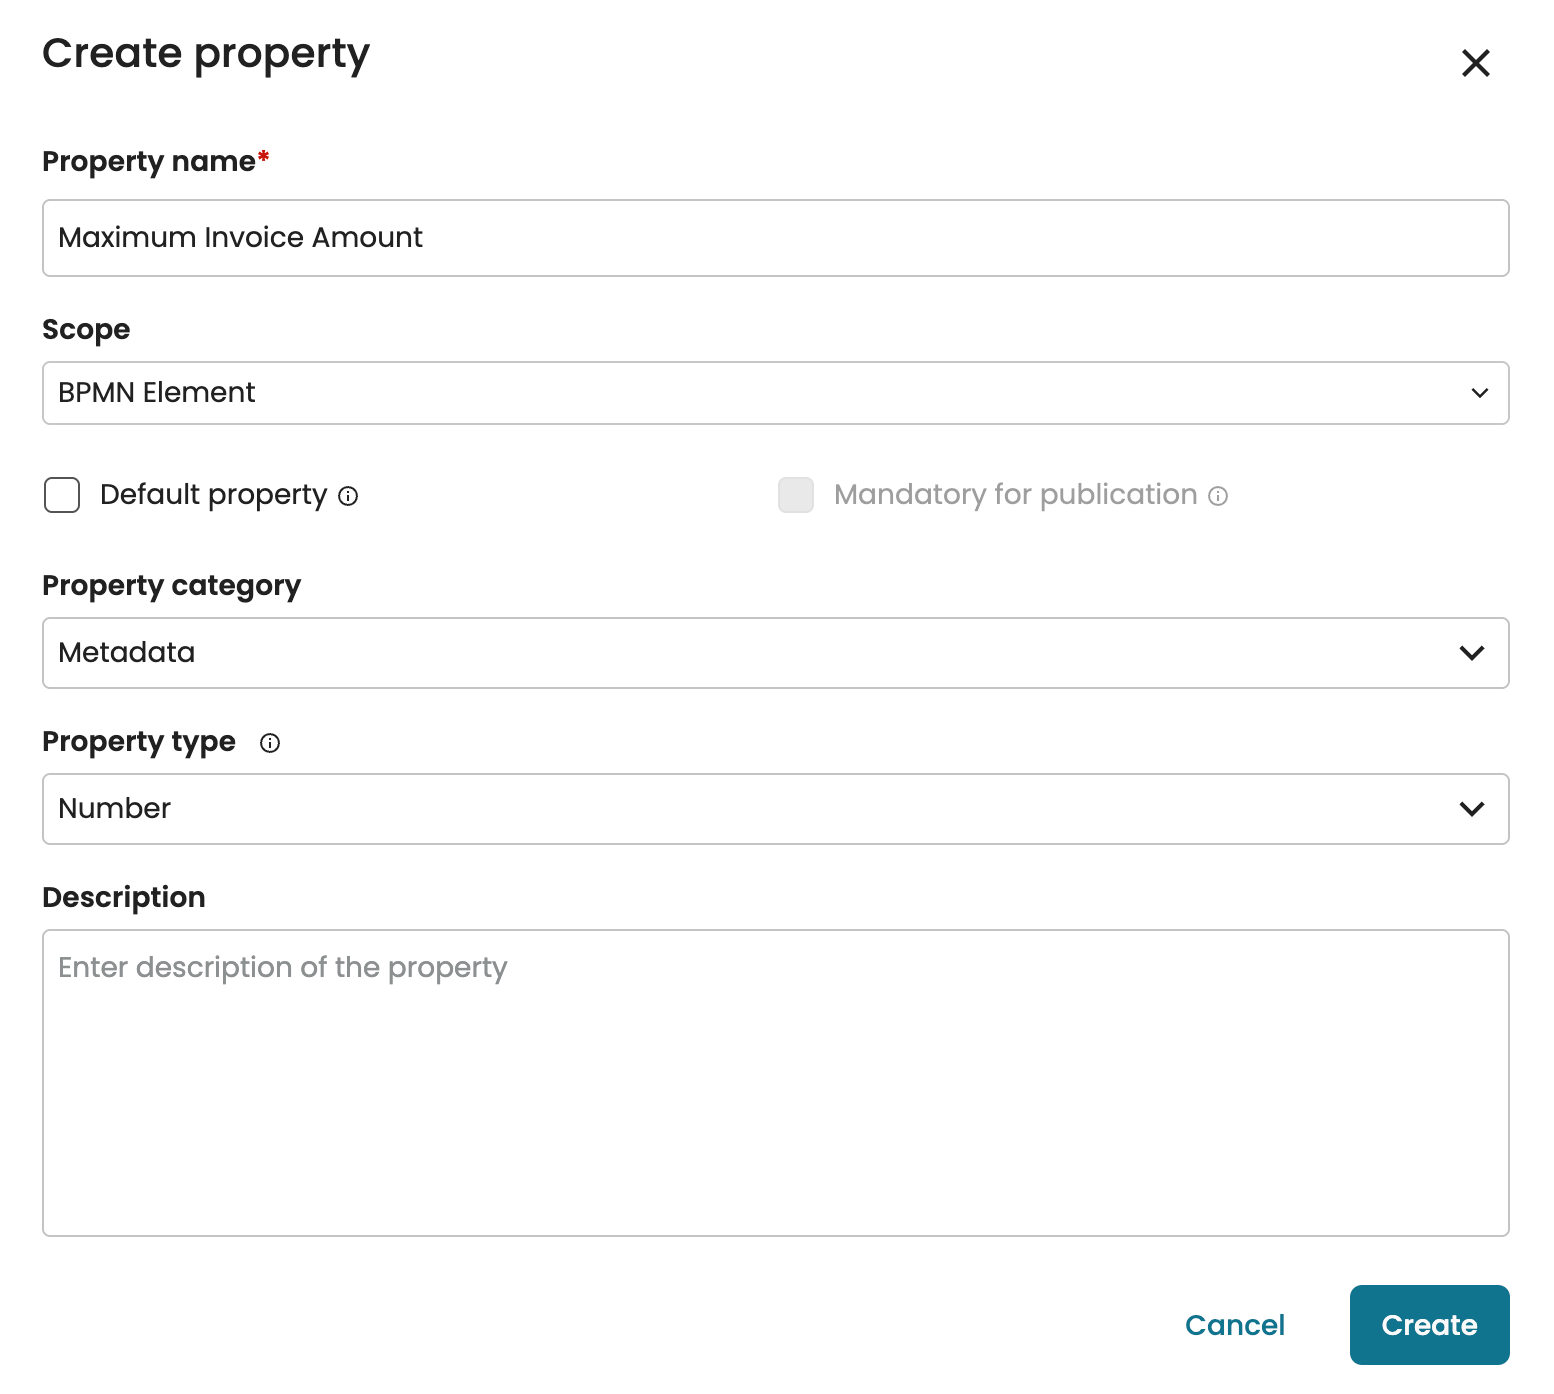
This opens the Create Property window. We can define the property’s name, scope, category, type, and description. We also specify whether the property is a default property and whether it is mandatory for model publication.
Specify property scope
When creating a property in Apromore, we must specify its scope to define where it can be applied. This helps categorize the property’s intended use.
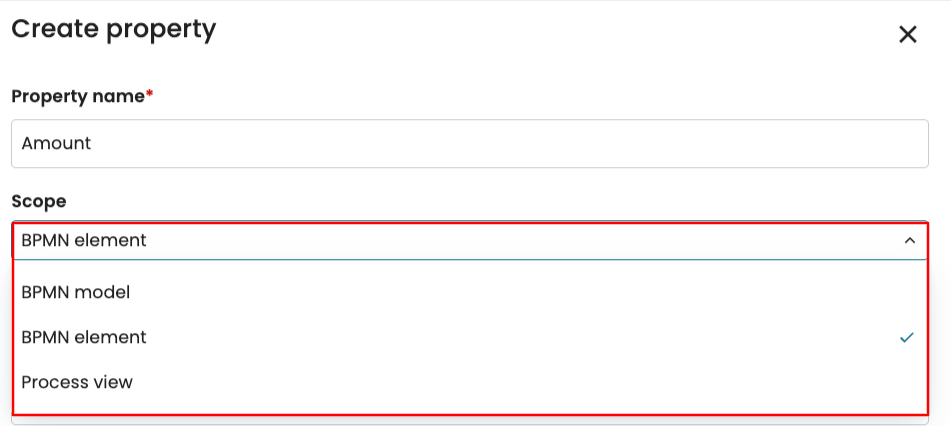
A property can have one of the following scopes:
BPMN model: Properties to be defined for a BPMN model.
BPMN element: Properties to be defined for an element in a BPMN model, such as a task, gateway, or event.
Process Discoverer views: Properties to be defined in a saved view on the Inventory page.
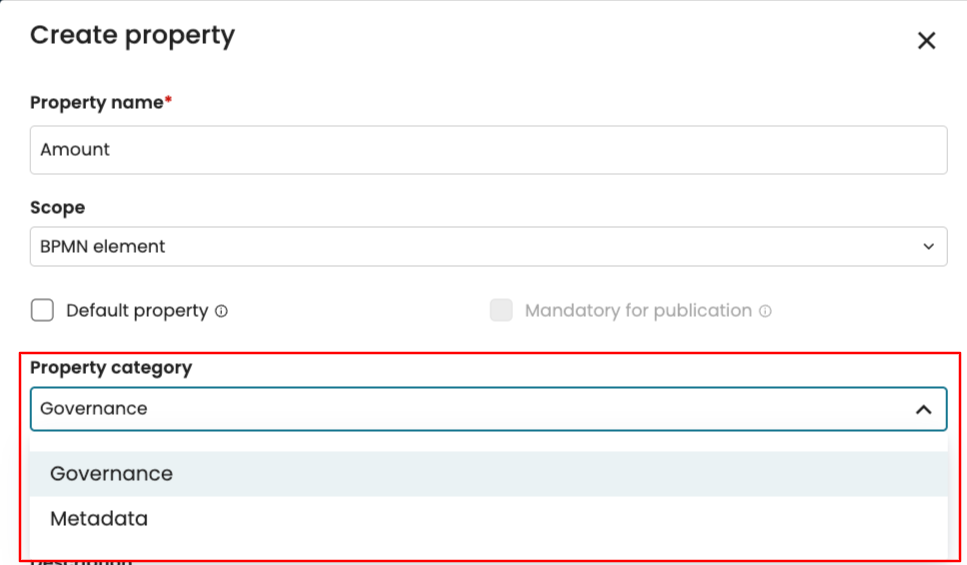
Imagine we wish to define an “Amount” property that would be used in the “Pay invoice” task of the Process-to-pay model. Because this property will be used in a model element, we can set the property’s scope to BPMN Element. Define the Property name as “Amount”. Click the Scope dropdown to select a scope. In this case, we select BPMN Element.
Specify property category
When creating a property in Apromore, we must assign it a category based on the type of value it represents. There are two categories:
Metadata: Properties that describe the attributes of the process.
Governance: Properties involving rules and policies for compliance, control, and management purposes.
Select the category of the property from the Property category drop-down.
Specify property type
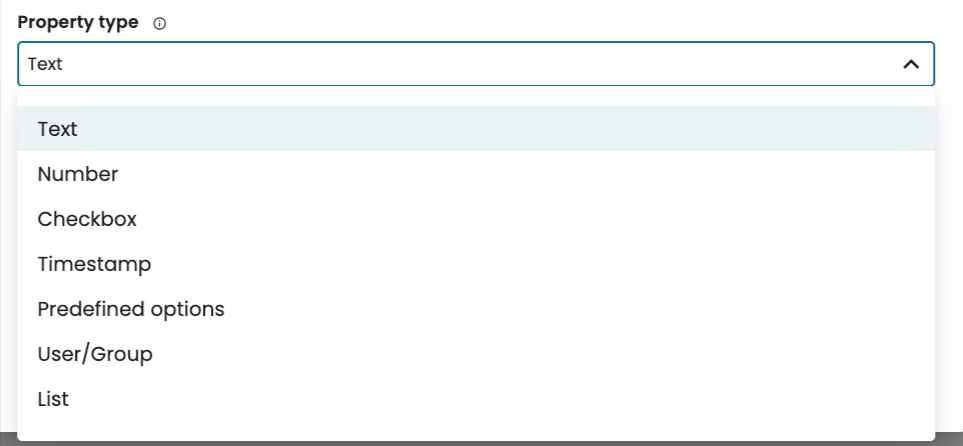
When creating a property, we must specify its type. The property type defines the data format of the value to be entered. For example, if the value is numeric, the type should be set to Number. Apromore supports the following property types:
Text: The user can input free text up to 1,000 characters. For example, a property called “Process Objective” would include a free text.
Number: The user can enter a number. For example, the maximum amount that can be processed.
Predefined options: A list of options would have been created. Users must select one option from the predefined list. For example, a property called “Data Sensitivity Level” contains predefined options such as “Public,” “Internal,” or “Confidential.”
Checkbox: An option that can be checked or not. For example, a property labelled “Encryption enabled” can either be toggled on or not.
User/Group: The property value is a user or group name in our Apromore tenancy. For instance, a property called “Process owner” requires selecting a user or group from the organization.
Timestamp: The property value would be a date-time value. For example, a property labelled “Data Creation Date” stores a timestamp value.
List: The user can enter a list of values. For instance, a property called “Authorized Users” would contain a list of users or groups.
To define the property type, select the type from the Property type dropdown.
Specify default property
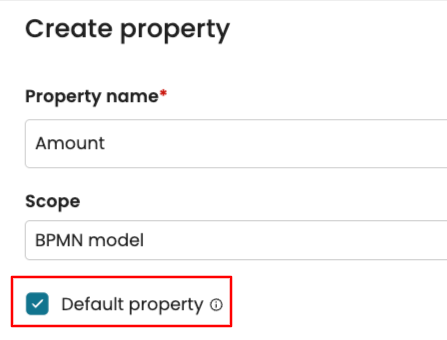
When we set a property as a default property, the property appears for all artifacts within its scope. For example, if a default property is created with the scope “BPMN model”, it will be visible in all models across the tenancy.
To enable the default property, simply check the ‘Default Property’.
Specify property description
The property description is an optional field provided when defining a property. If a description is set, it will be displayed when assigning the property’s value. To add a description, enter the desired text into the Description field.
Add properties for models
Properties with the scope “BPMN model” can only have their values added or edited within the BPMN Editor. These properties are applied at the model level and are not for individual elements or process views.
As an example, we might want to define the following metadata properties on a payment processing model:
Process objective: Describes the objective of the process.
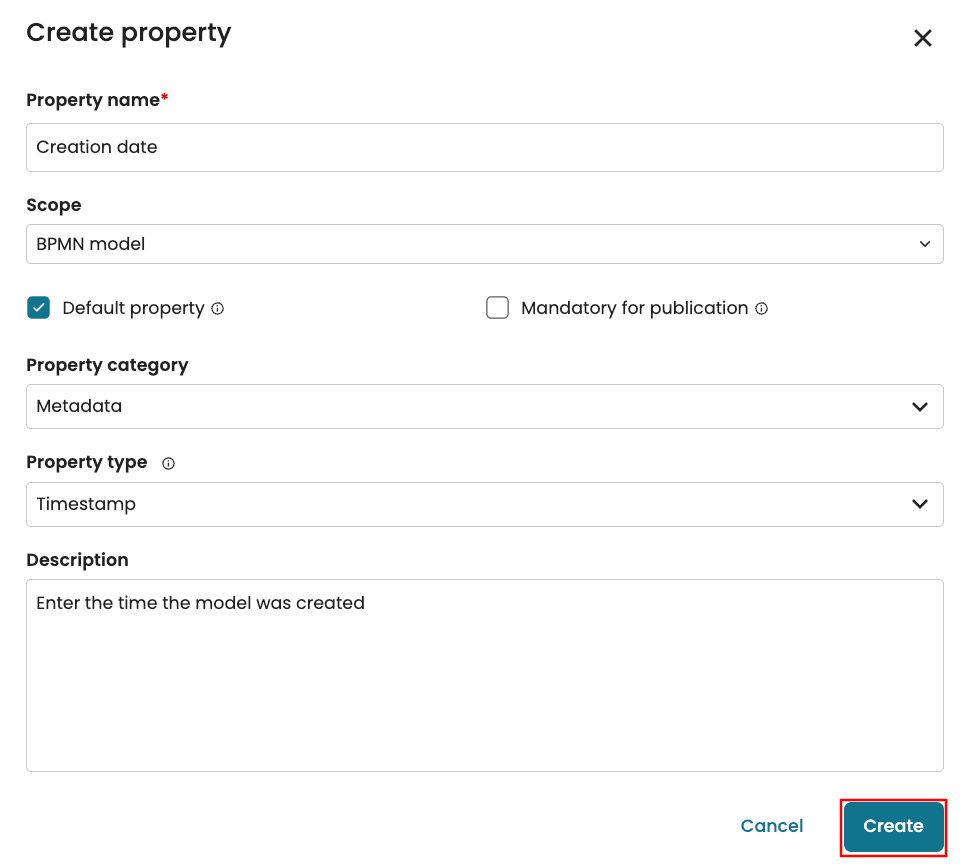
Creation date: States the creation date of the model.
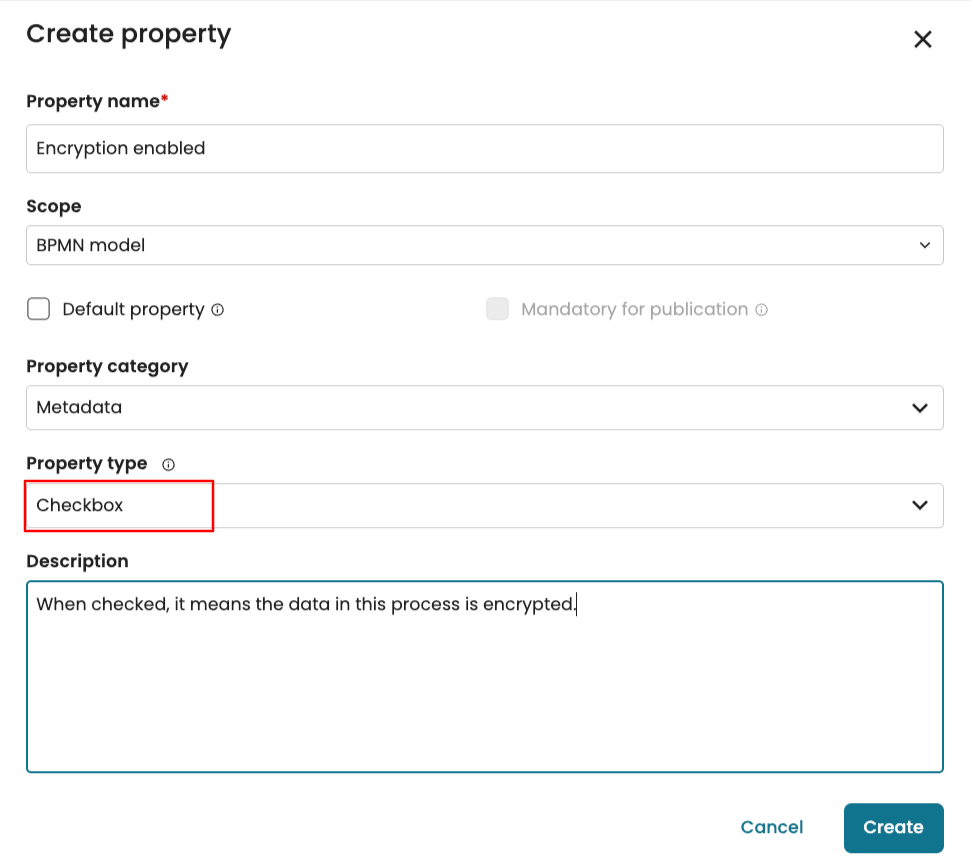
Encryption enabled: States whether data in the process is true or false.
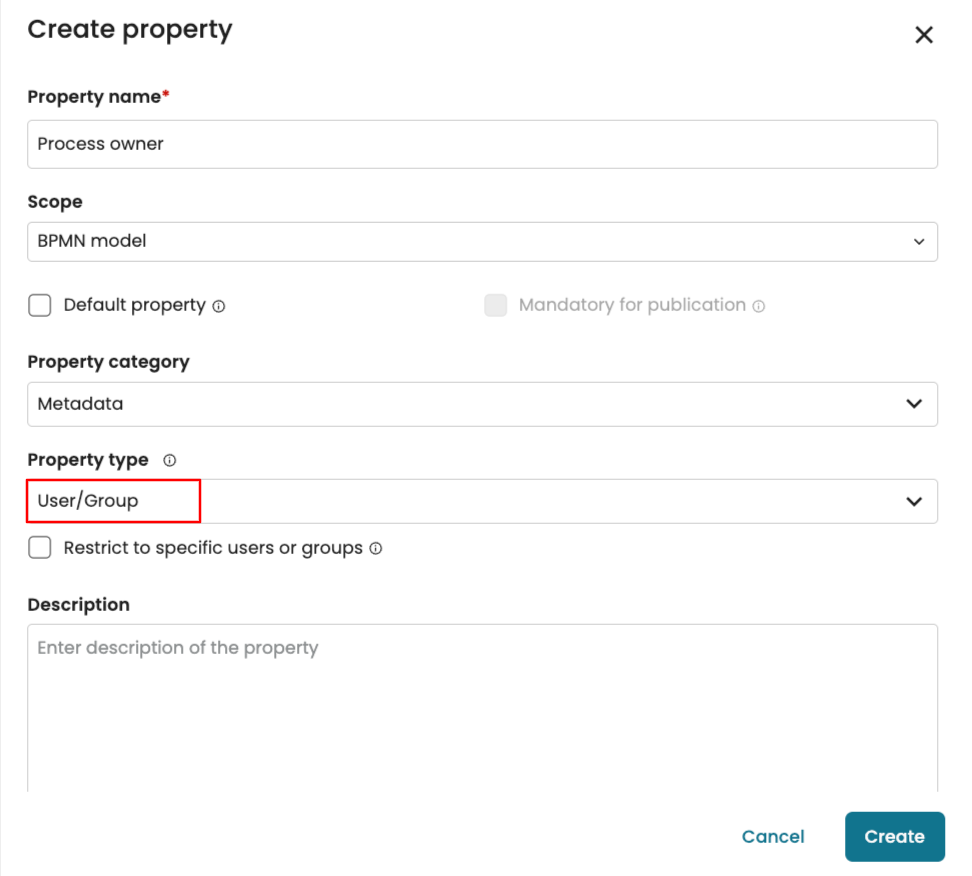
Process owner: States the owner of the process.
We can also define the following governance properties:
Required compliance: Specifies the compliance requirements the process must follow. The compliance can either be GDPR, CCPA, KYC, or AML.
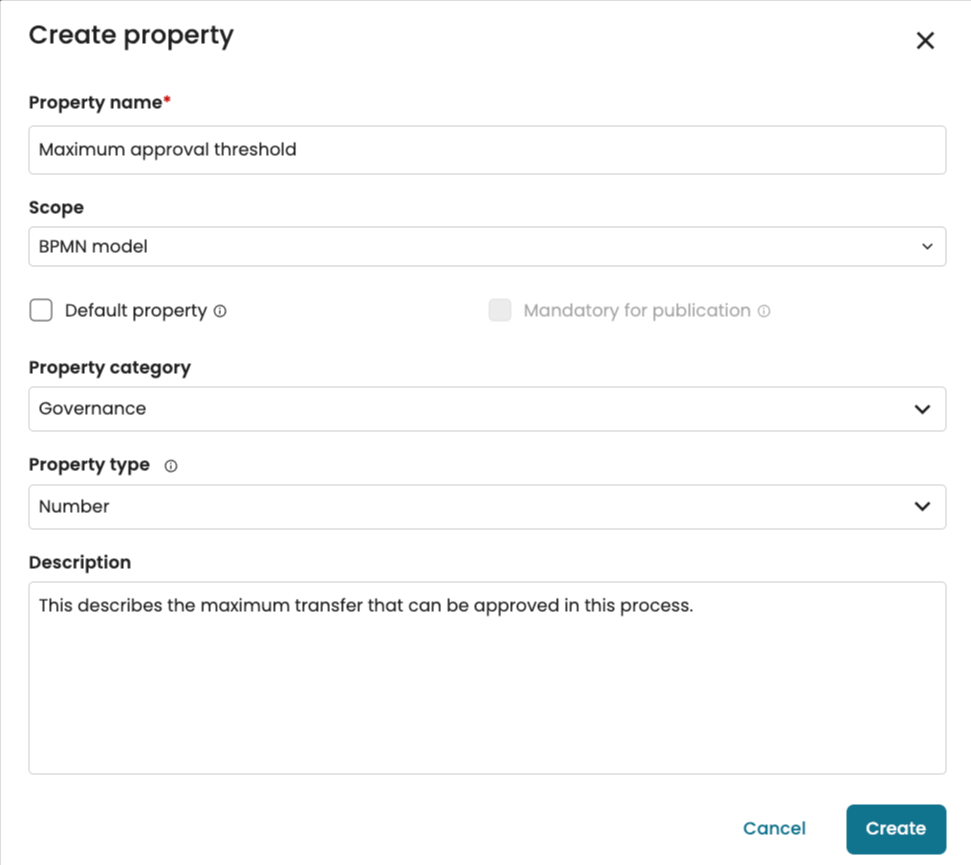
Maximum approval threshold: Specifies the transaction maximum amount allowed within the payment processing process.
Approved auditors: List of roles authorized to conduct audits and reviews of the process to ensure compliance.
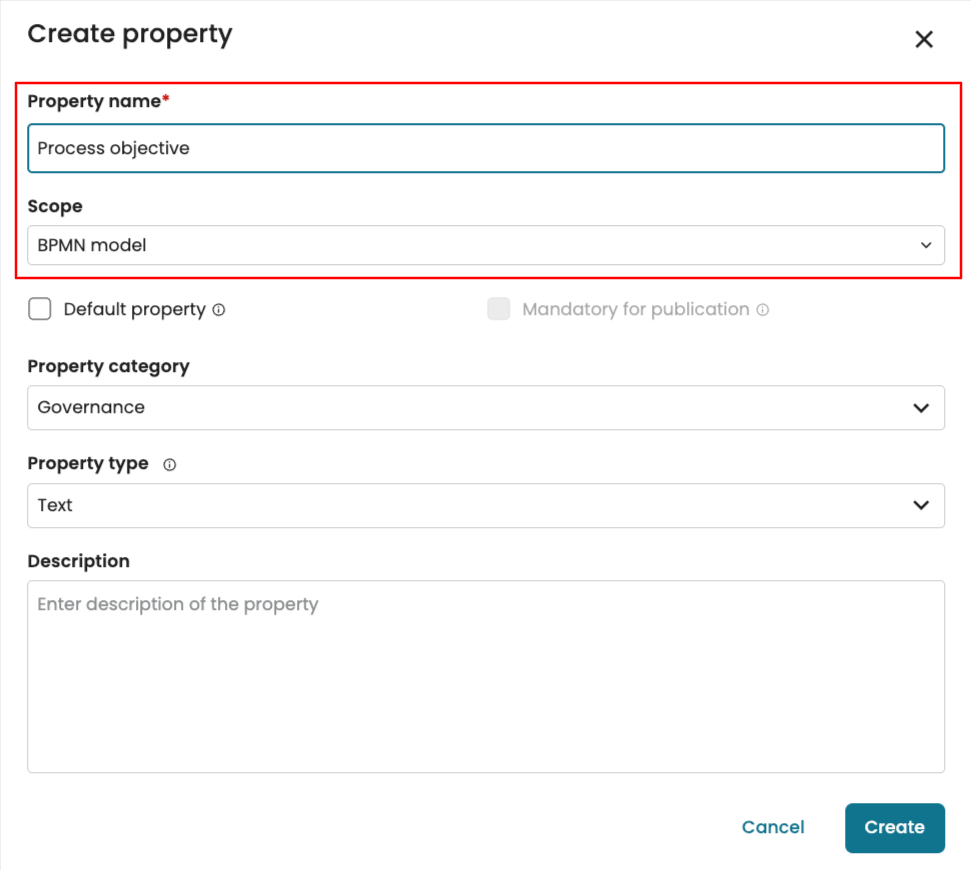
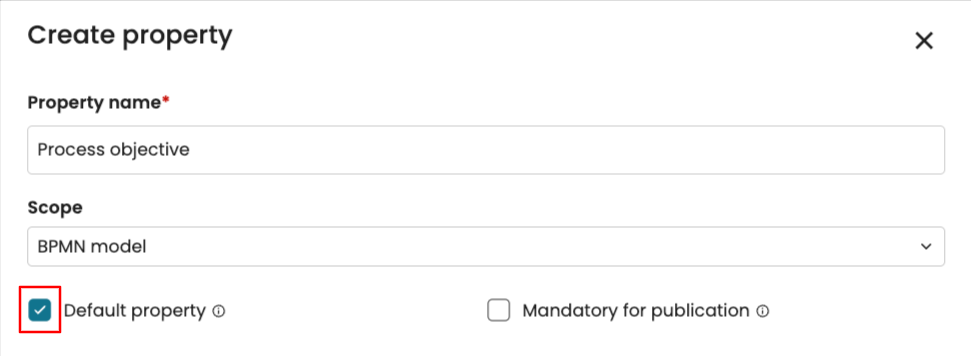
We can add these properties as follows. First, we create the “Process objective” property. Enter the property name and set the scope to BPMN model.
Check Default Property to include the ‘Process Objective’ in all models.
Note
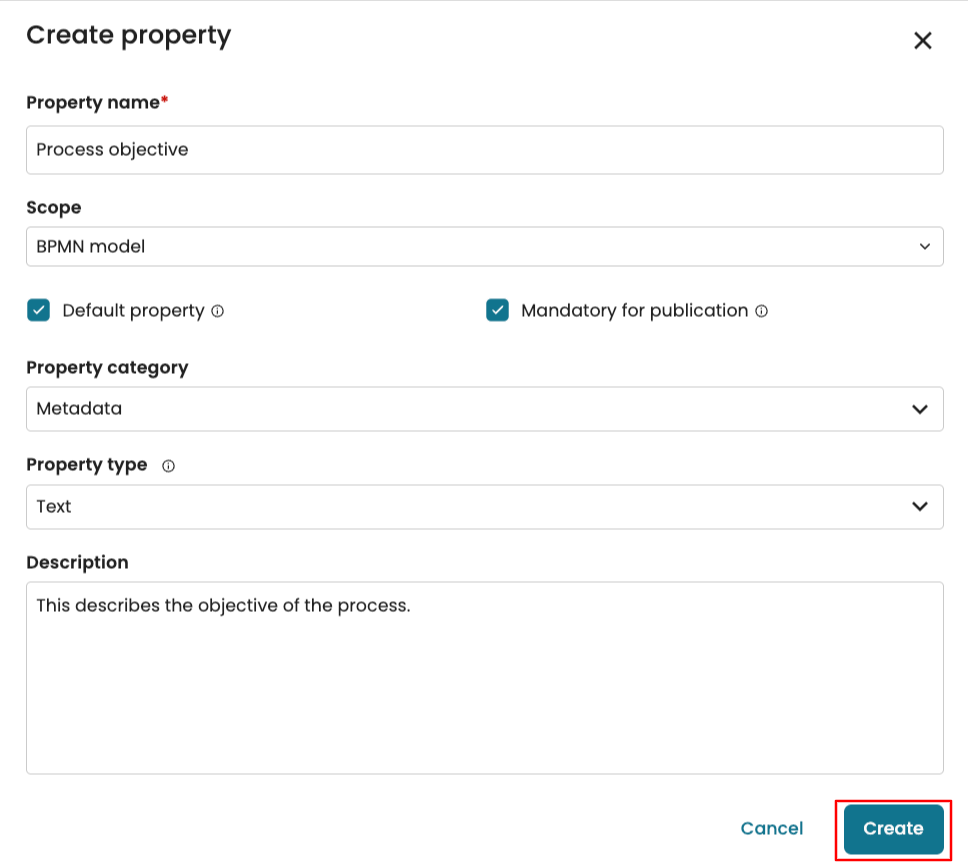
When a model property is set as a default property, we can specify whether the model is mandatory for publication. By checking Mandatory for publication, the value of this property must be defined before any model in the organization is published.
Next, select the property category: either Metadata or Governance. In our case, “Process objective” is a Metadata property.
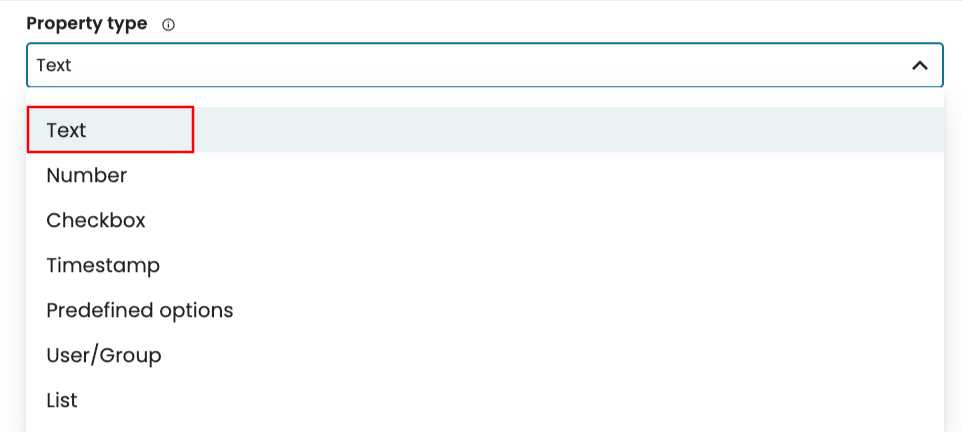
Next, specify the Property type. Since the business objective is entered as free text, select Text.
We can optionally enter a description. Click Create to save the property.
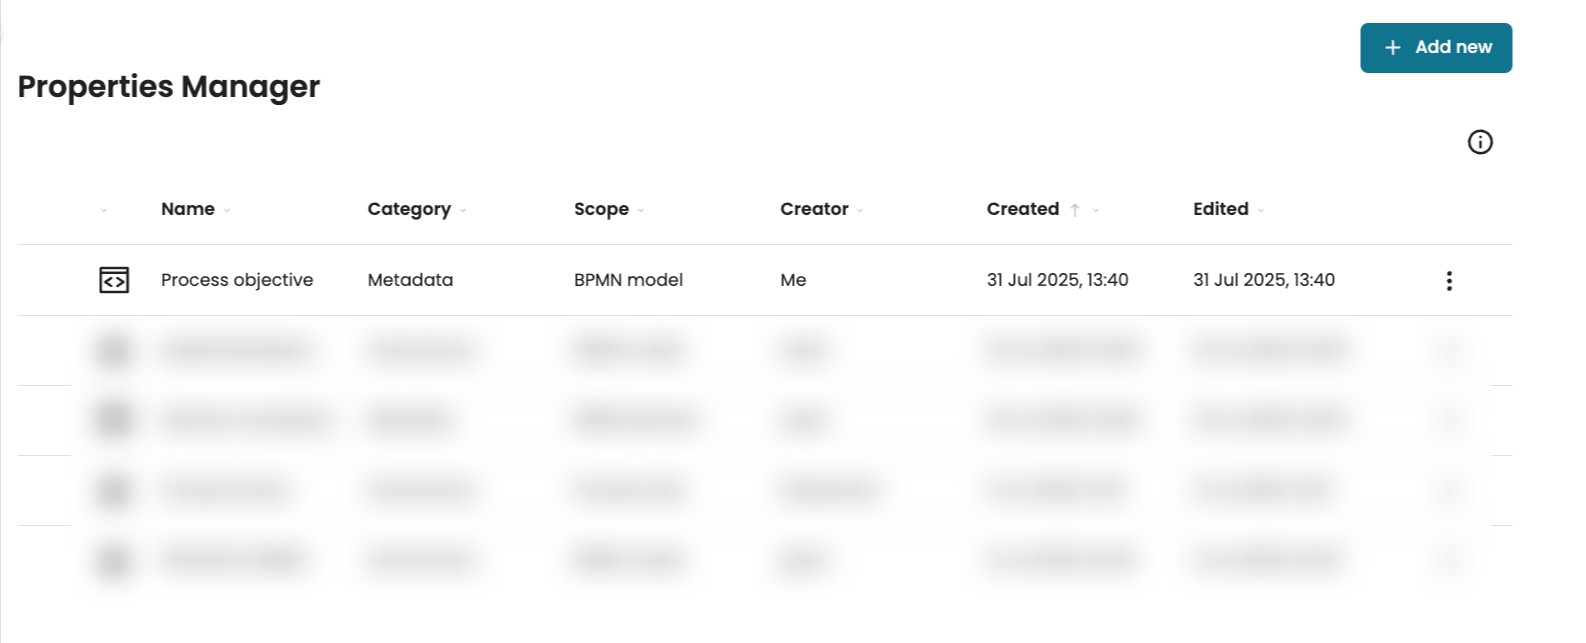
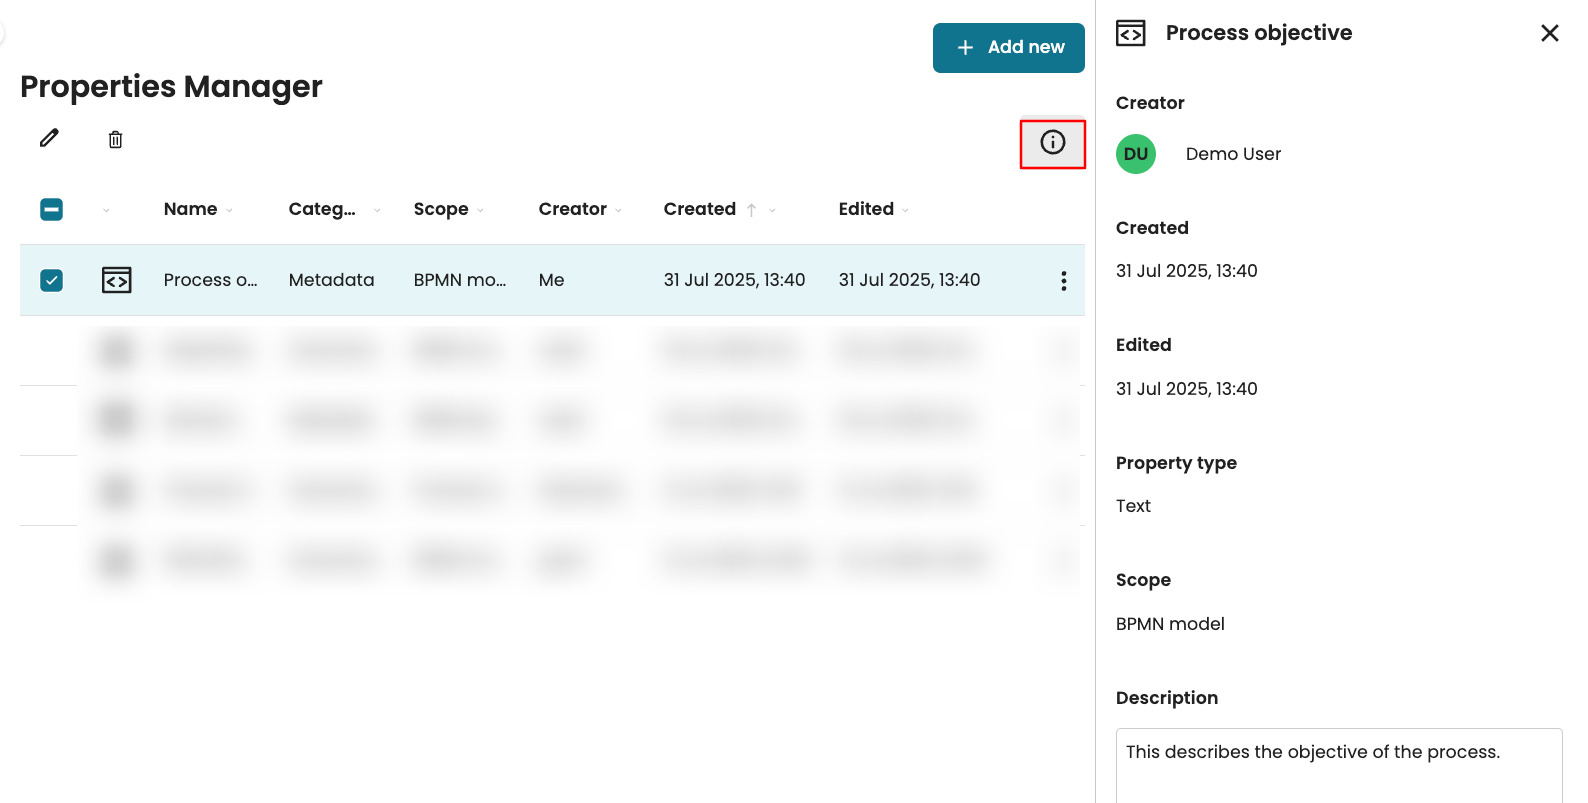
The newly created property will be displayed in the property manager.
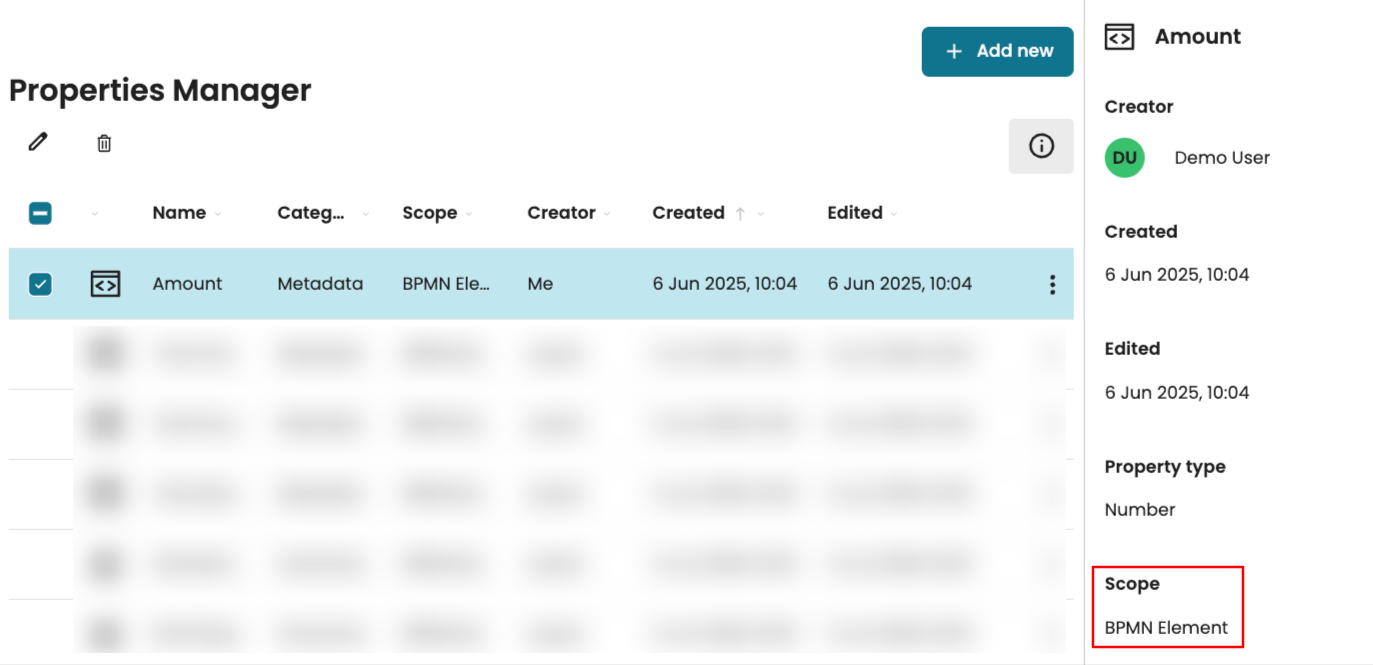
We can also open the side panel to view the property details. Select the property and click the info icon.
We also create the “Creation date” property with the type, Timestamp. The screenshot below shows the process.
Next, we can create the “Encryption enabled” property that indicates whether the data in the model is encrypted. This property will be of type Checkbox. The user can either check or uncheck this property.
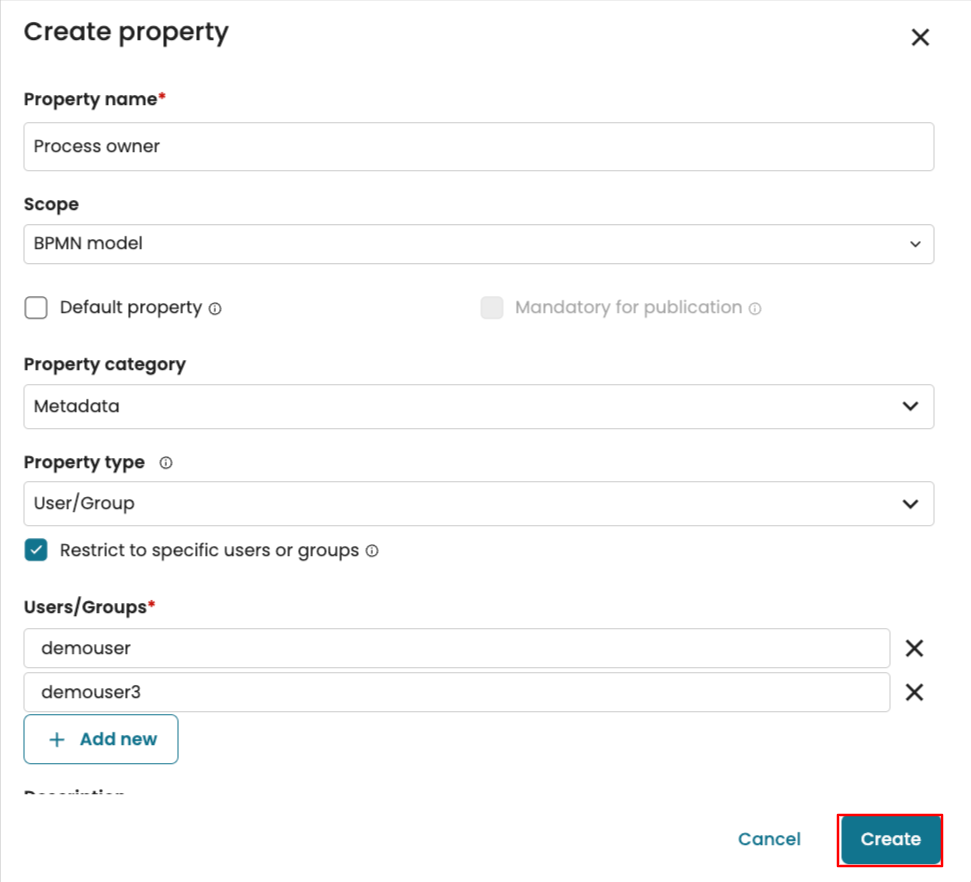
Next, we define the “Process owner” property. Since this property states the owner of the process, the property type is User/Group.
When User/Group is selected as the property type, the property value can be any user or group in our instance. We can enable “Restrict to specific users or groups”. This allows us to select the specific users or groups that can be selected in the model.
Search the specific users or groups in the Add user or group dropdown.
Click Add New to include additional users or groups.
We can optionally provide a description for the property. Click Create to save the property.
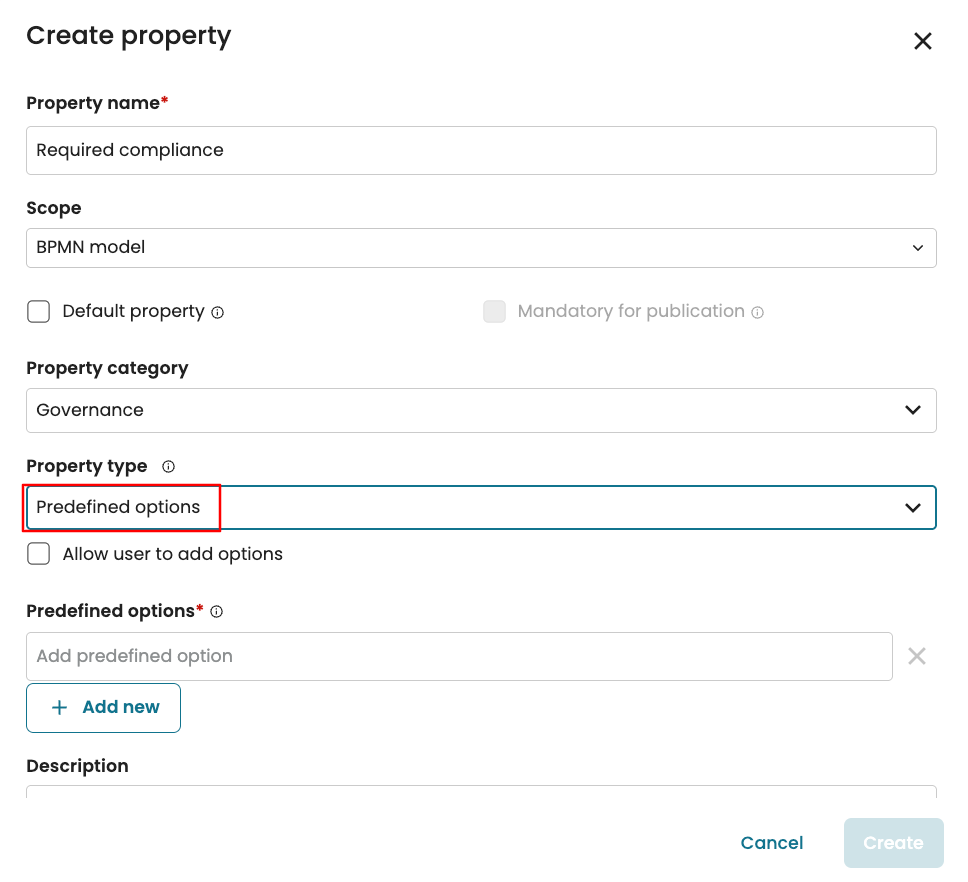
Next, we can define some governance-related properties. Let us add the “Required compliance” property of type Predefined options. The possible values would be GDPR, CCPA, KYC, and AML.
When predefined options are selected as the property type, we are to enter the possible options the user will select from. To add an option, enter it in the Predefined options field.
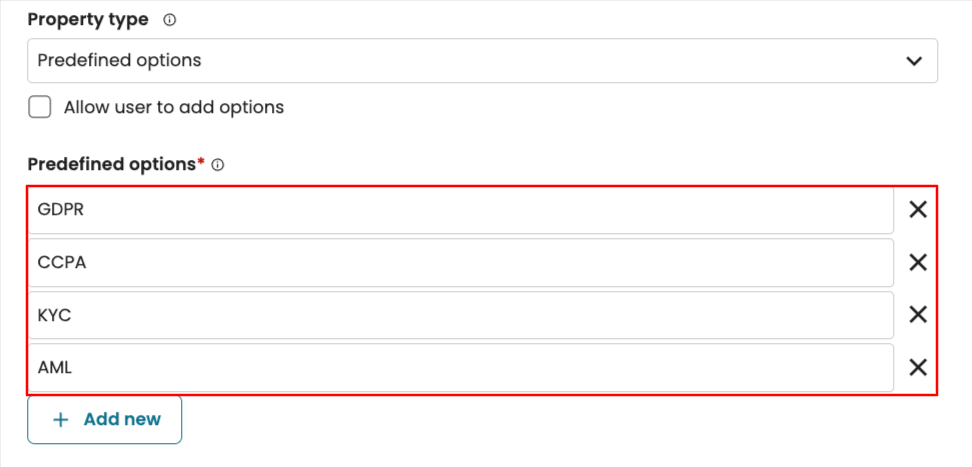
To add more options, click Add new.
Enter the other options. In our case, we enter CCPA, KYC, and AML.
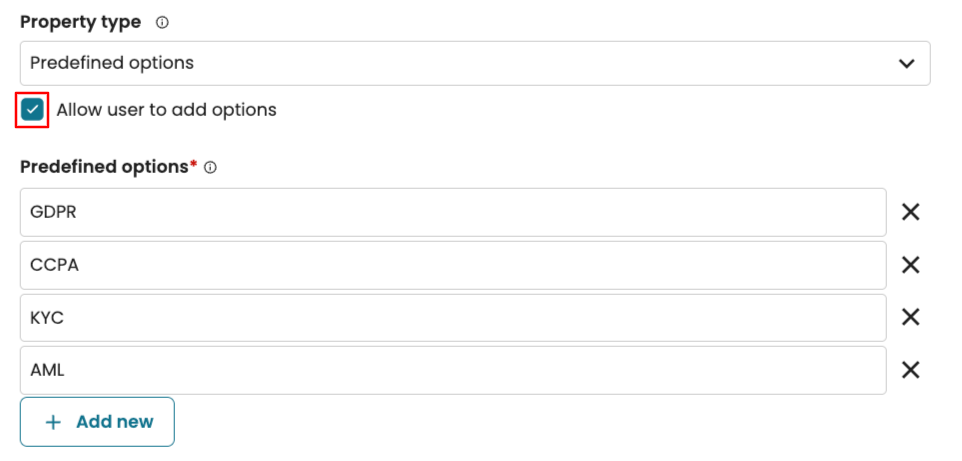
When we check “Allow user to add options”, the user, who will work on the process model, can add options beyond what is currently added. If not, the user is limited to the options we create.
Next, we define the “Maximum approval threshold” property with the type Number.
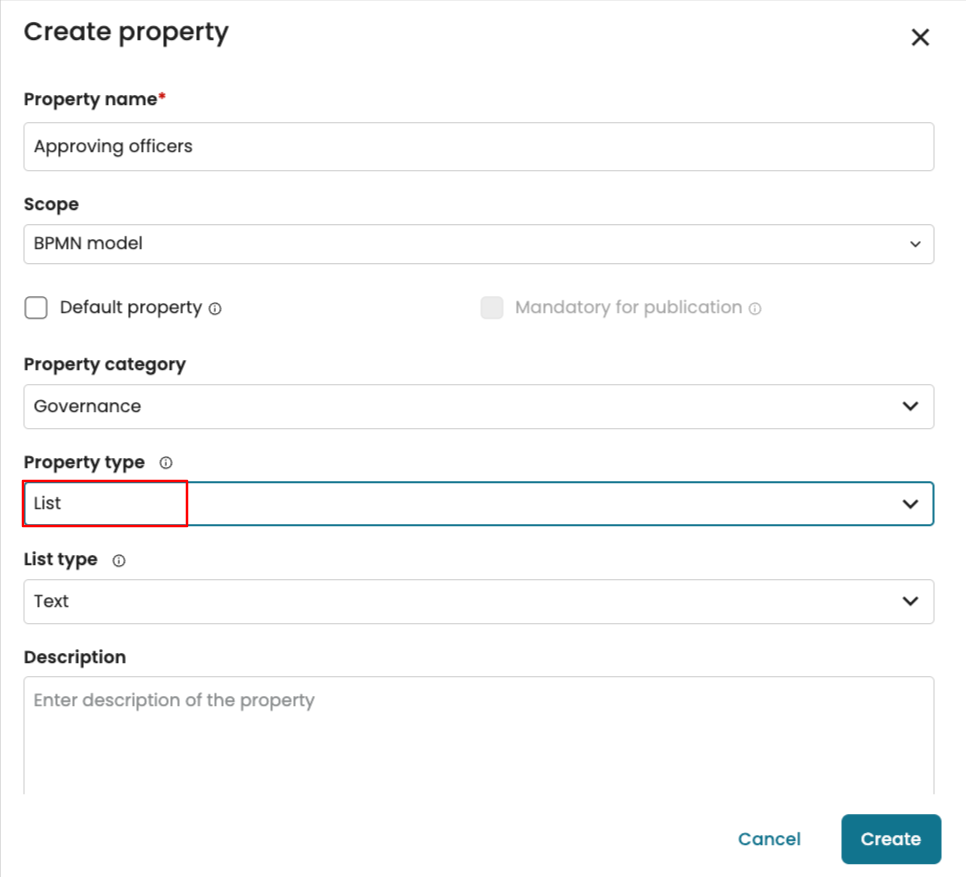
Lastly, we define the “Approving officers” property with a List type. This will allow the user to select a list of users or groups that can serve as approving officers.
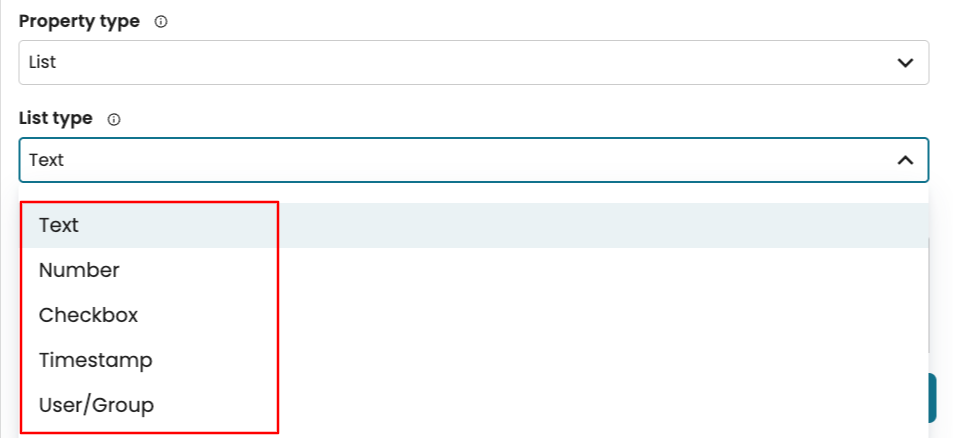
After selecting the Property type as List, we specify the List type. This can be a text, number, checkbox, timestamp, or user/group. Click the List type dropdown to specify this.
Since we want to specify a list of users/groups, select User/Group.
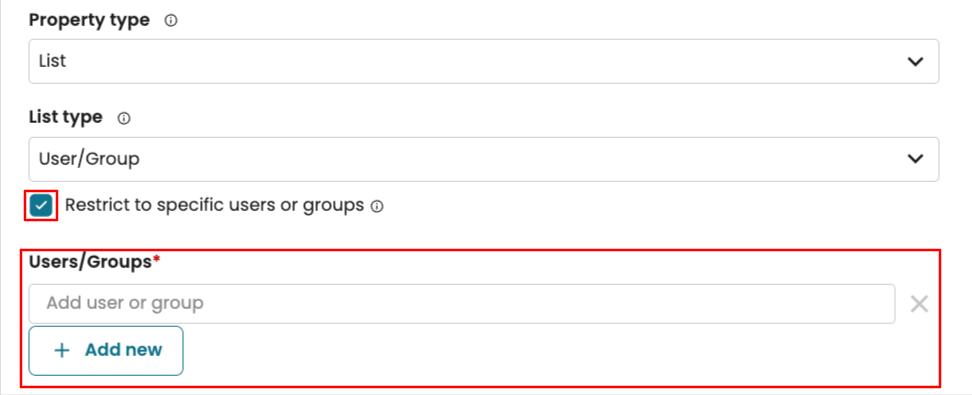
We may also restrict the list to specific users or groups by checking Restrict to specific users or groups. We are then prompted to add the user/group that the user can select from.
Optionally enter a description and click Create to save the property.
In the Properties Manager, we can see a list of all created properties with their scope.
When we select a property, we can see the details of the property on the side panel.
Specify property values in a model
After creating a property in the Properties Manager, we can assign its value in a model. To add a property value to a model, the scope must be specified as “BPMN model”. We have created the following properties in the Properties Manager with scope “BPMN model”:
Process objective.
Creation date.
Encryption enabled.
Process owner.
Required compliance.
Maximum approval threshold.
Approving officers.
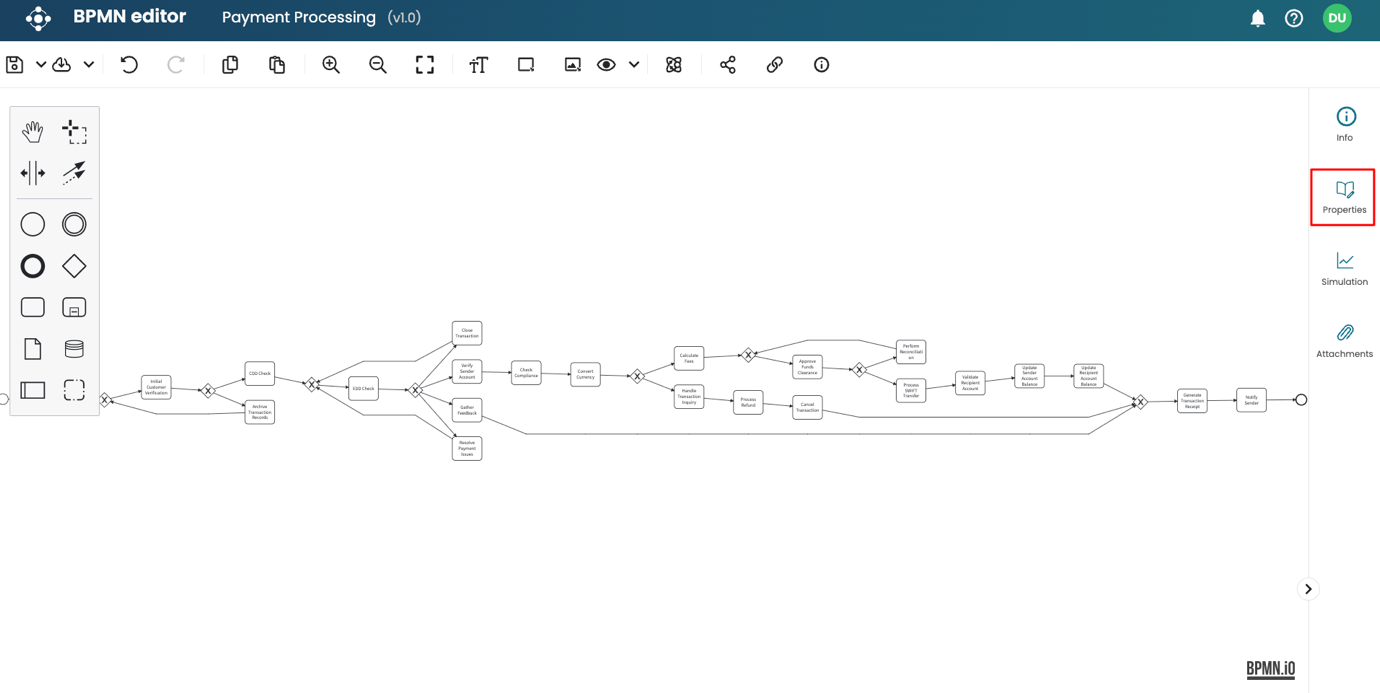
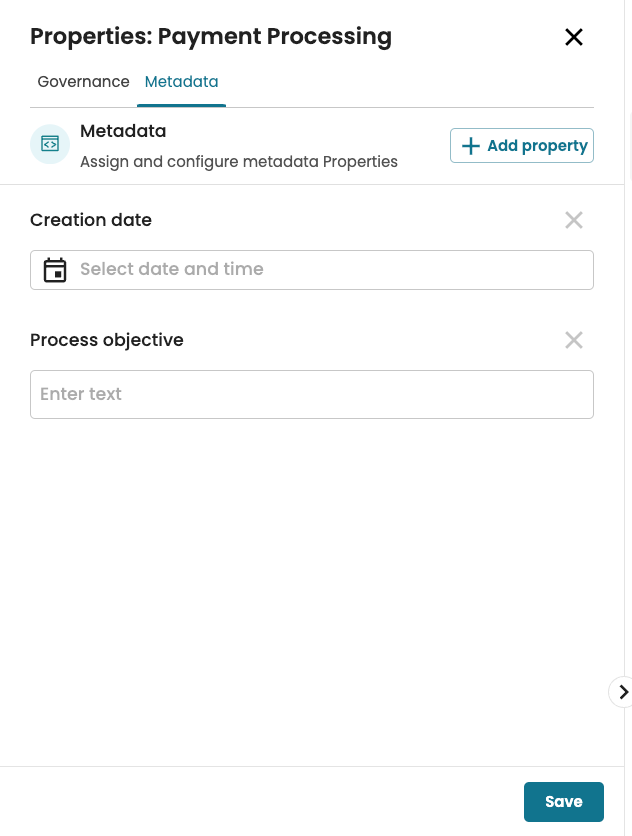
To define their values, open a model in the BPMN Editor. Click Properties.
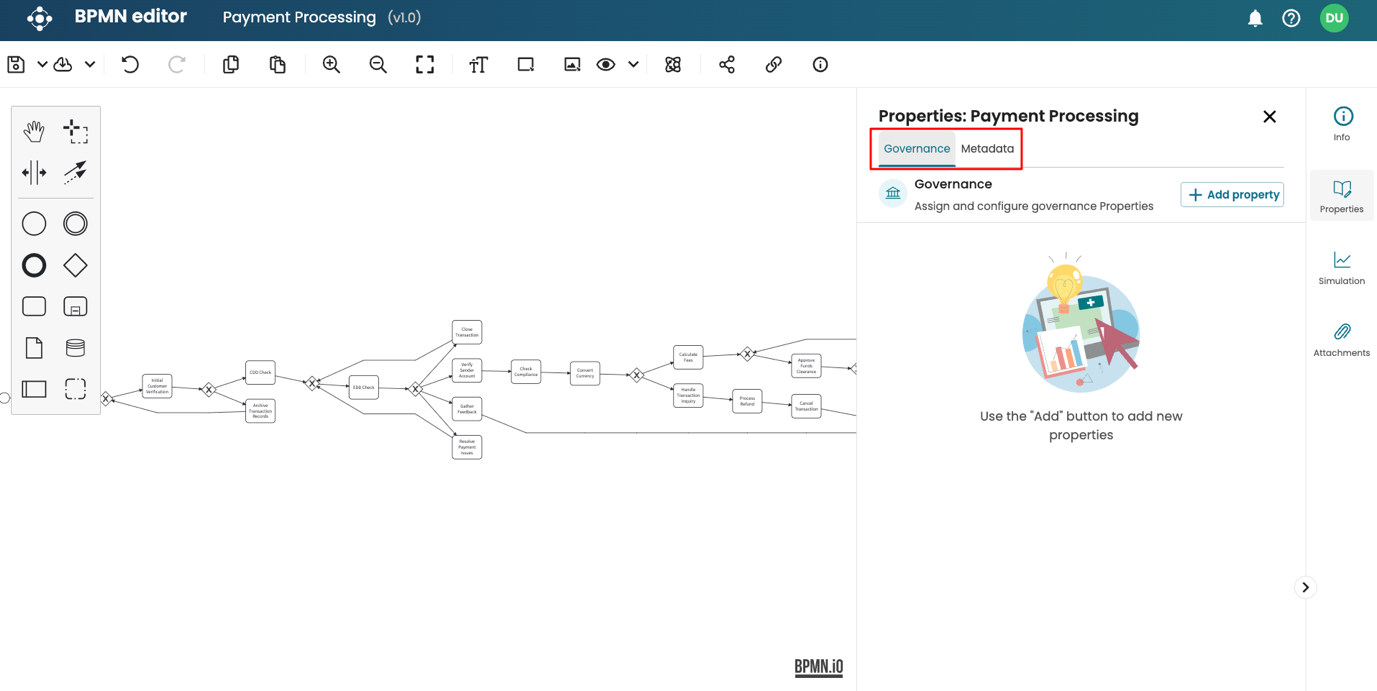
Depending on the kind of properties we wish to define, go to the Governance or Metadata tab.
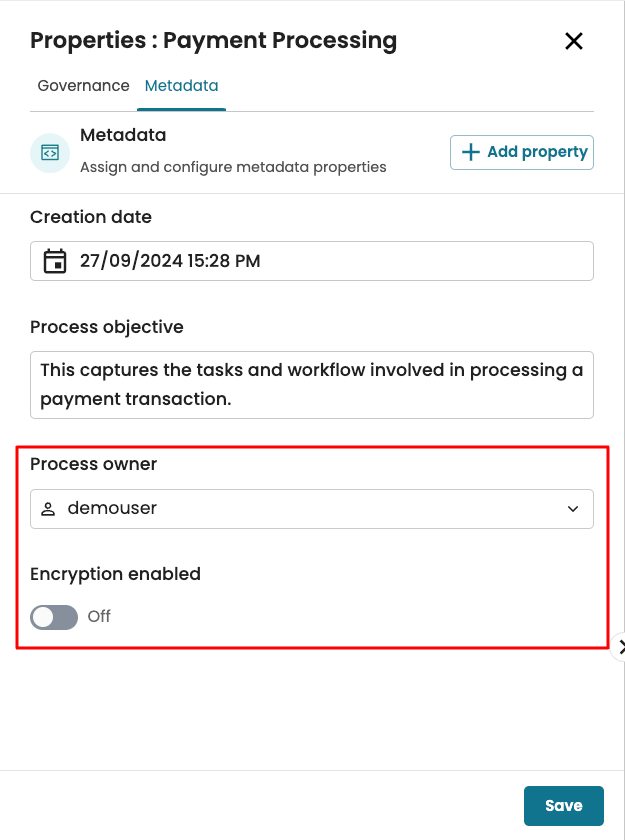
The first property, Process objective, is a metadata property. Go to Metadata.
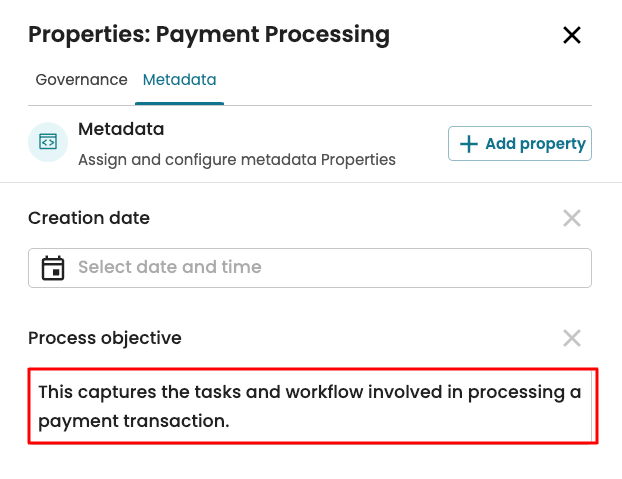
Because the Process objective was defined as a default property, it is added already and cannot be removed. Enter the process objective.
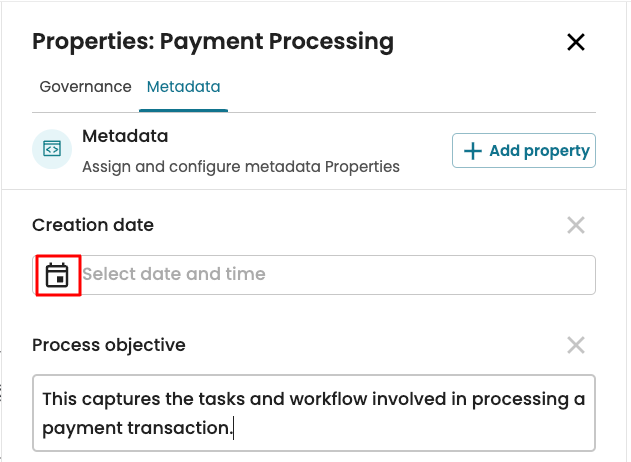
We can also enter the creation date and time. Click the calendar icon.
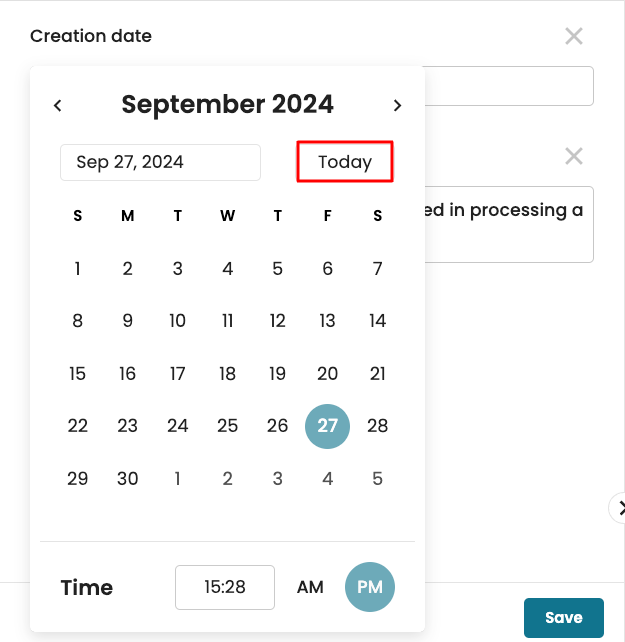
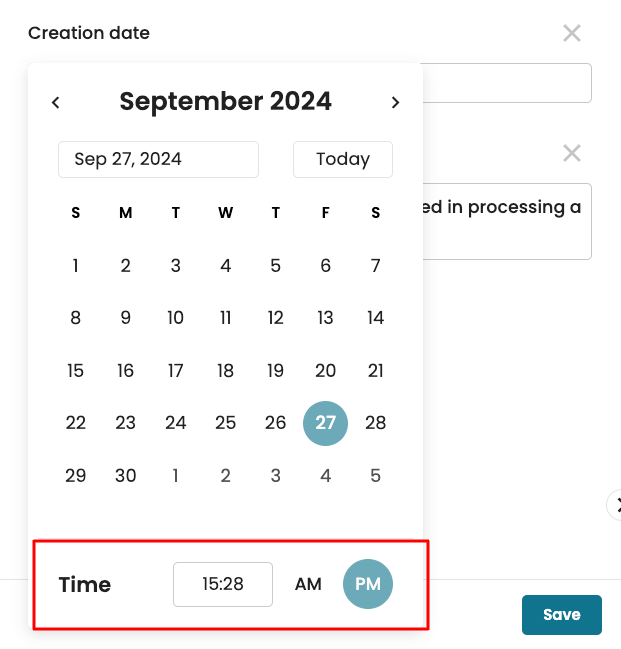
Select a date from the calendar. We can also enter today’s date by clicking Today.
We can also specify a time.
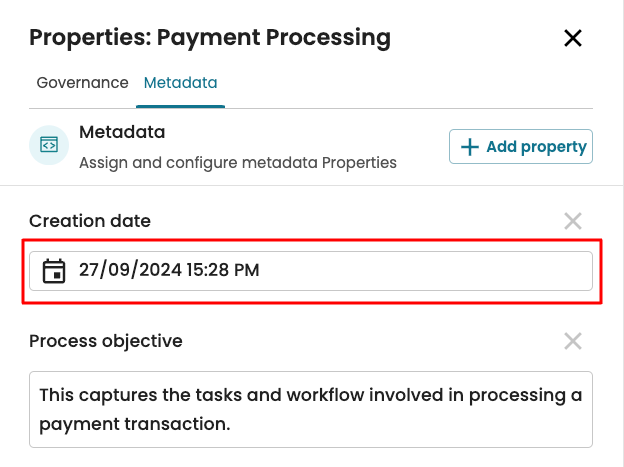
Once done, we see the time defined.
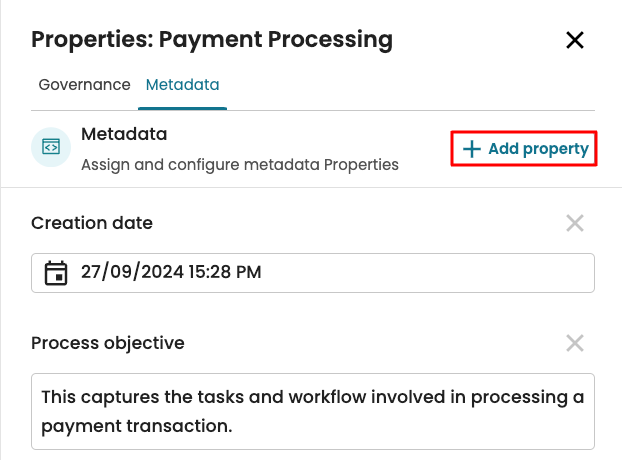
Click Add Property to include properties that are not set as default.
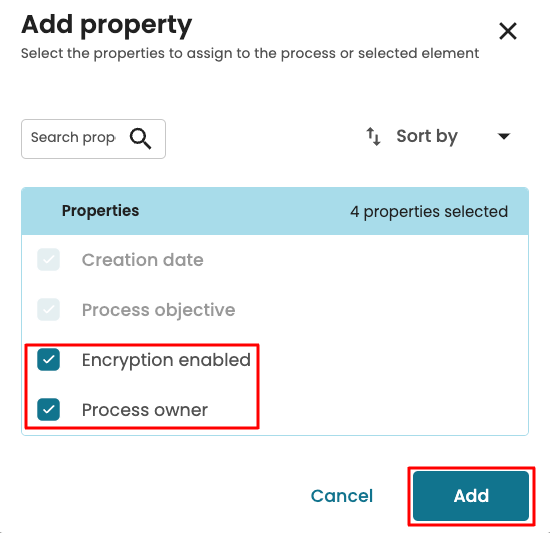
Select the properties to add and click Add.
We see the properties where we can define their values.
Note
The properties that appear must have been defined in the Properties Manager.
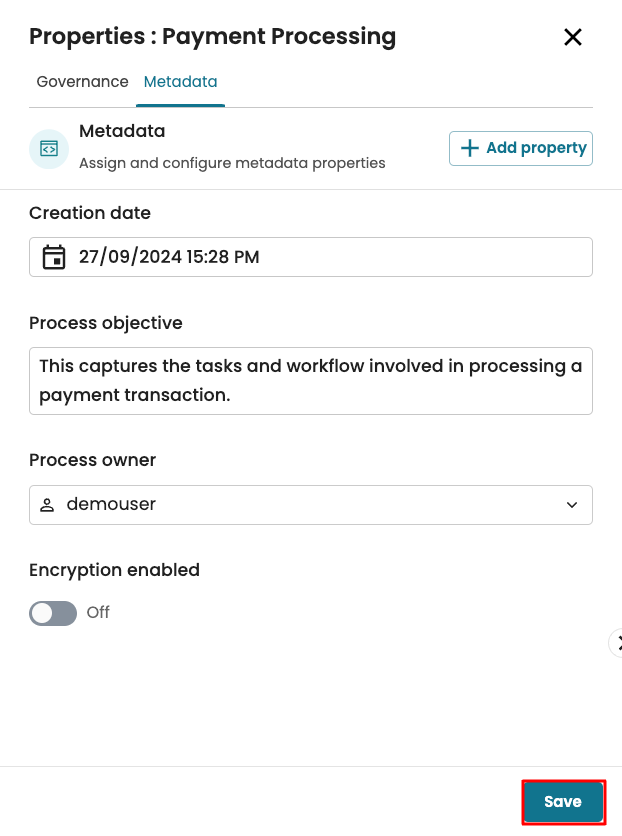
Click Save to save the property values.
Note
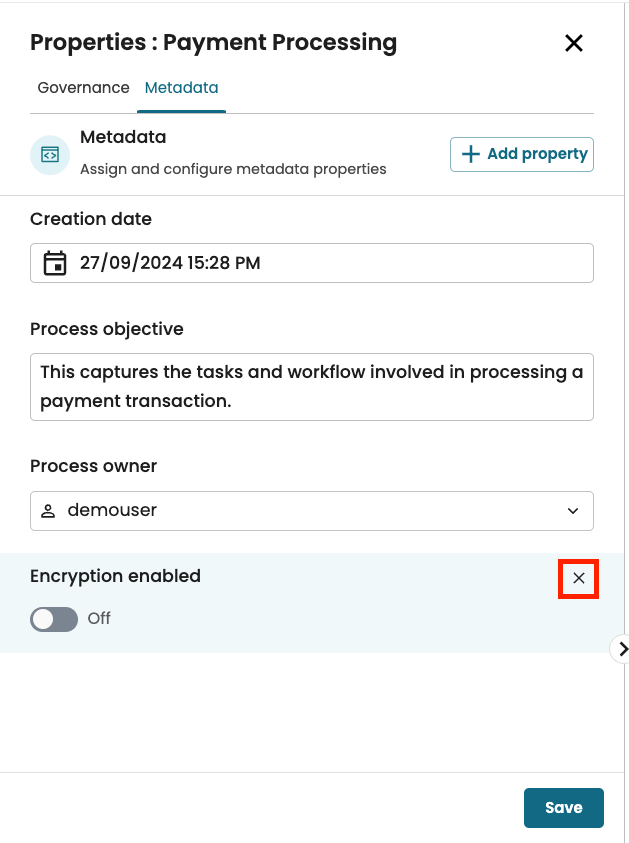
When a property is not the default, we can unassign/remove it from the model. For instance, if we do not want the “Encryption enabled” property in this model, hover over the property and click X.
The property is removed.
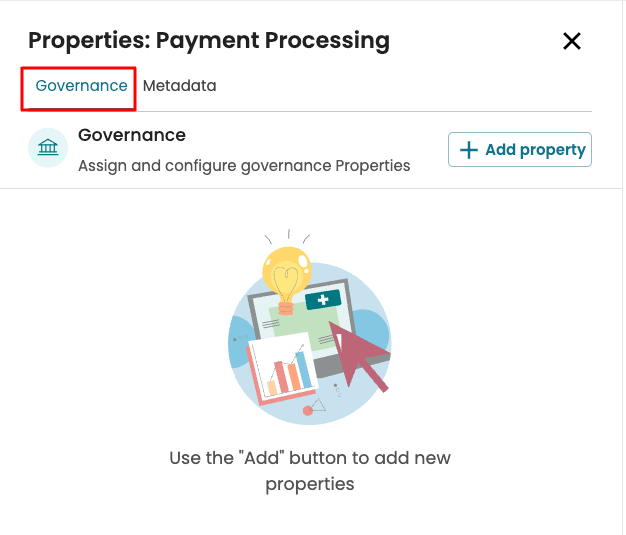
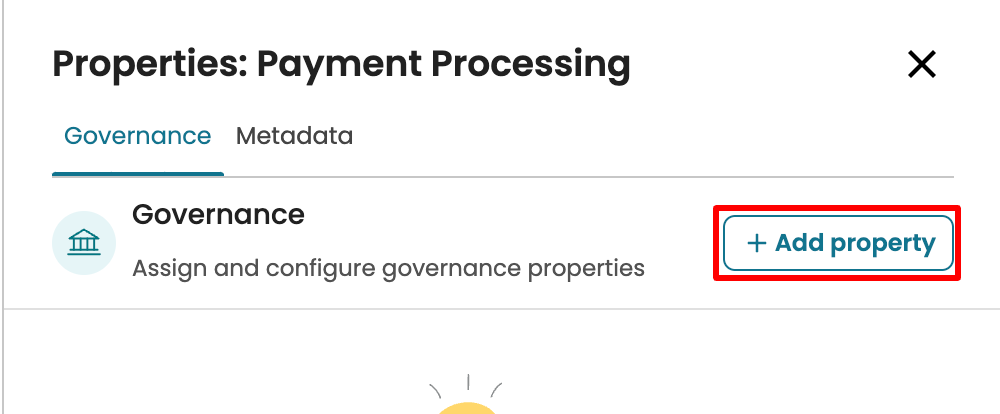
We can also specify governance-related properties. Go to Governance.
Click Add properties to enter the properties for this task.
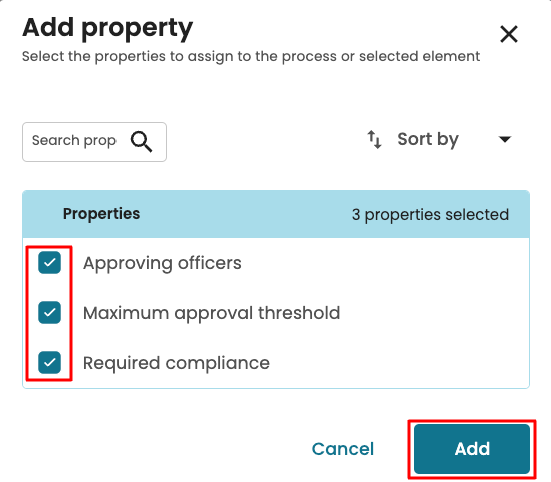
We see all available properties categorized as Governance in the Property manager. Select the properties to add and click Add.
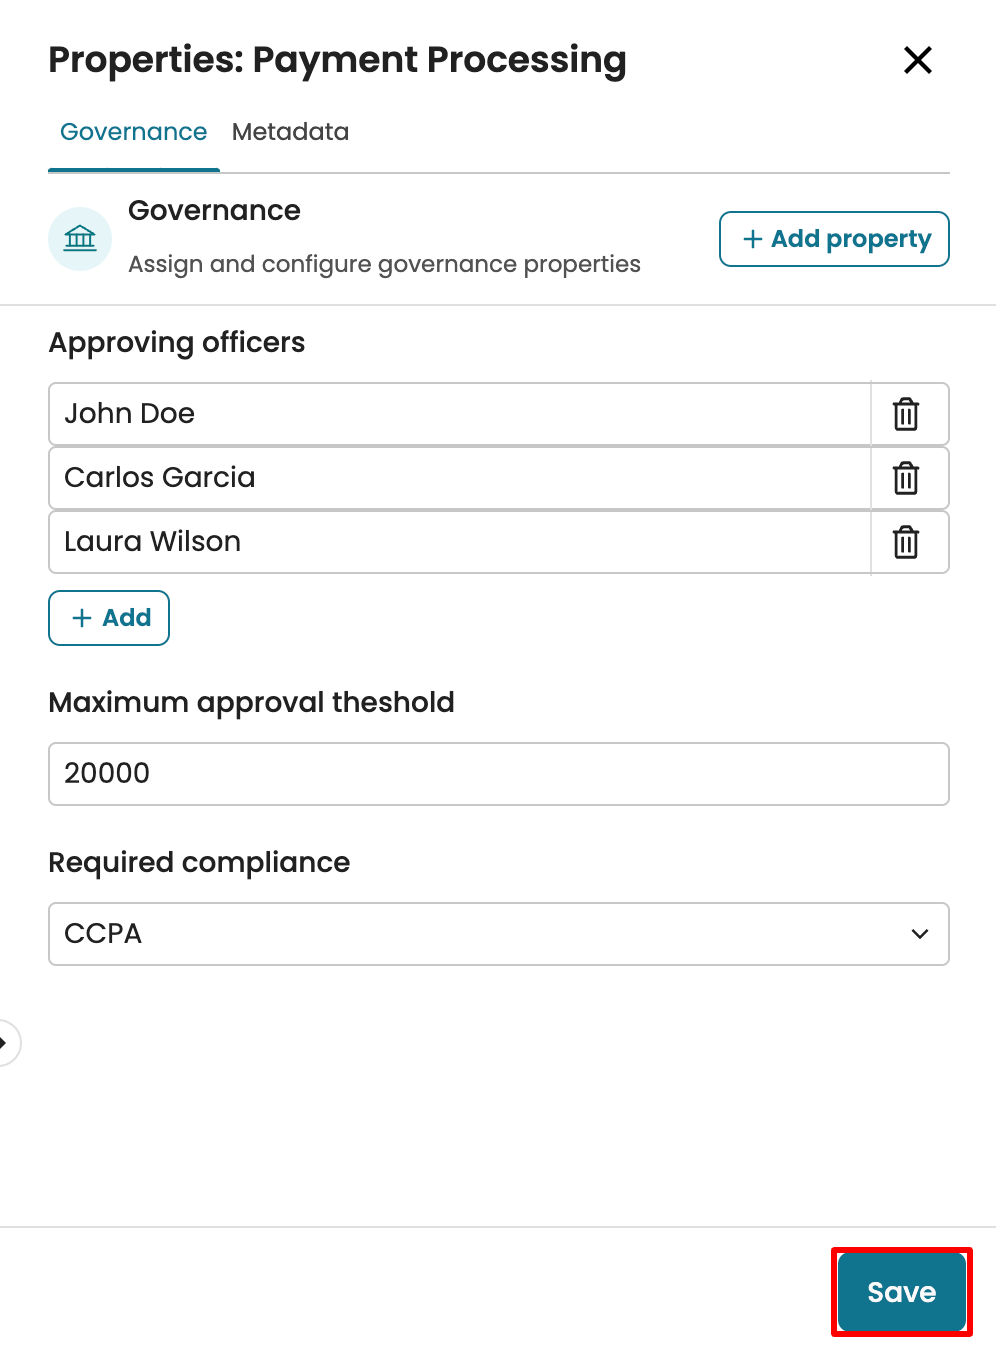
Finally, specify the property values for the task. Once done, click Save.
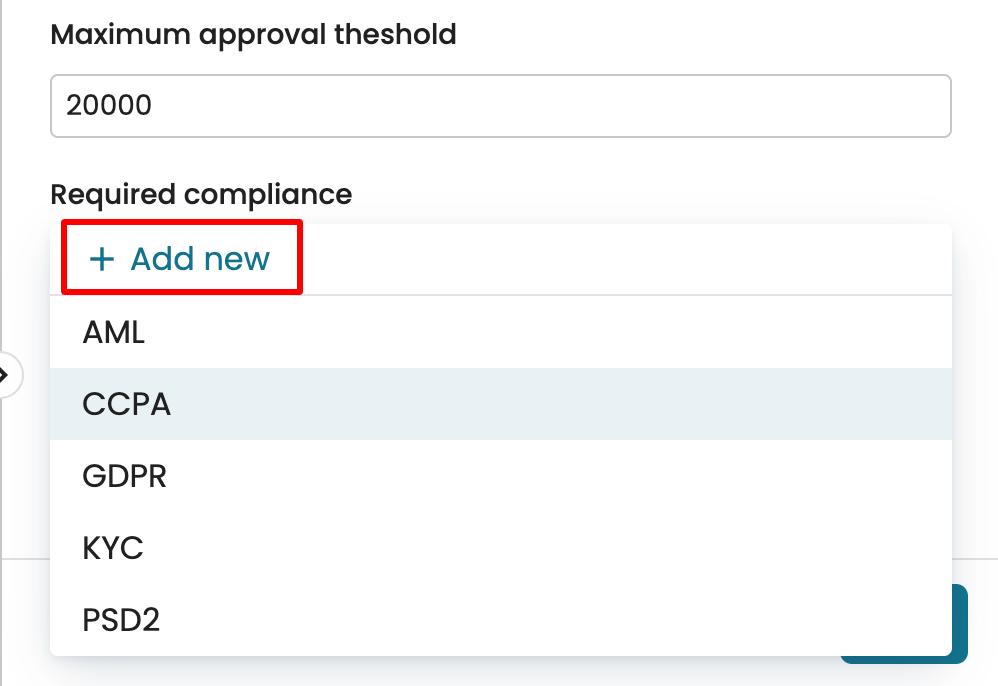
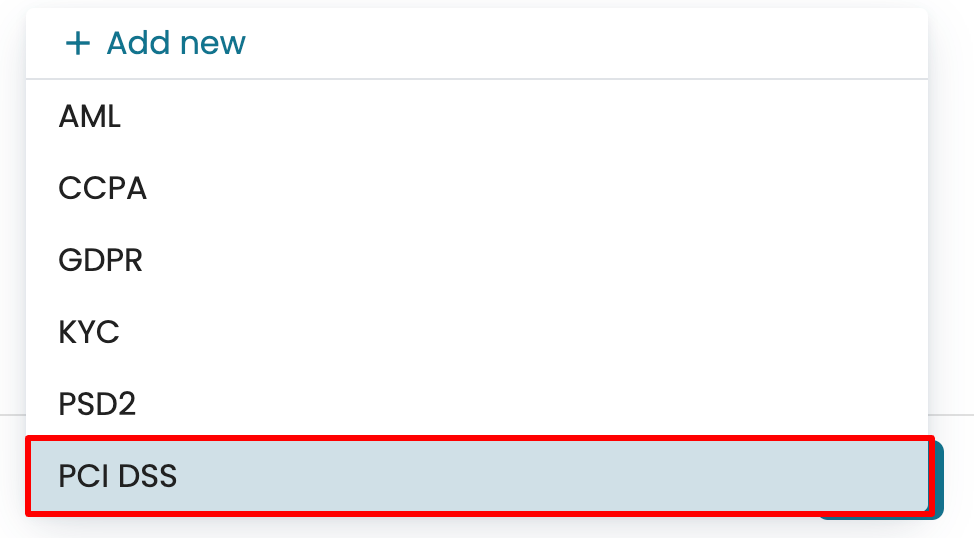
Since the “Allow user to add options” setting was enabled for the Required Compliance property, we can add new options to the existing list. For instance, if “PCI DSS” needs to be added as a compliance option for this process, we can do so by clicking the required compliance dropdown and clicking Add new.
Enter the new option, PCI DSS, and press Enter. The new option has now been added to the list of the “Required compliance” property.
When a model is being published, the reviewer can view the properties of a model before approving the publication request.
Add properties for model elements
To enable us to add specific information to model elements, we can associate properties with them. Properties can be added to the following types of elements:
A task
A gateway
An event
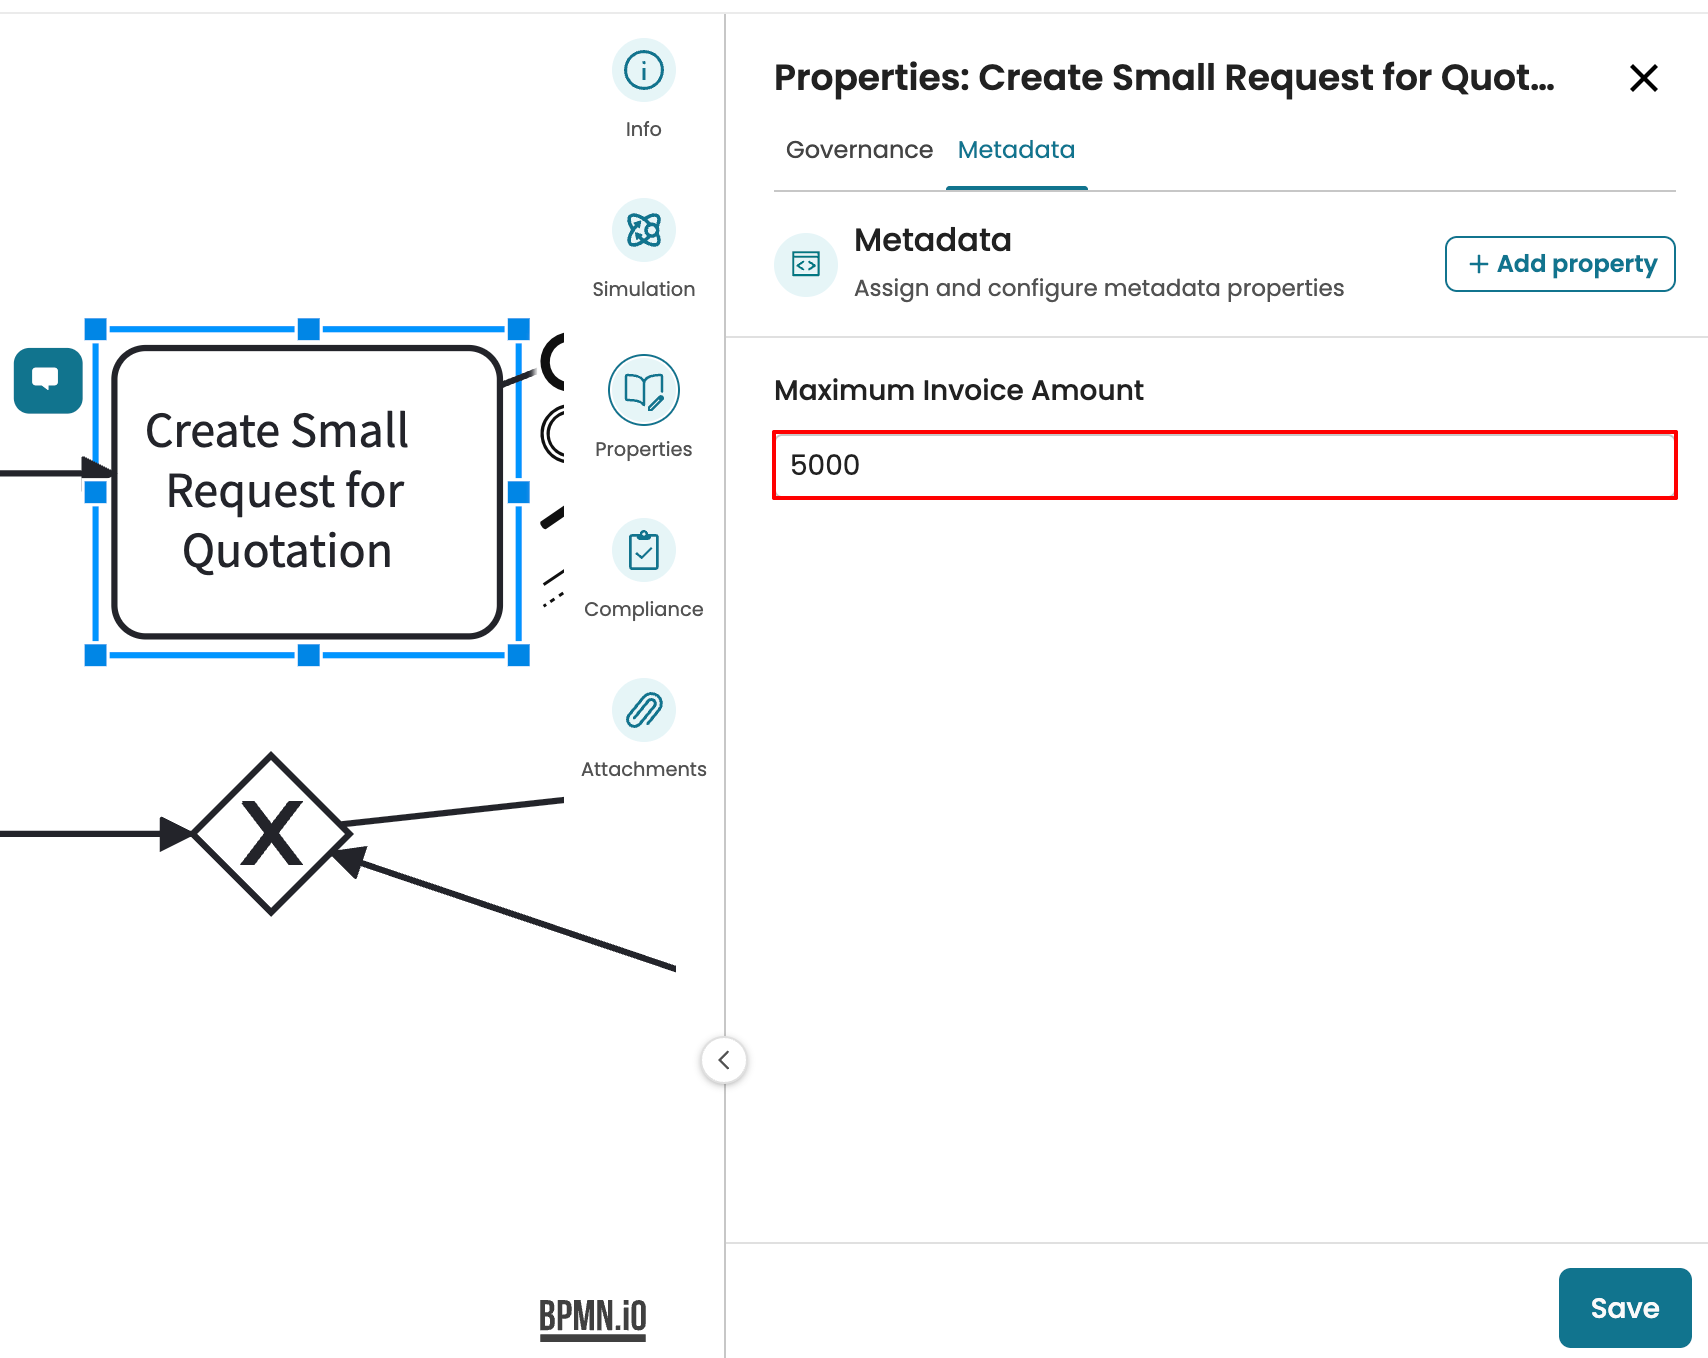
For example, in a procure-to-pay model, we may want to inform users that the task “Create Small Request for Quotation” should have a maximum invoice amount of 5,000 AUD. In this case, we can add a property called “Maximum Invoice Amount” to that task.
To add a property to a model, first create a property in the Properties Manager with Scope “BPMN Element”.
Specify property values in a model element
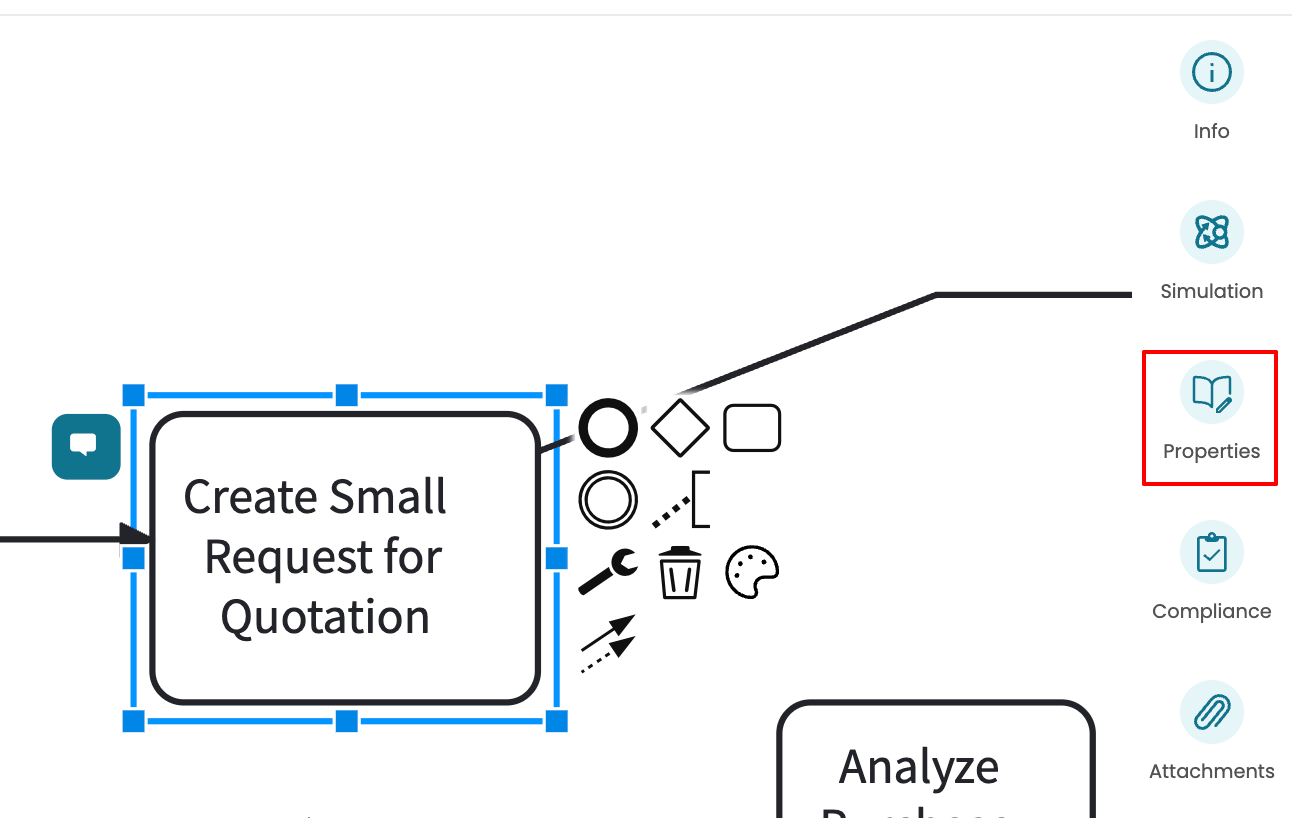
Once saved, open the model in the BPMN and select the model where we wish to add the element. Click Properties to open the properties tab.
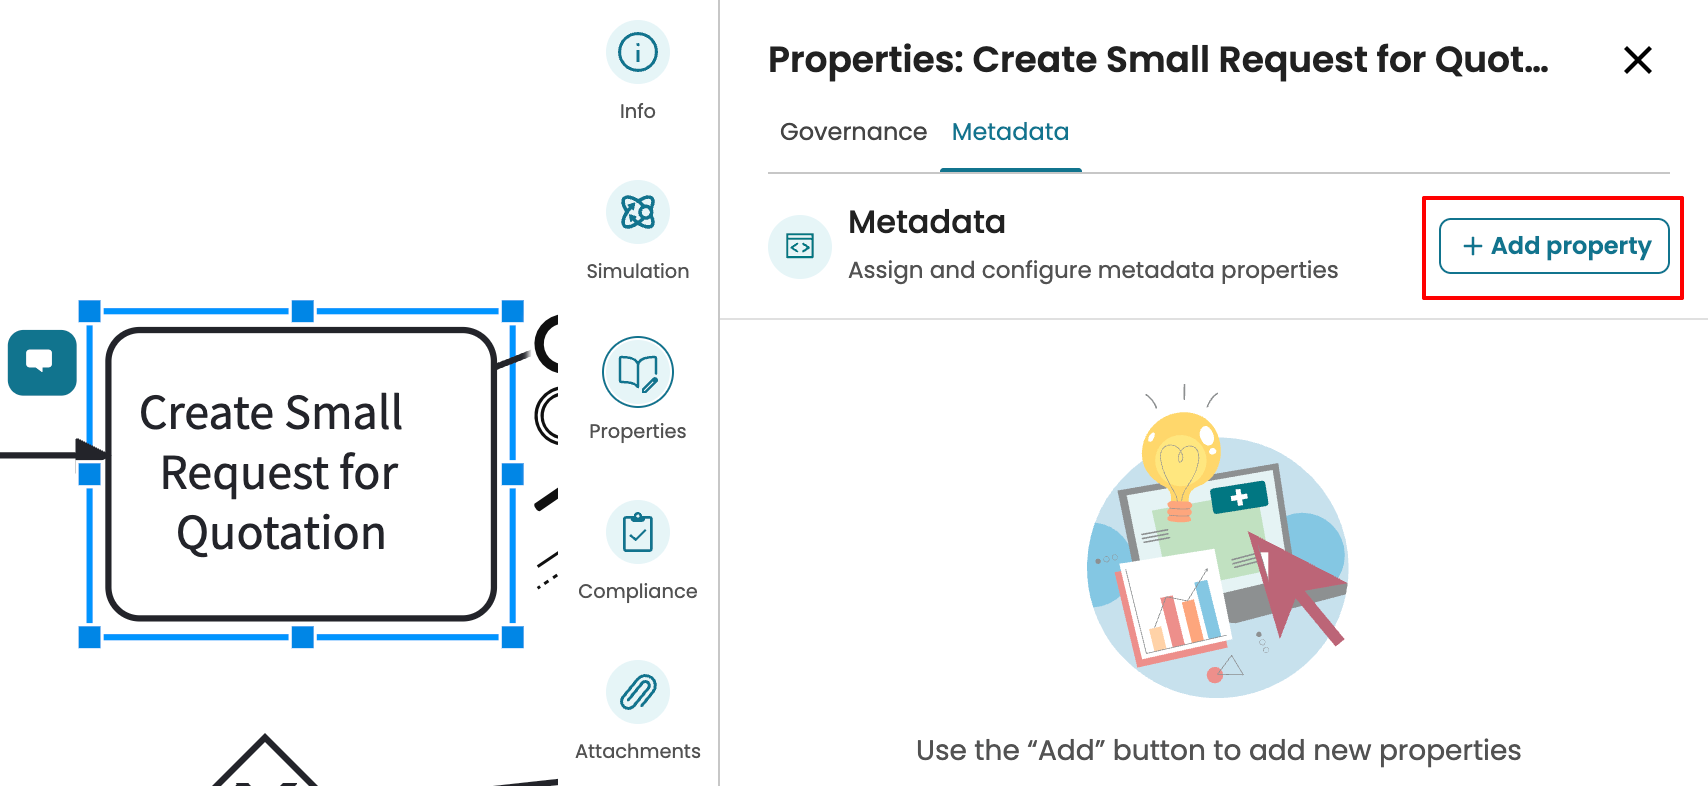
Since the property was created as a metadata property, go to the Metadata tab and click Add property.
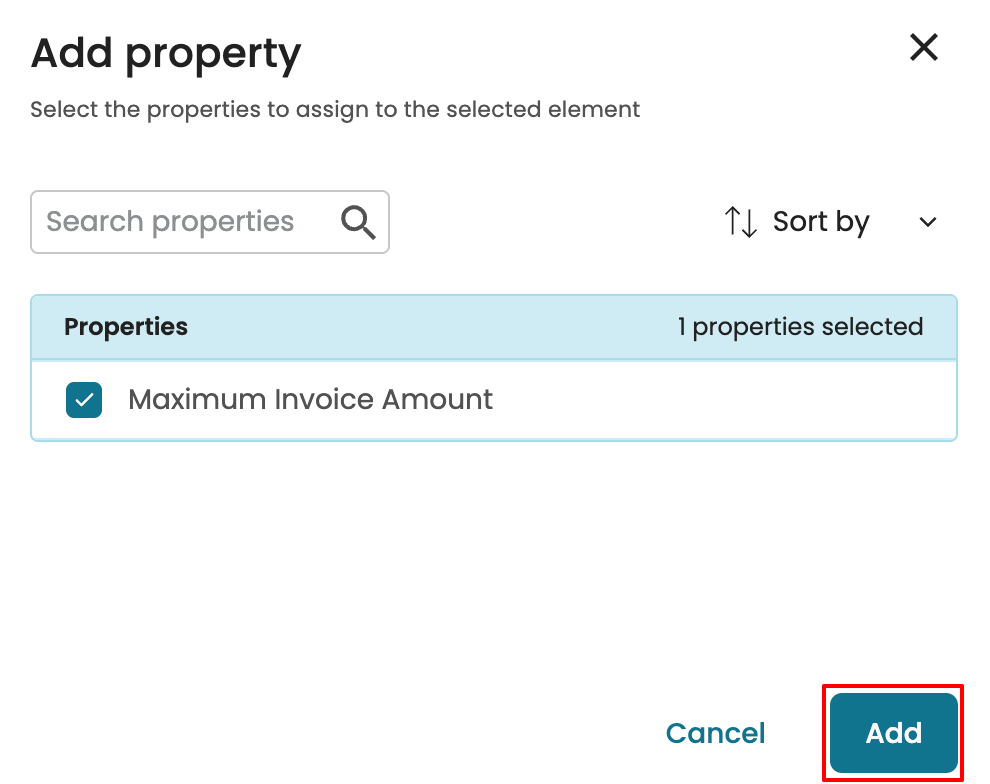
Click the property and click Add.
We can now enter the property value.
Click Save to save the property value.
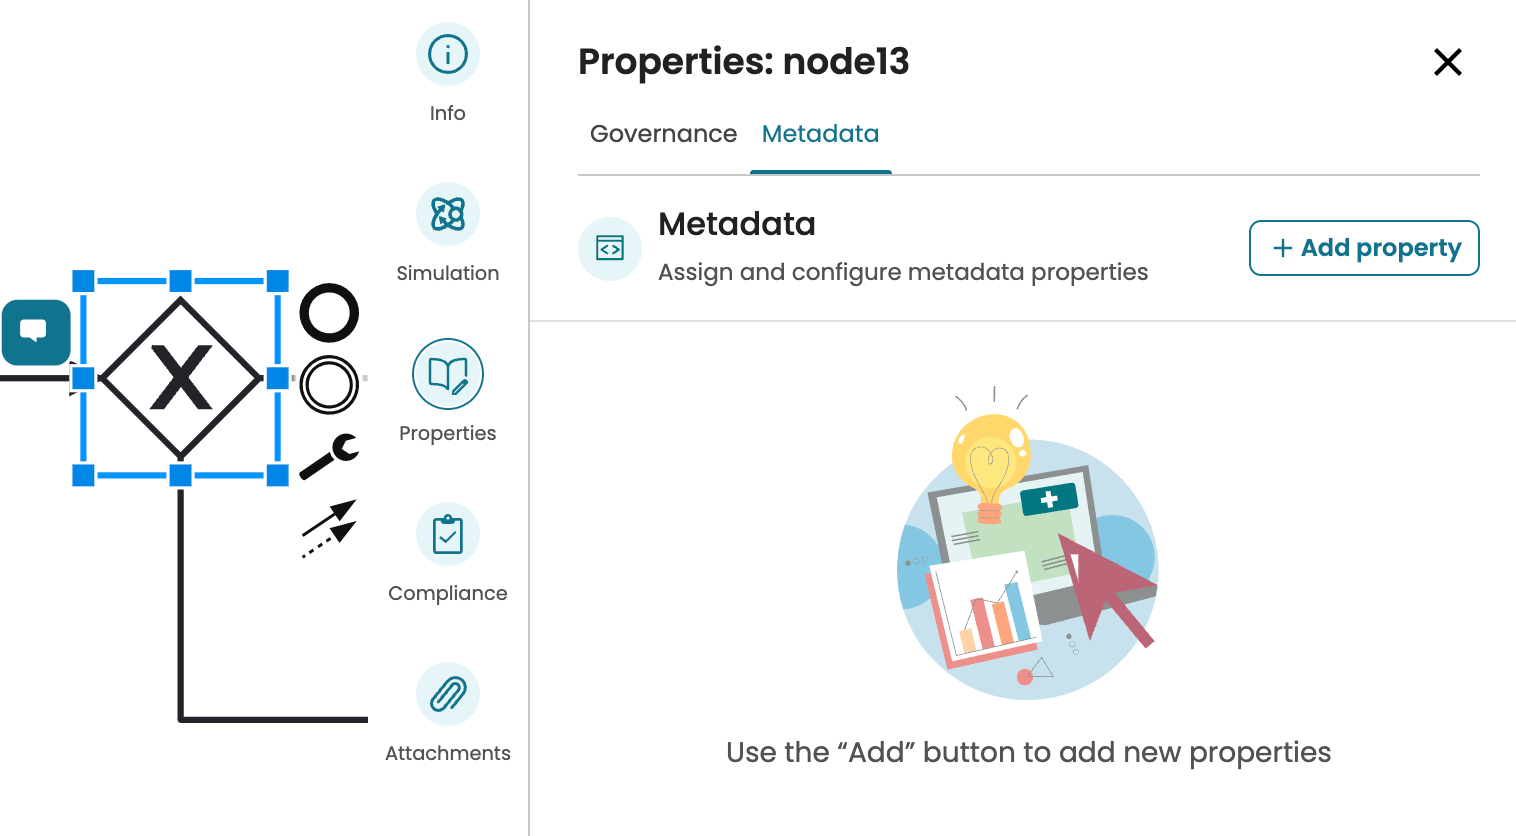
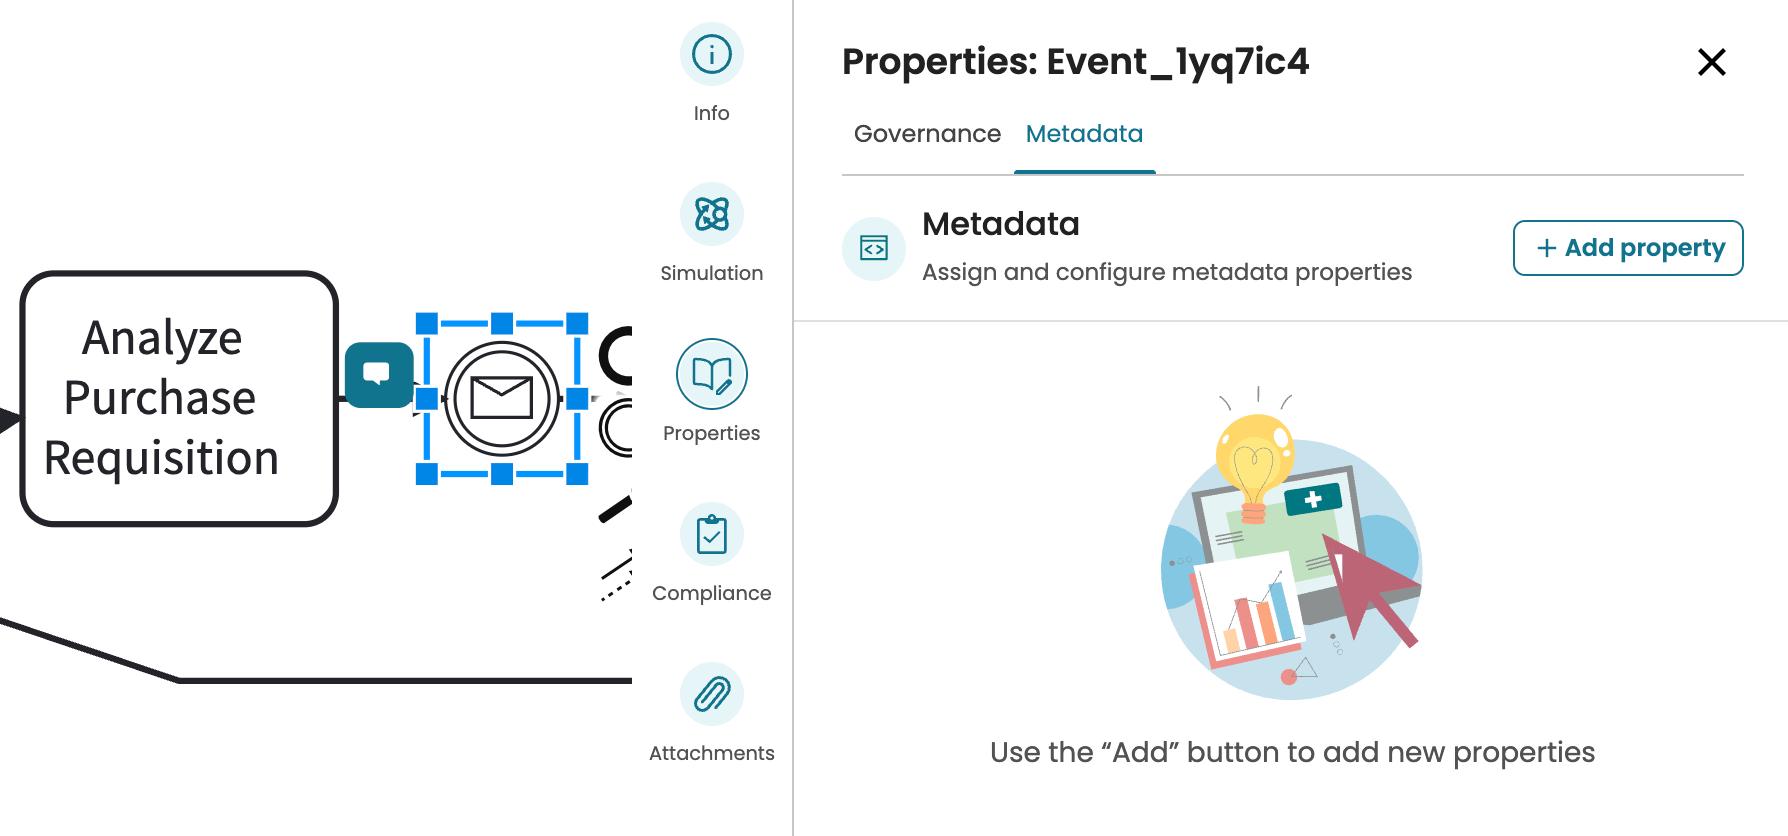
Similarly, we can add a property value to a gateway or event. Select the gateway or event and add the required property and its value.
