Navigating the compliance center
Compliance management allows organizations to monitor the fulfillment or violation of their service level agreements (SLAs) and regulatory requirements. In earlier versions of Apromore, we could create compliance rules for a process by creating filters on the event log. For instance, in an international payment process, we can have a compliance rule that rejects payments to blacklisted individuals. This is done by creating the filter condition on the log. However, operationalizing this workflow is a bottleneck.
When we have multiple compliance rules to check, we must create multiple filters. Also, if we want to create the same compliance rules on other logs, we must create the filters for each log and apply the filter each time. To streamline the process of operationalizing compliance management in Apromore, we introduced the compliance center.
Note
The Compliance Center is an add-on. It will only be enabled in your tenancy if you have acquired the corresponding add-on license.
The compliance center allows us to create compliance items used to track the SLAs or compliance violations. A compliance item can be either of the three options:
Risks: These are potential events that could cause businesses to not achieve their compliance or regulatory objectives. For instance, payments to individuals on a blacklist are successful.
Obligations: These are the duties from SLAs or regulatory requirements that must be fulfilled. For instance, the time between approving payment and disbursing payment should be less than 12 hours.
Controls: These are manual or automated actions performed during a process execution that aim to mitigate risks and ensure the obligations are met. For instance, to mitigate the risk of approving payments to a blacklisted individual, we can create a control rule that ensures that before a payment is approved, a due diligence check has been performed. In Apromore, controls are defined using control templates. Then, such control templates are applied to an event log to instantiate the actual control rule (also referred to as compliance rule).
While controls are used both for documentation and instantiation of compliance rules, risks and obligations are primarily used for documentation and governance purposes. Compliance items are saved in a risk, obligation, control (ROC) register. The ROC register helps us track our compliance status and serves as a reference for managing SLAs or regulatory requirements.
Note
While defining the risks and obligations is not mandatory for running a compliance check, we are required to define a control to run a compliance check.
Having defined the compliance items of interest, we can then check the compliance of our processes to identify the controls that are being violated.
As an example, in international banking, the anti-money laundering (AML) Act opens banks to the following risk during payment processing.
Risk #1: The beneficiary bank might have pending sanctions or might not be eligible to receive the funds due to regulations (e.g., funds cannot be transferred to banks of a specific region). To avoid violating this risk, a bank screening is required. This is an activity in the process called Enhanced Due Diligence Check (EDD Check). During this check, all the information related to the beneficiary bank is checked and validated against blacklists. The screening outcome must be positive for the process to continue with the payment.
Risk #2: The beneficiary of the payment might be on a blacklist (i.e., an individual that is flagged as a high-risk profile that should not receive international payments). Similar to the bank’s screening, there exists also another activity in the payment process to perform a check on the beneficiary of the payment. This is called a Customer Due Diligence Check (CDD Check).
Meanwhile, in the context of payment processing, the bank is exposed to the risk of overdraft.
Risk #3: The payee’s bank account might not have enough funds to complete the payment, and its account might not allow overdraft (i.e., negative balance). This is checked by verifying that there exist enough funds in the payer’s account or that the payee’s account allows a negative balance.
Given these risks, we can create compliance items in Apromore to check whether the bank complies with these regulatory requirements.
Here are the steps to create compliance items and run a compliance check in Apromore.
Create the risk or obligation of interest.
Create the corresponding control for the risk or obligation.
When creating the control, define its control template.
Assign the control to the risk or obligation register.
Select the created control and edit its compliance rule.
Operationalise the control. This is done by assigning an event log to the control so that the compliance rule is based on the data in the event log.
When creating a compliance rule, a compliance check for that rule is automatically run in the background, and violations are recorded if any exist.
Visualize the results of the compliance check in a dashboard tile, table, or chart.
Create risks or obligations
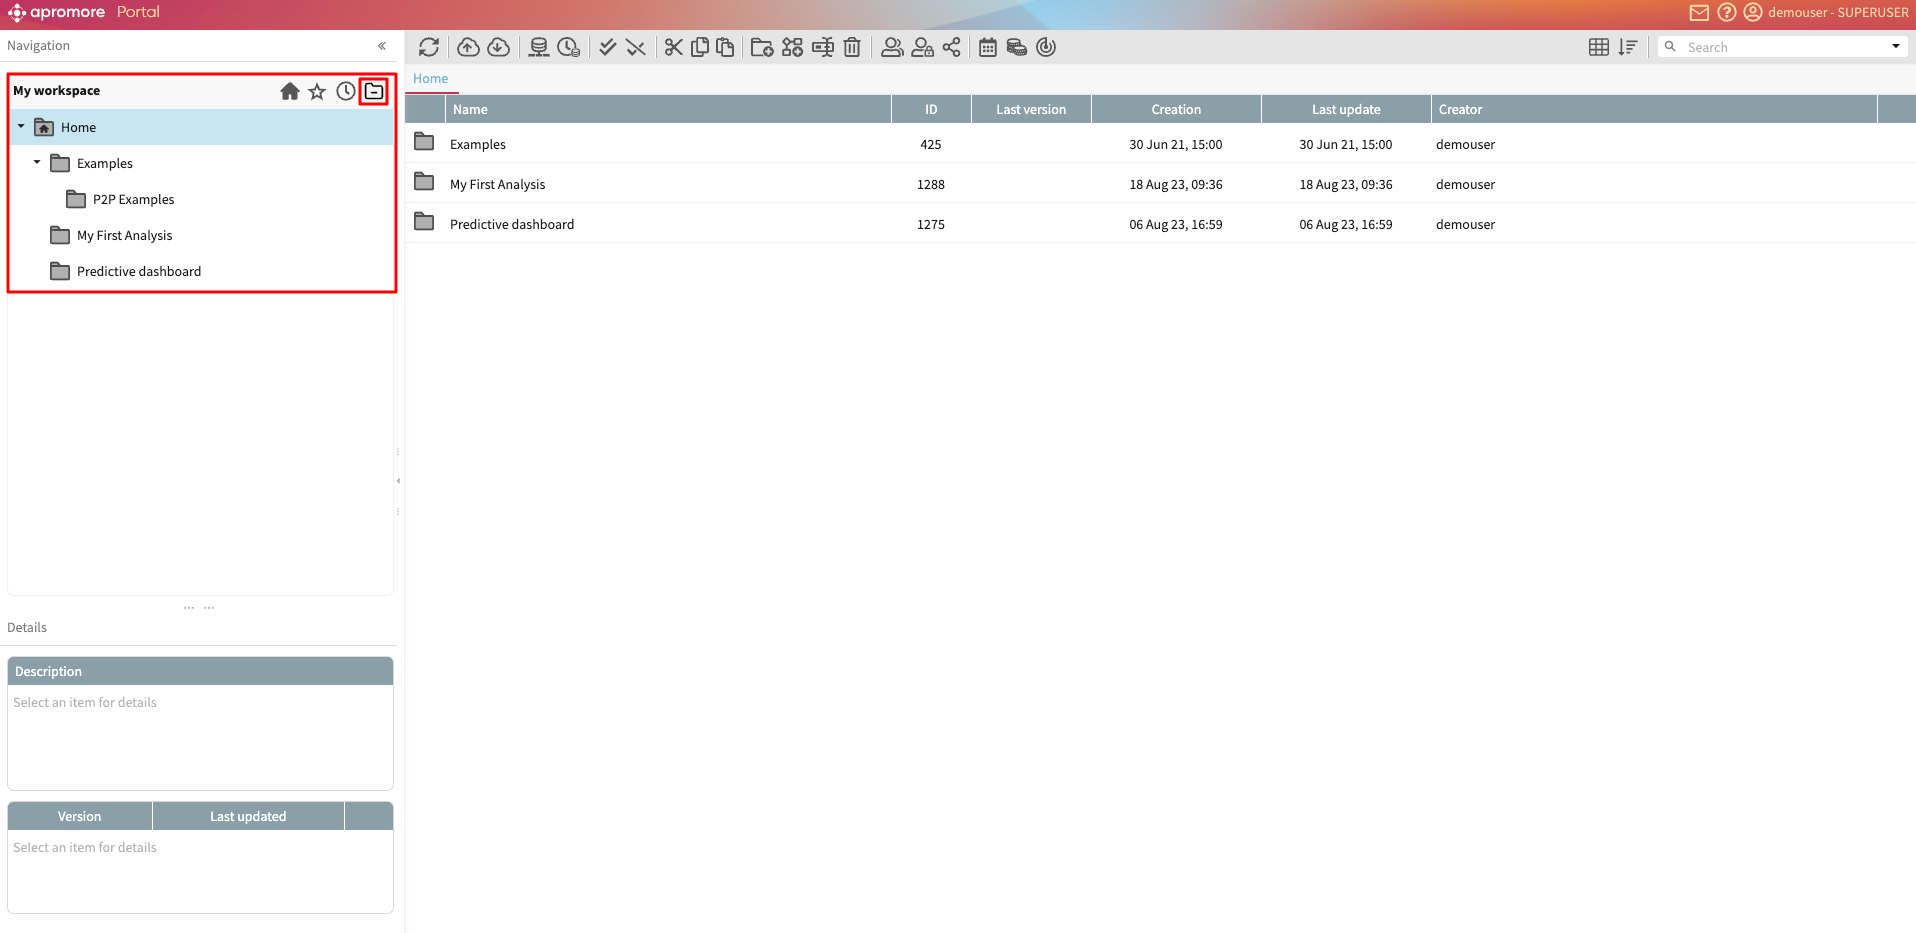
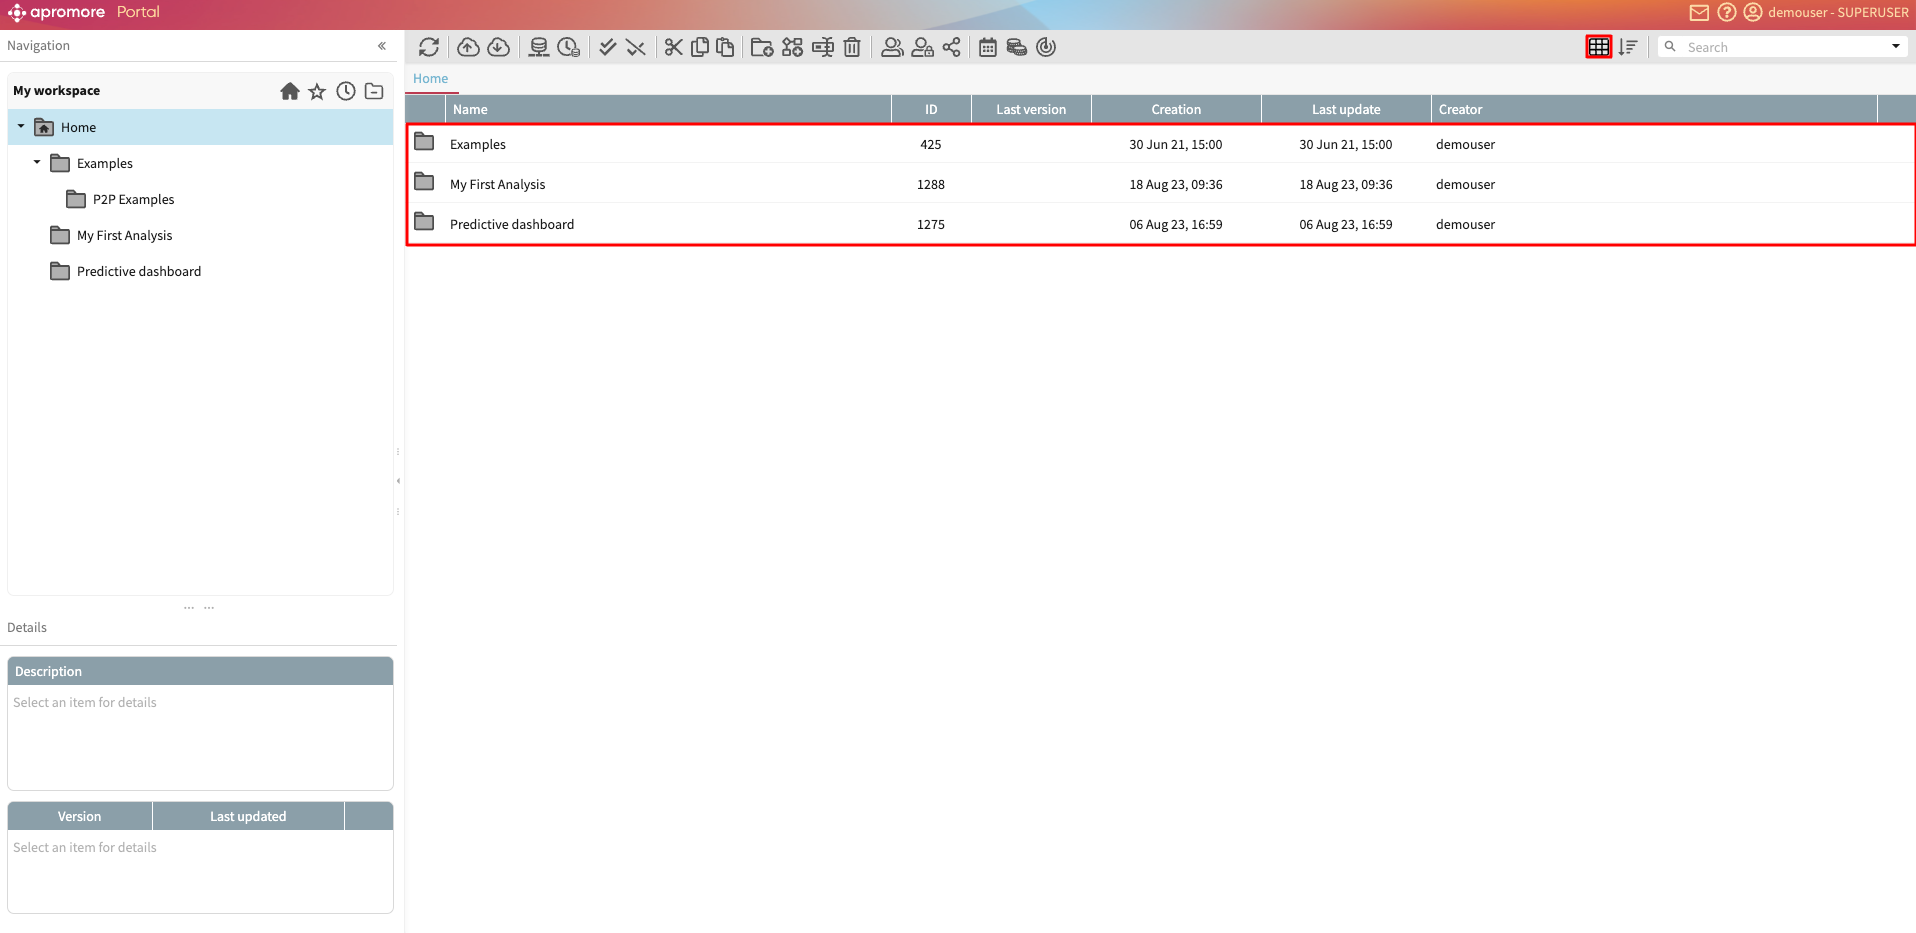
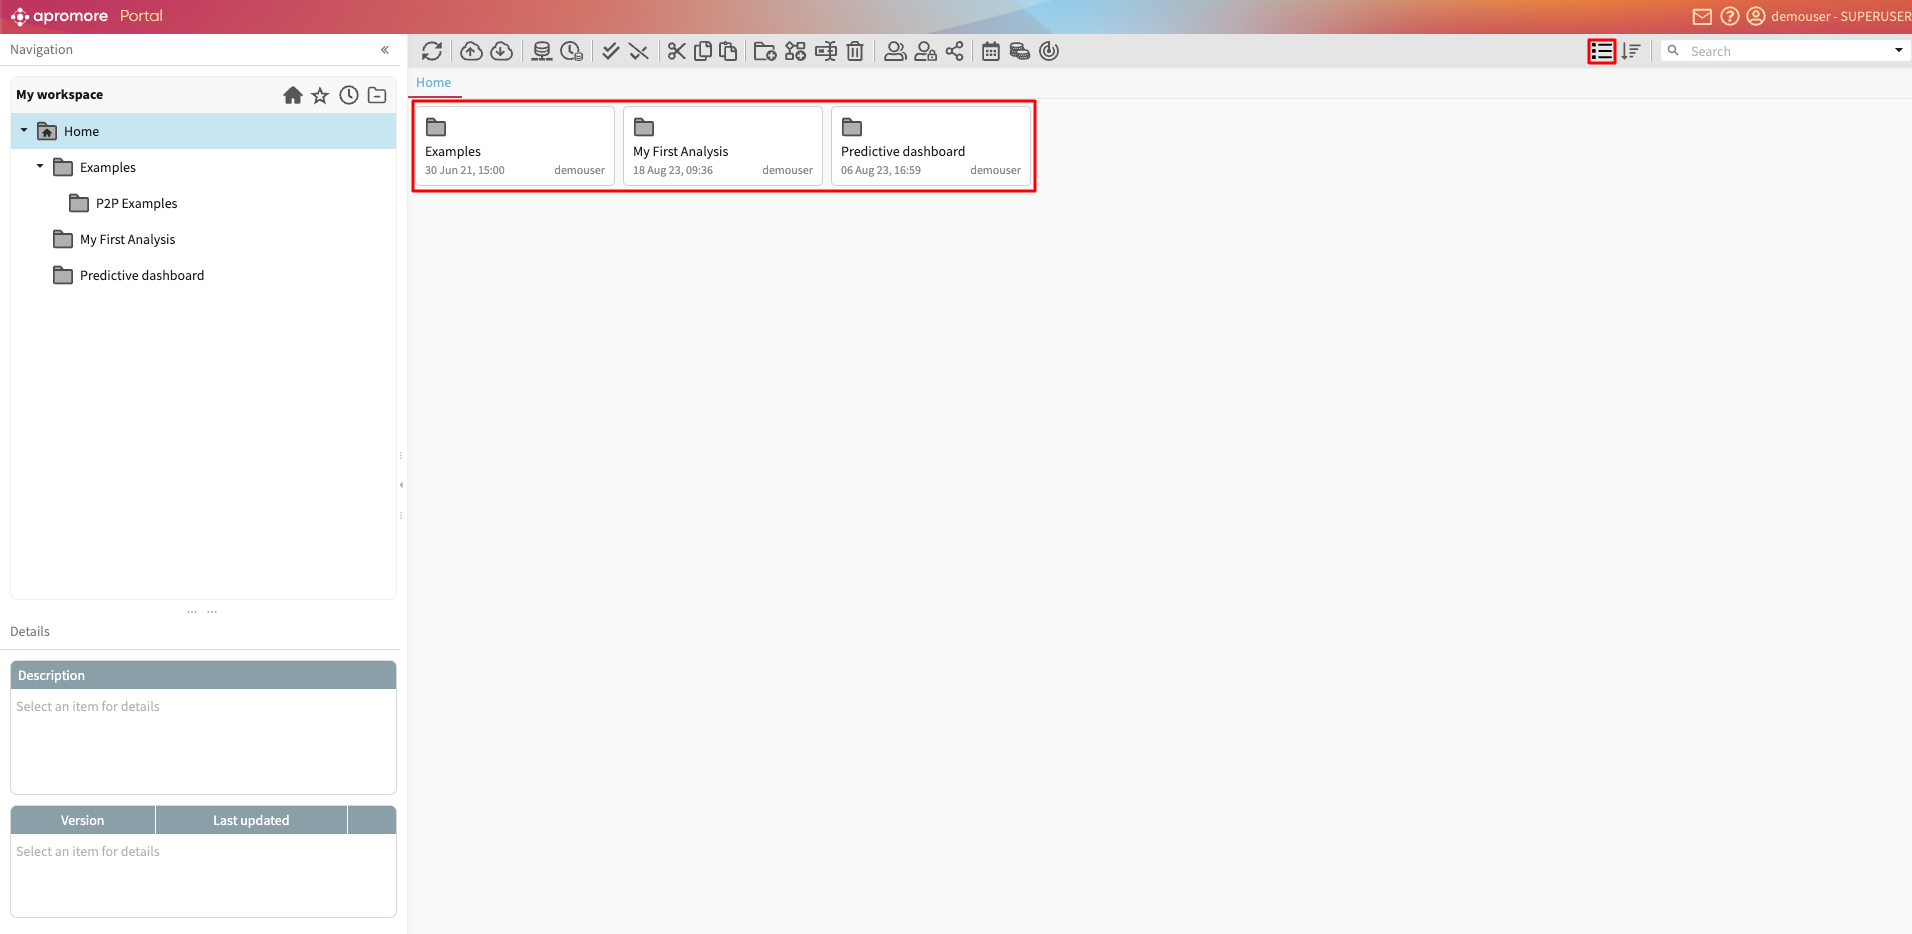
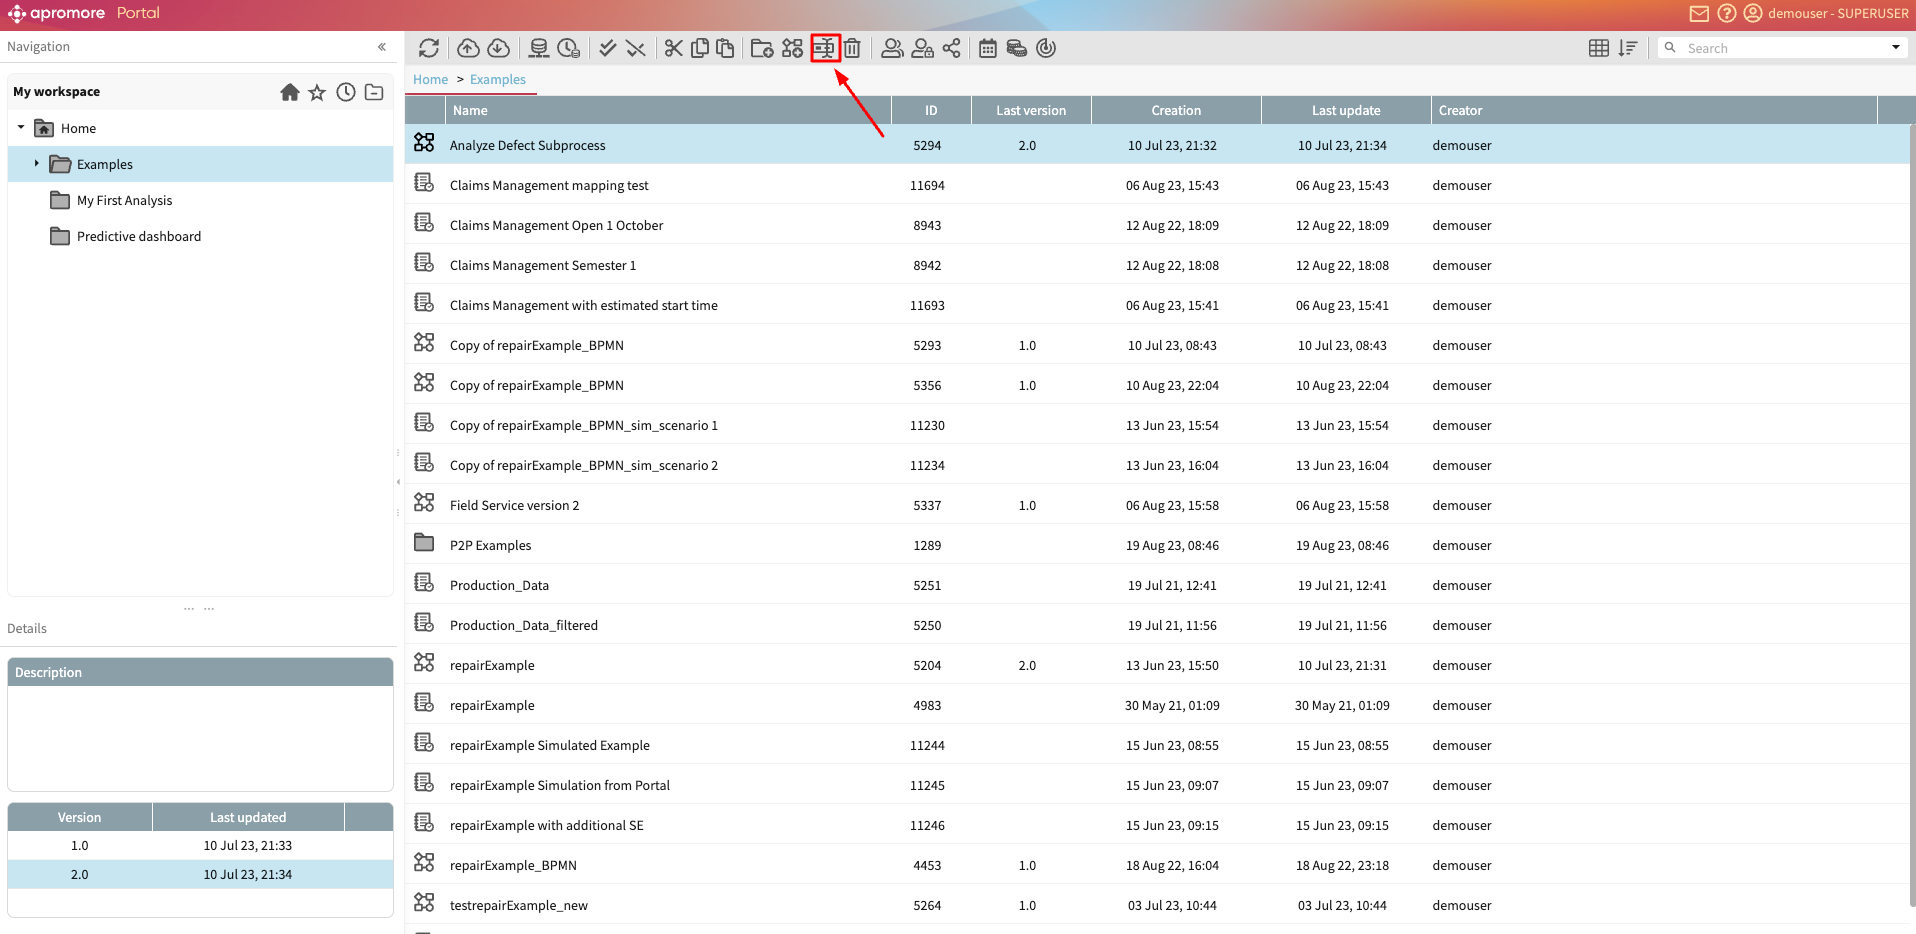
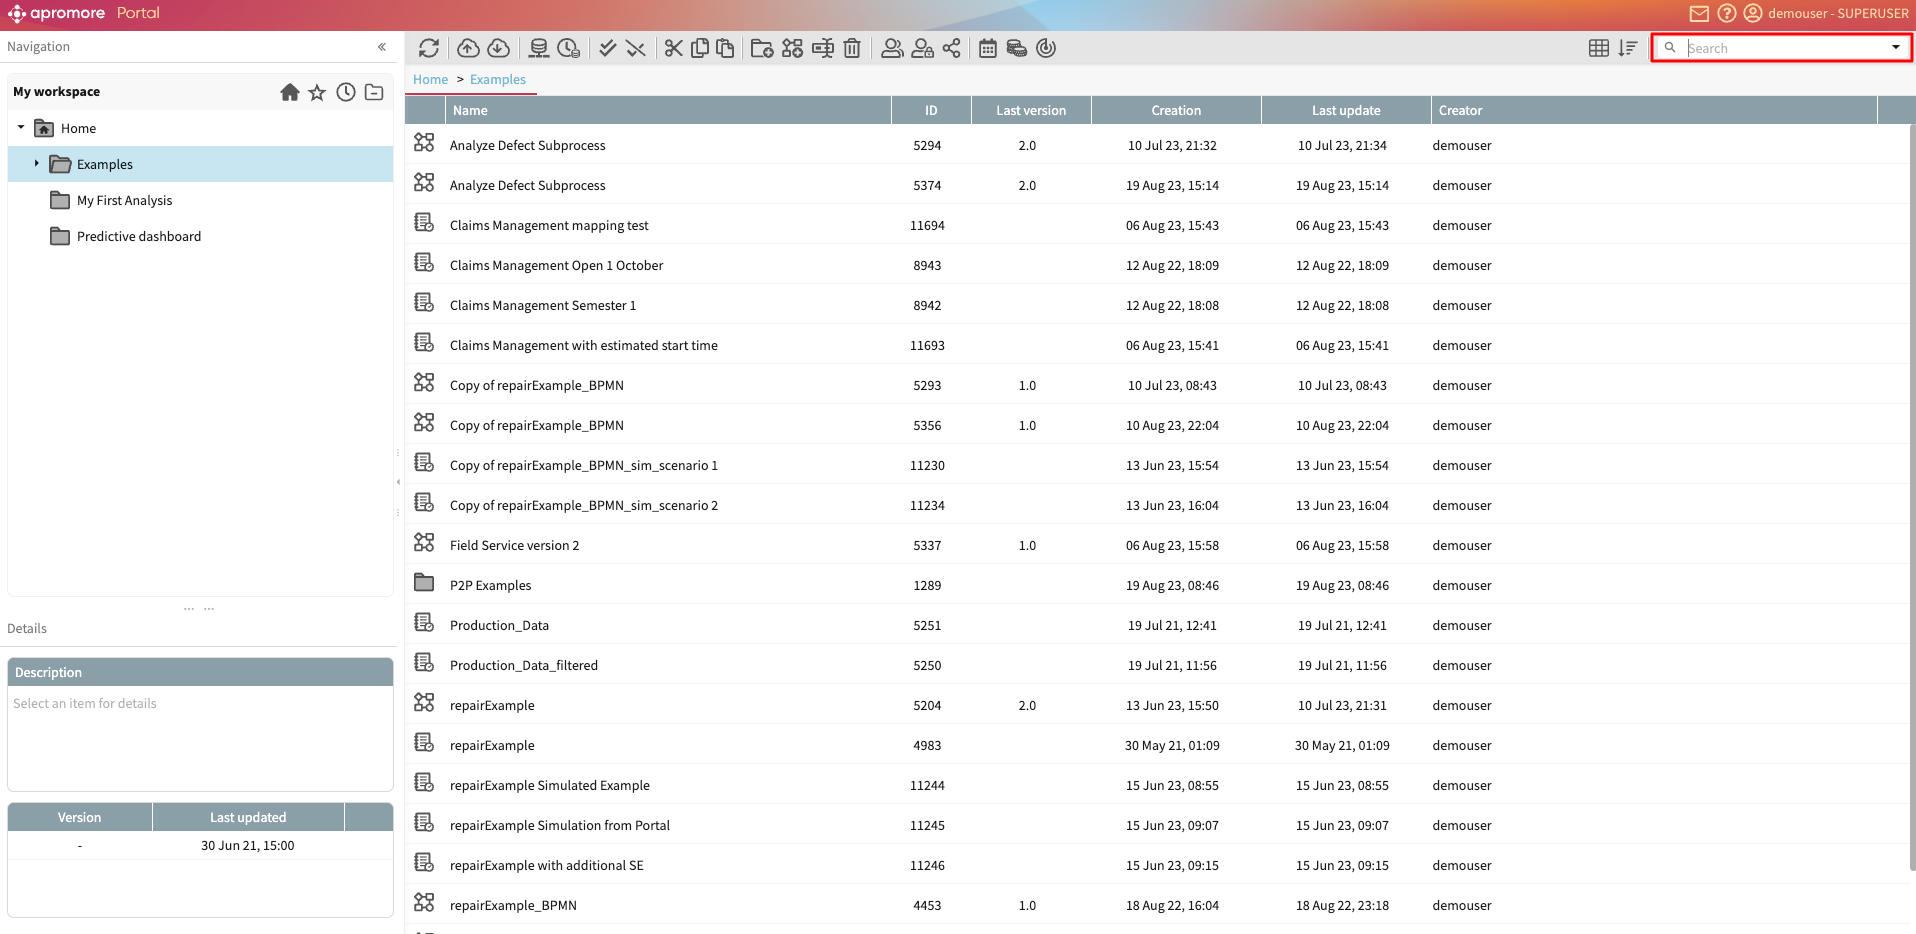
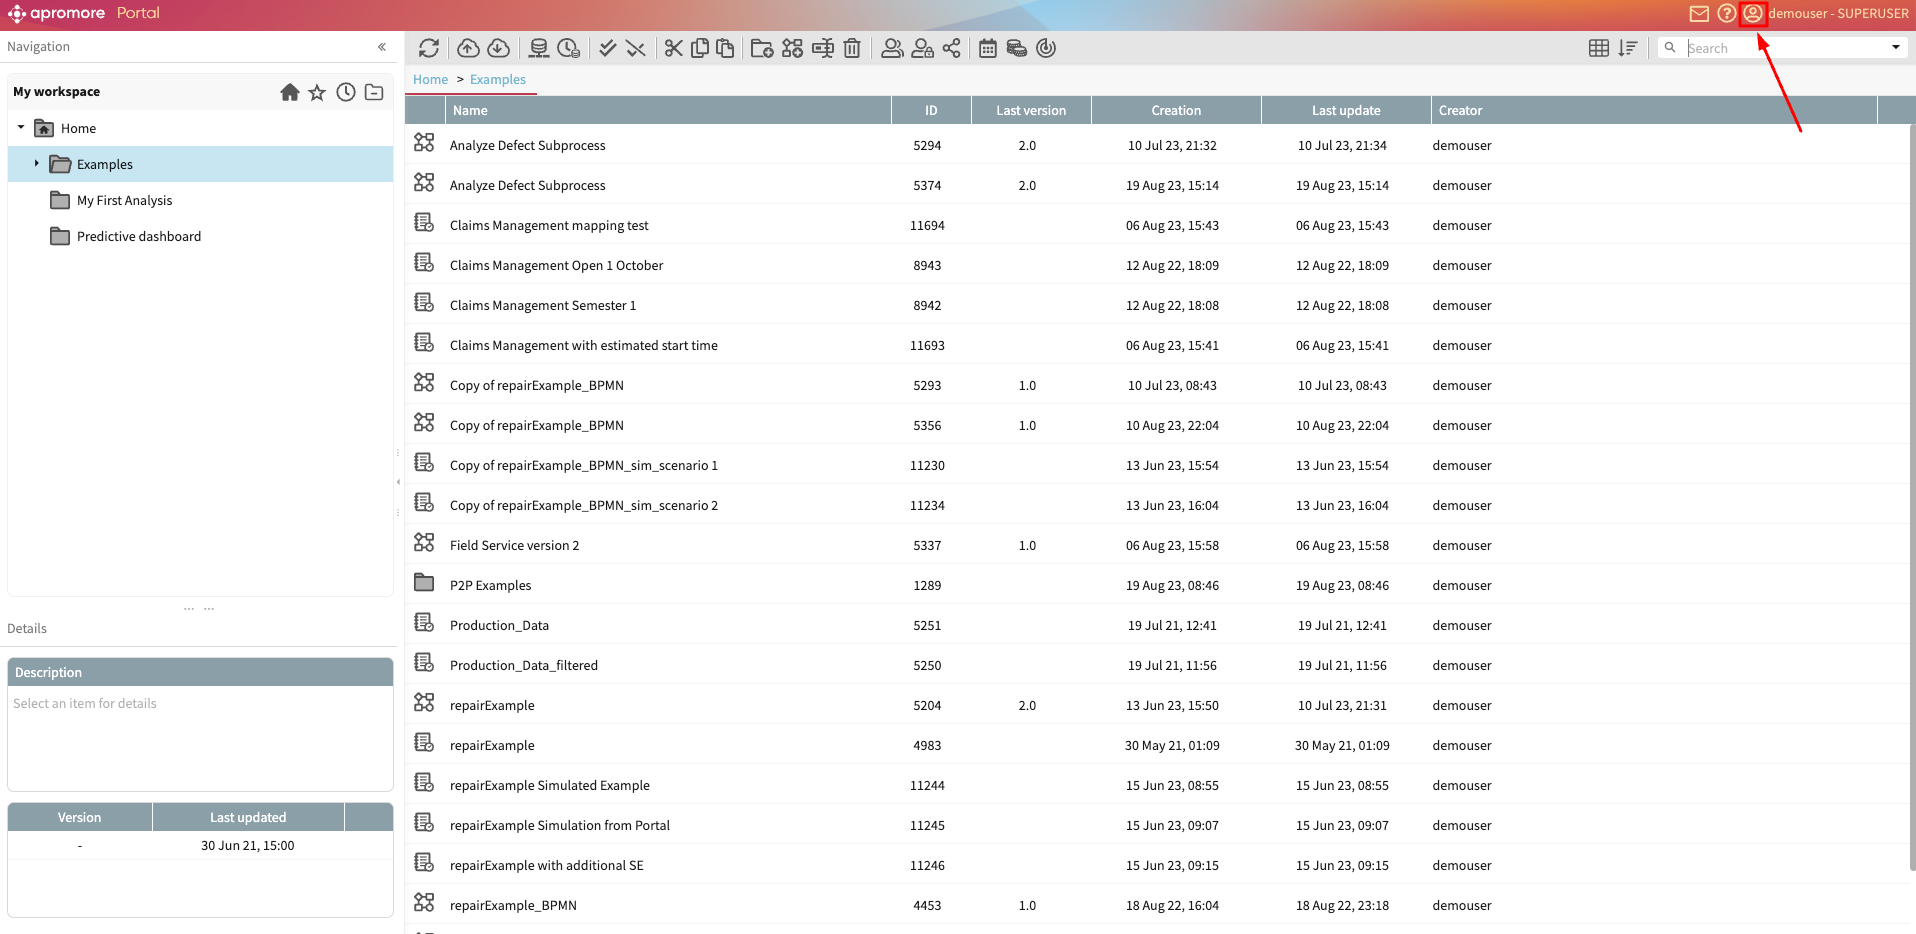
To begin, go to the Apromore Portal and click Compliance Center.
This opens the compliance center environment where we can specify the compliance items. Click Add new > New item to add a compliance item.
First, we create Risk #1: High-risk profile beneficiary bank. In the Item drop-down, Risk will be selected by default.
Specify the risk name, ID, state, and description. Other fields might be available if a risk and control register was uploaded into Apromore (in this example, they are category and sub-category).
Note
Compliance states allow us to keep track of the lifecycle of a compliance item, as it can change. Five states can be selected: Draft, Reviewed, Validated, Suspended, and Deprecated. To learn more about states, see Manage compliance states.
We can include other custom fields when creating a compliance item. To learn more, see Manage compliance item fields.
To complete the risk creation, we need to add its associated control. However, since we have two other risks, we can first create the risks and then create the controls for each of these risks. Finally, we return to the risks and add the controls.
Click Save to save the current risk.
Next, we create Risk #2: High-risk profile beneficiary. Click Add new > New item. Select Risk and fill in the details accordingly.

Click Save.
Next, we define Risk #3: Overdraft when the account type is not credit. Click Add new > New item. Select Risk and fill in the risk details.

Create controls
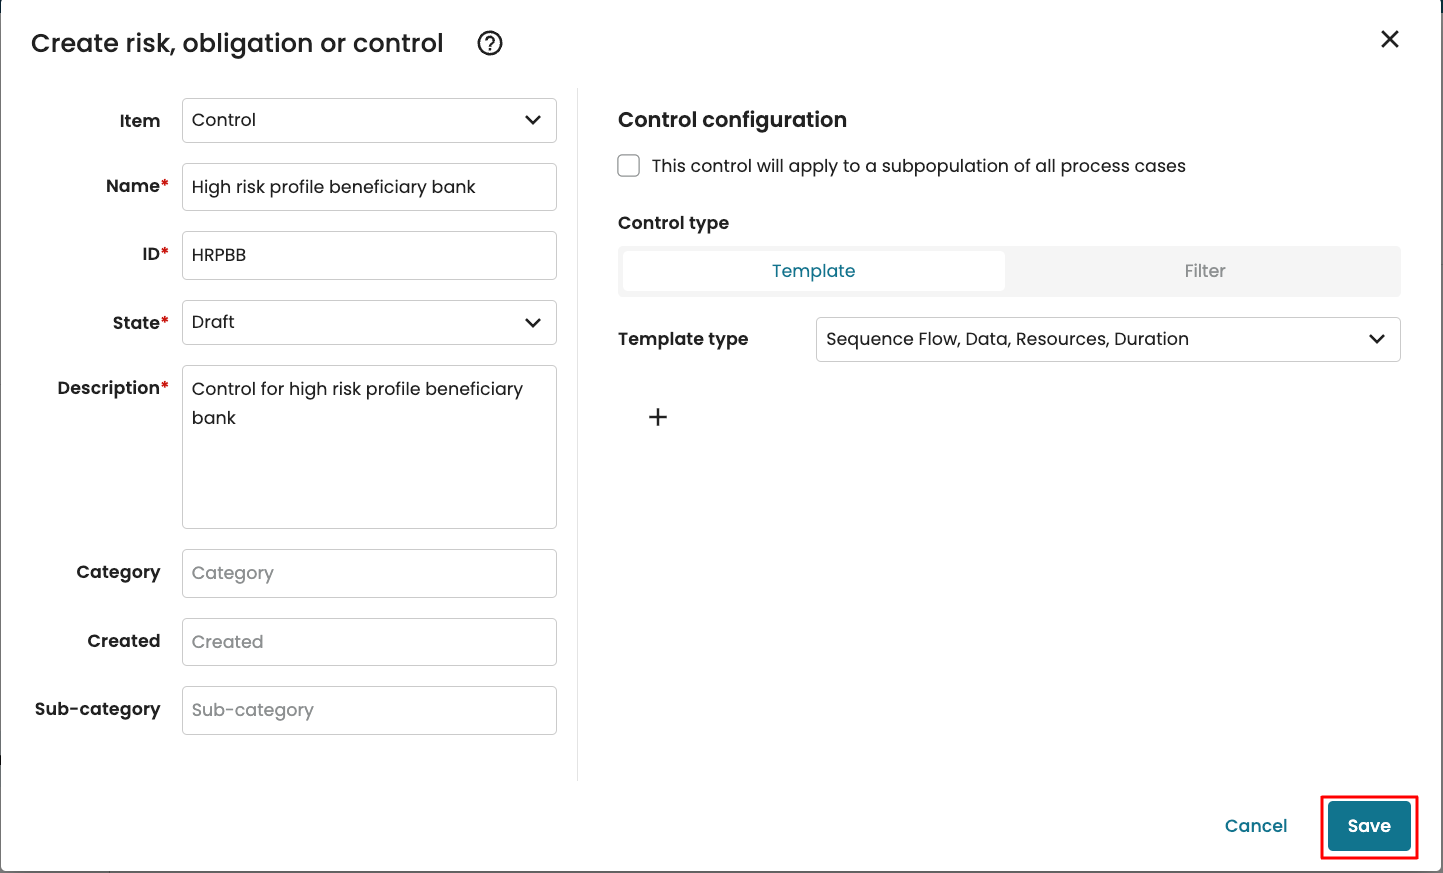
Now that we have created the risks, we can create the associated control for each of the risks. We begin with the control for risk #1. Click Add new > New item.
Change the Item drop-down to Control.
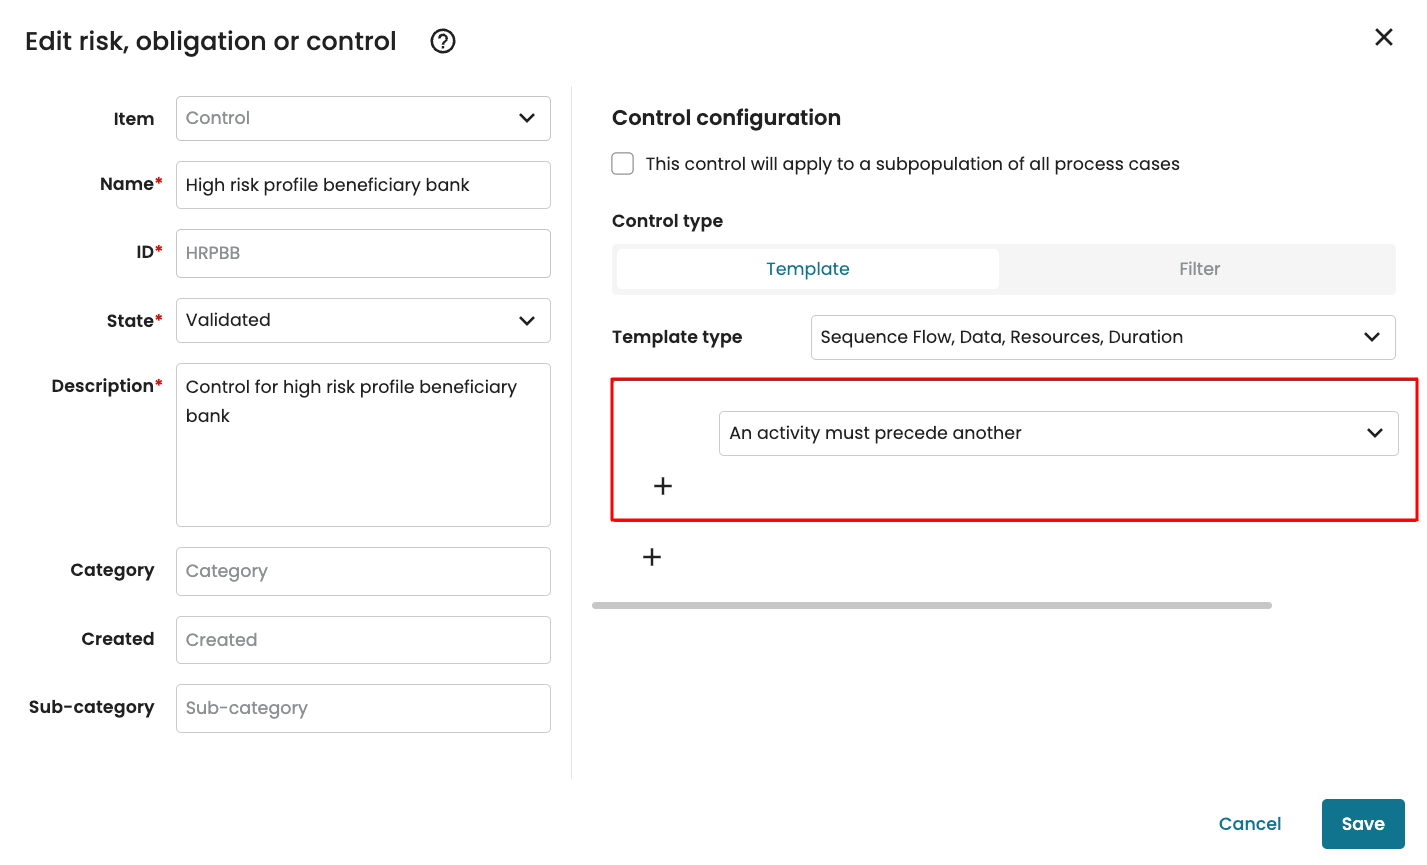
For Risk #1, the associated control is that “EDD Check” precedes “Approve funds clearance”. Specify the name of the control, ID, state and description.
Note
In this example, we use the default “Draft” state. However, you can change it to any of the available compliance states: Draft, Reviewed, Validated, Suspended, and Deprecated. To learn more about compliance states, see Manage compliance states.
We can check “This control will apply to a subpopulation of all process cases”.
When we do, Apromore allows us to specify the subset of the log where the compliance result will apply. For instance, we may want this control to only apply to cases where the activity “Approve funds clearance” occurred. There will be no need for this control to consider cases where no funds were approved in the case. We are also prompted to enter a description for the subpopulation to be created.
Note
If we specify that the control should be specified on a subpopulation of the log, we will be prompted to define the log population (using filters) when assigning the control to a log.
When defining a control rule in Apromore, we can use two means:
By using a control template
By applying filters.
Create a control using control templates
When defining a control rule in Apromore, one approach is to use control templates. A control template serves as a predefined structure or pattern for creating control rules. For example, if an “EDD check” must be completed before “Approve Funds Clearance”, an “An activity must precede another” control template would be defined to enforce that sequence.
Control templates can be classified into four types.
Sequence flow: When we select this type, the template to be created can only involve pathway rules. For instance, activity X precedes activity Y.
Data: When we select this type, we can only create a template that involves the comparison of process attribute values to other attribute values or manually inputted data values. For instance, the payment amount is greater than $1,000.
Resources: When we select this type, we can only create a template that is based on a resource or role. For instance, activity X is performed by resource Y.
Duration: When we select this type, we can only create a template that checks an activity or a sequence of activities is completed no later than, no earlier than, within, or exactly at a given time. For instance, the flow of activities in a case leads to “triage”, and triage happens less than 1 hour from the first activity of the sequence.
In the Template Type drop-down, select the type needed to build the control template. By default, all four template types are selected.
To create an “An activity must precede another” template, select the Sequence Flow control type.
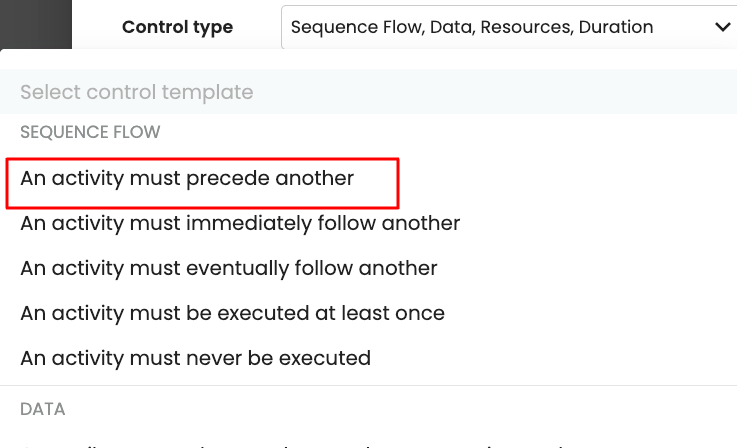
We can now proceed to define the control template. Click “+”.

In the drop-down, select An activity must precede another.
This creates a template block with the selected template.
To create a complex control template, we may need to combine multiple templates. Templates within the same block will be checked with an “AND” condition, which means all the conditions in the block must be true for the template condition to be met. However, templates in different blocks are linked with an “OR” condition. This means that if a condition in any block is true, the overall template condition is met.
To add templates within a block, click + inside the block and select another template.
To add a new block, click + outside the block.
For this control, we require only the “An activity must precede another” template. After creating the control template, click Save.
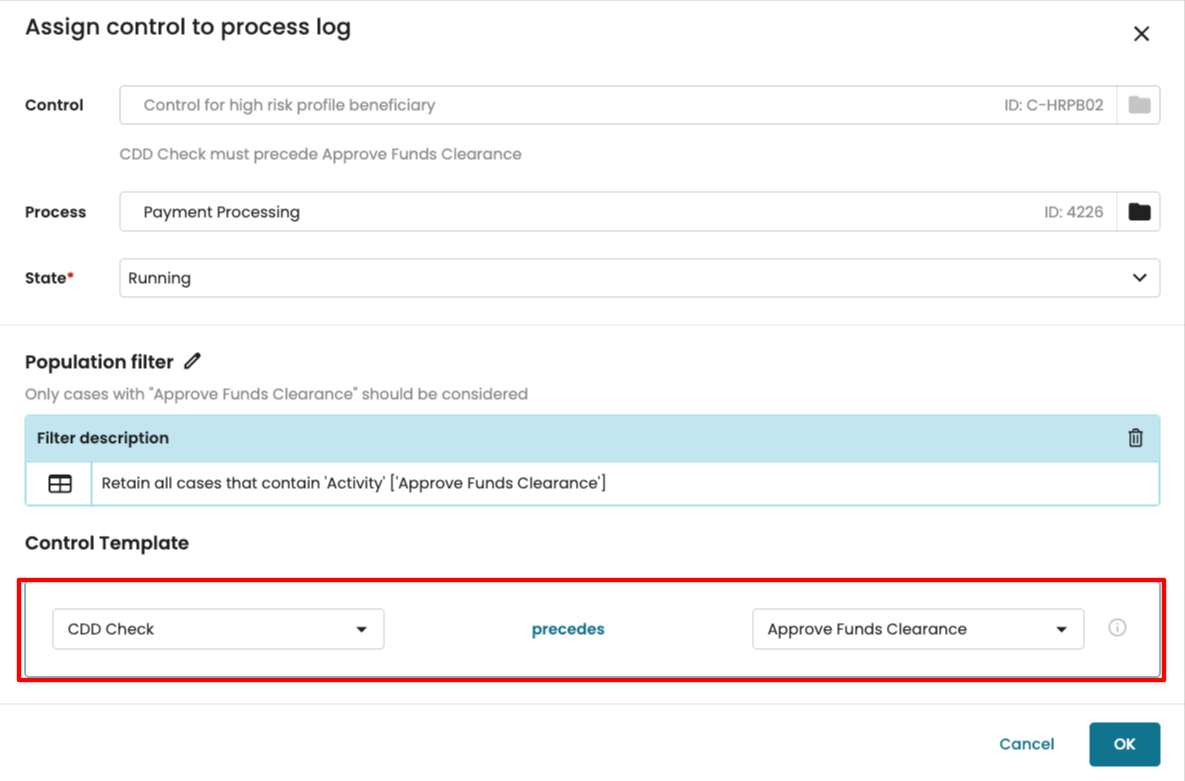
We can create a similar control for Risk #2. The control template for this risk is that “CDD Check” precedes “Approve funds clearance”. Click Add new > New item. Fill in the control information accordingly. Here too, we check “This control will apply to a subpopulation of all process cases”.

Click Save.
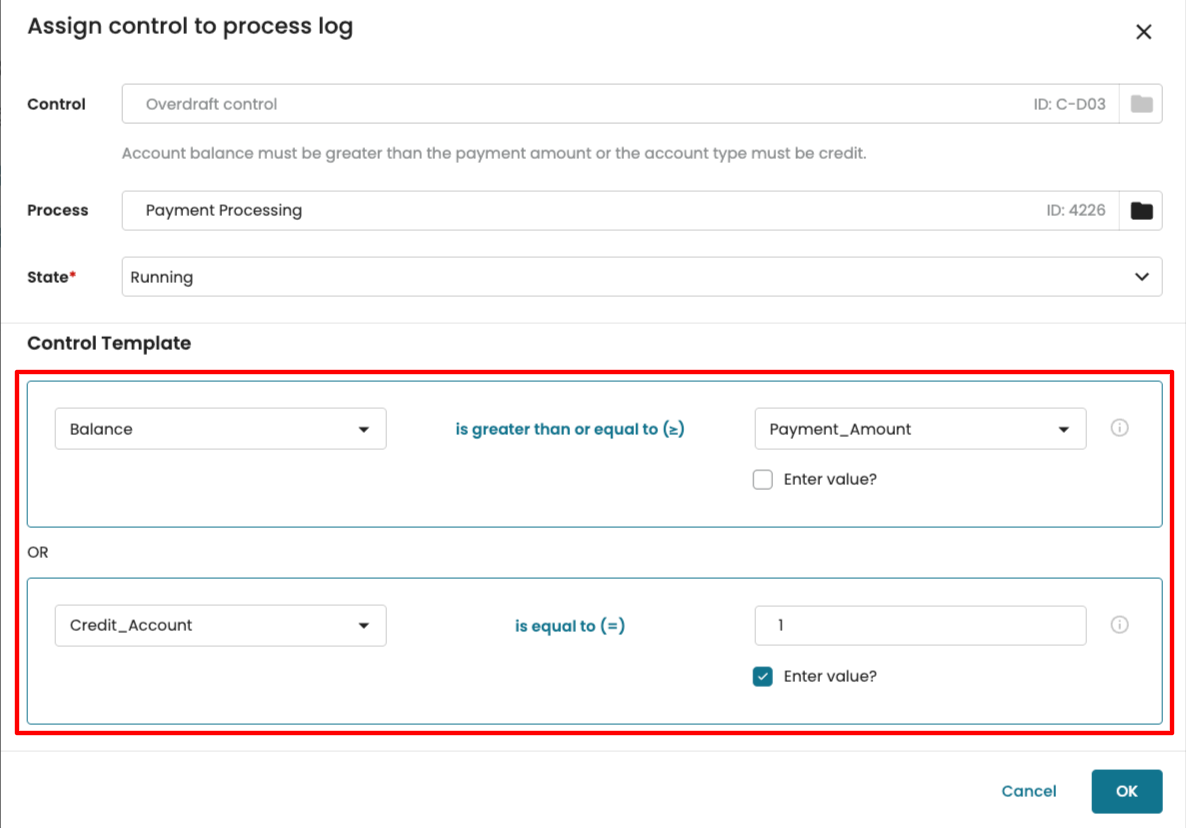
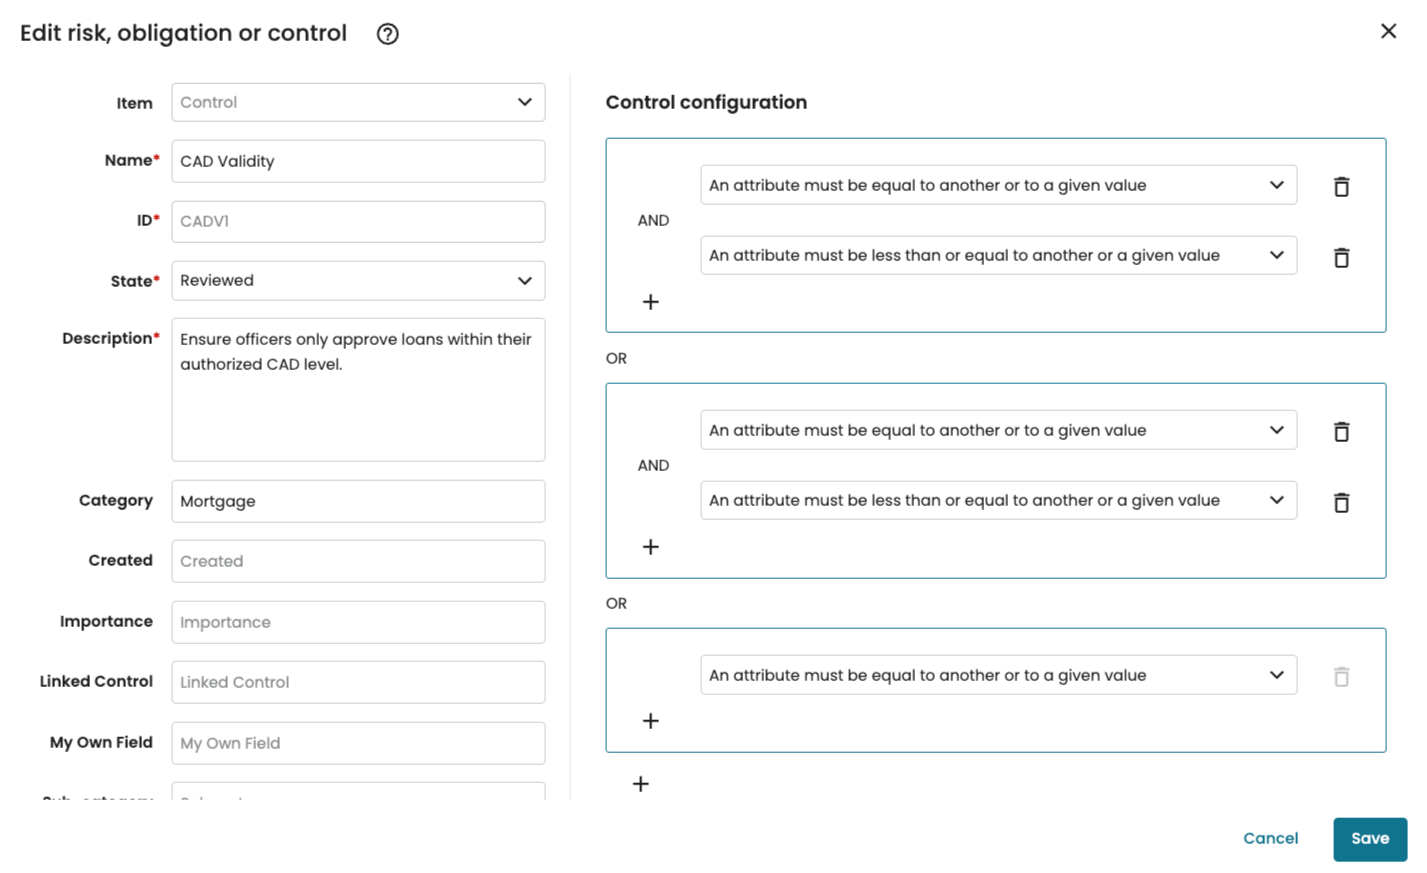
We then create the control for Risk #3. This time, we need a control that confirms that the payer’s balance is greater than the payment amount, OR that the payer’s account type is “Credit”.
Add a new control and enter its name, ID, state, description, and control type.

Next, we add the control template. The control template will involve the combination of two templates: greater than or equal to and equal to.
The screenshot below shows the template type required.

Click Save.
Note
We can save a control without specifying a control template. When assigning the control to a log, we will be prompted to define the template at that stage. To learn more, see Assign controls without a template to log.
Create a control using filters
We can also create controls with filters. When creating a control with a filter, cases that meet the filter criterion are considered the violating cases. For instance, if the filter retains cases that took more than 2 weeks, the filter result would be the cases violate the control rule.
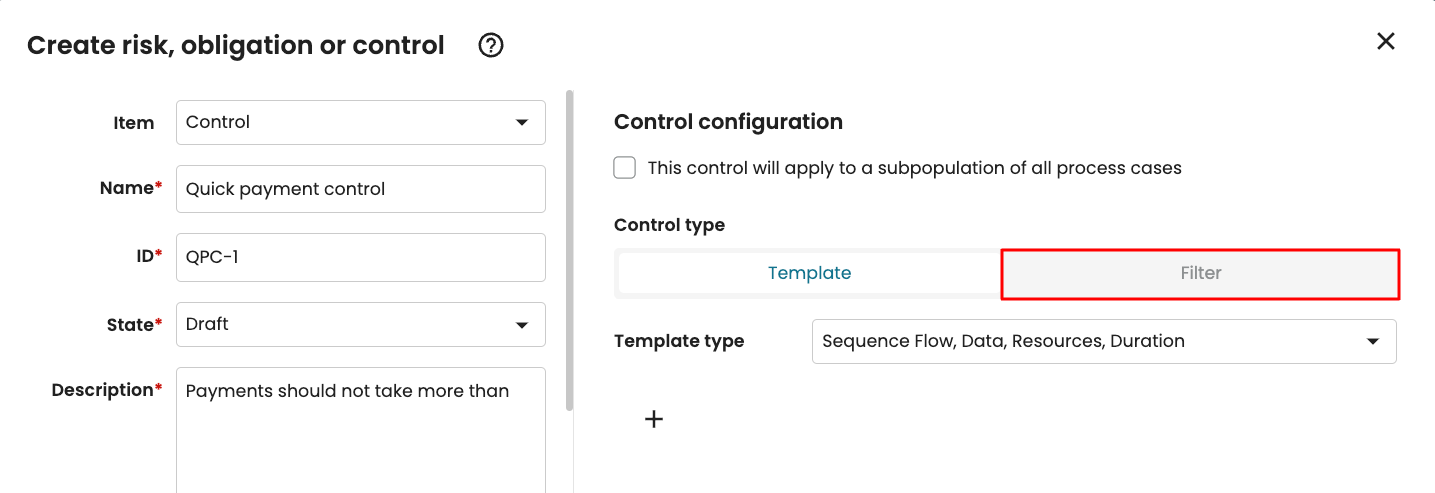
Imagine we wish to create a control that checks cases where the payment processing took more than 2 weeks. Specify the control name, ID, state, and description.

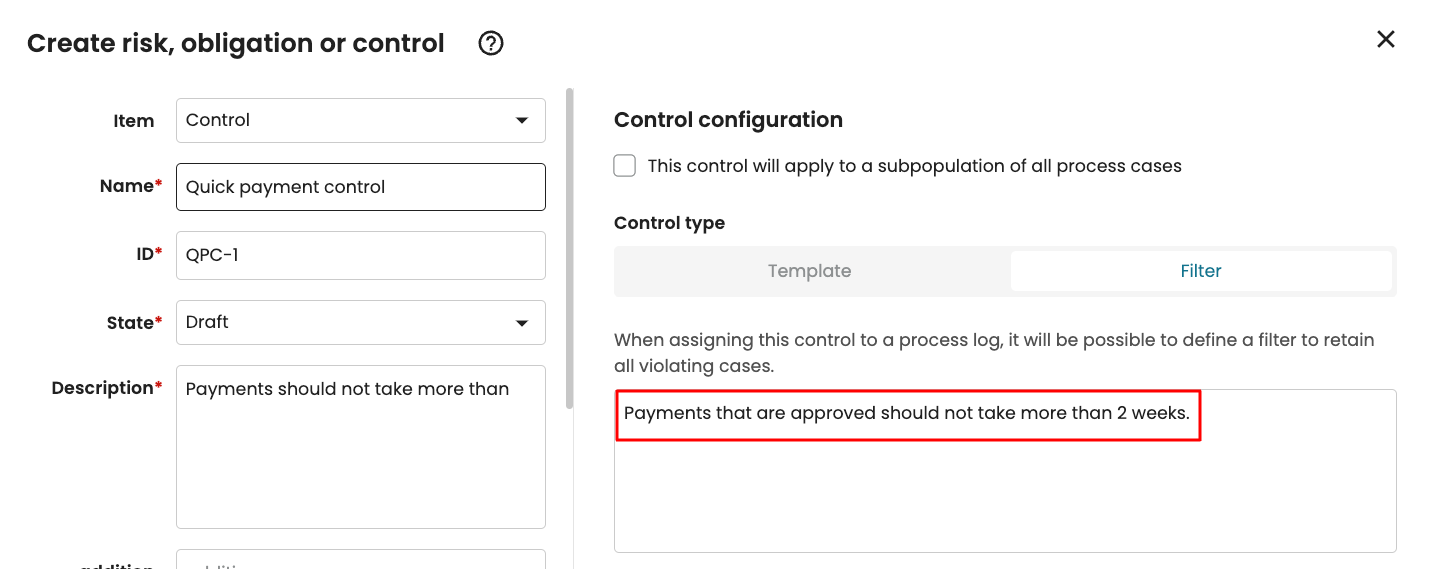
For the Control type, click Filter.
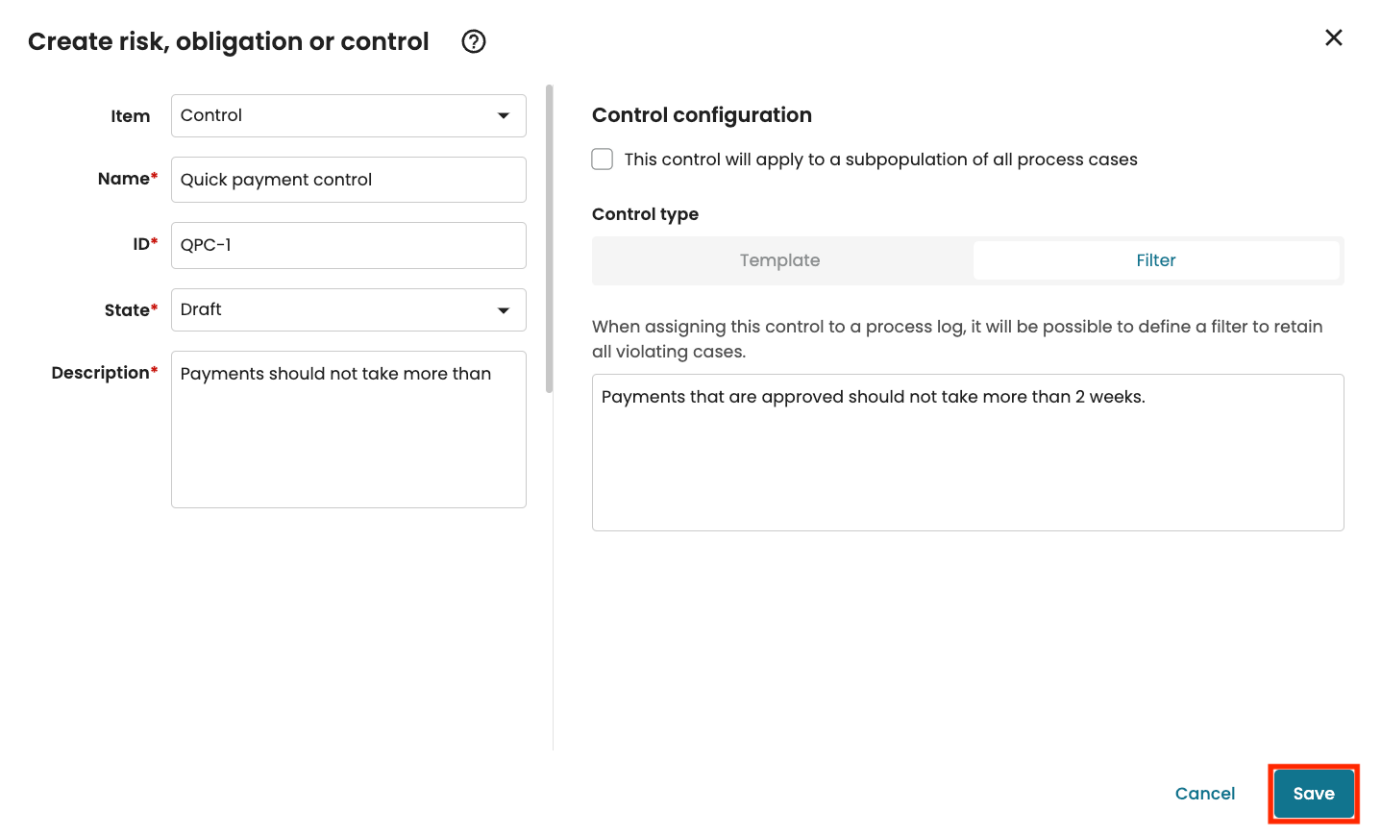
Enter a description for the filter that would be created.
Click Save to save the control.
When assigning this control to a log, we will be prompted to create the filter. To learn how to create the filter, see Assign controls to log using filters.
Add controls to risks
Now we have created the controls, we can add each control to its corresponding risk.
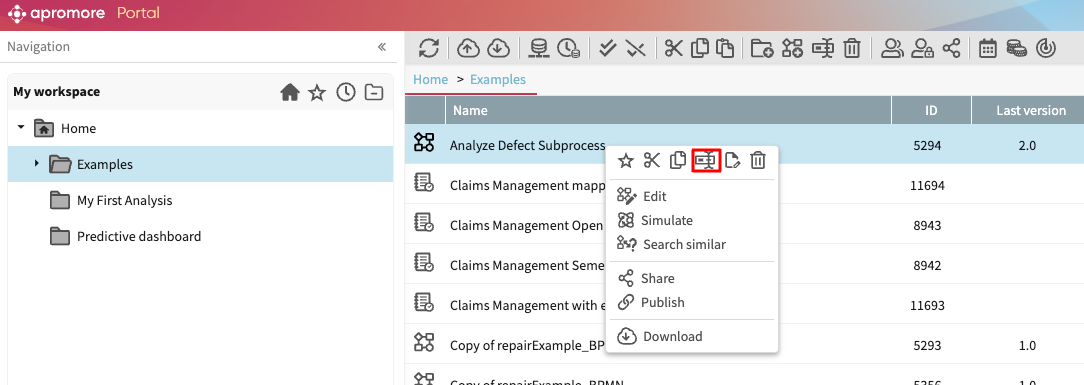
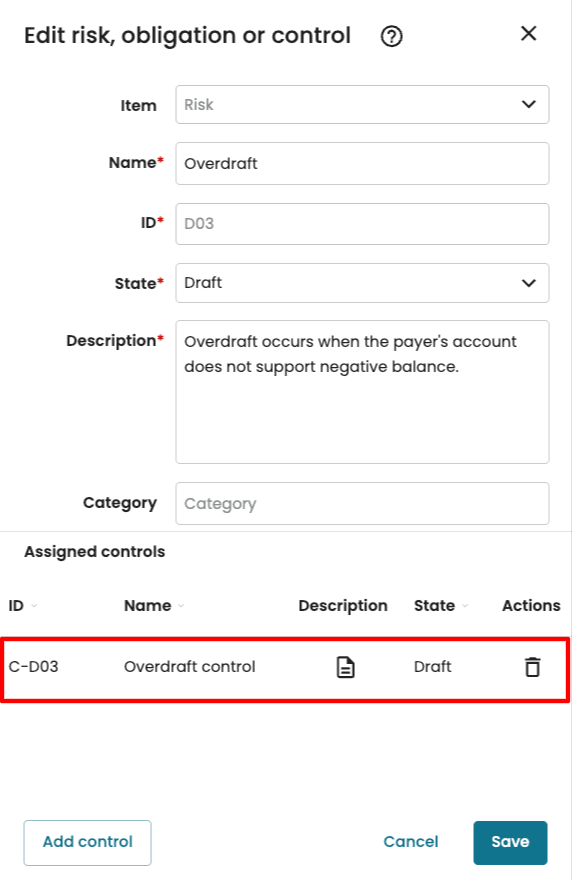
Click the risk and click the edit icon to edit it.
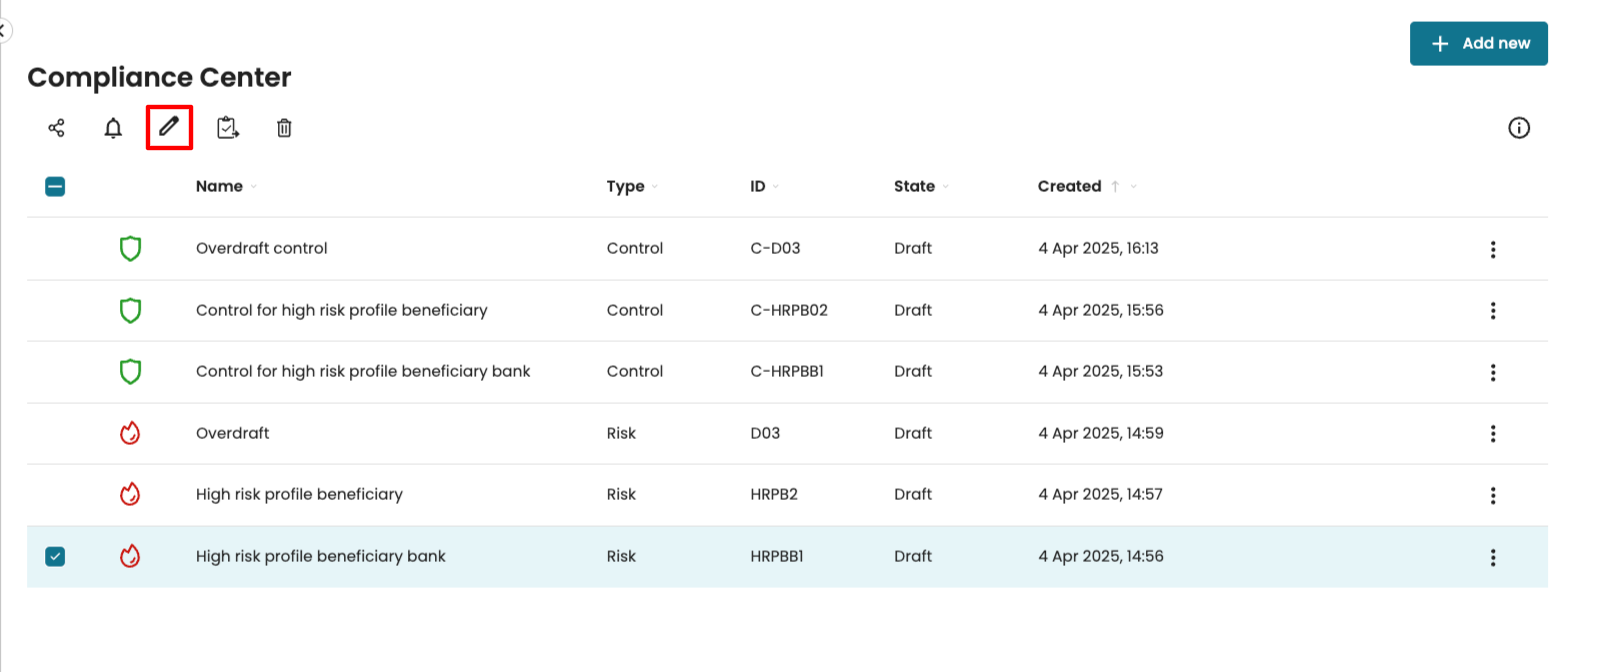
Click Add control.
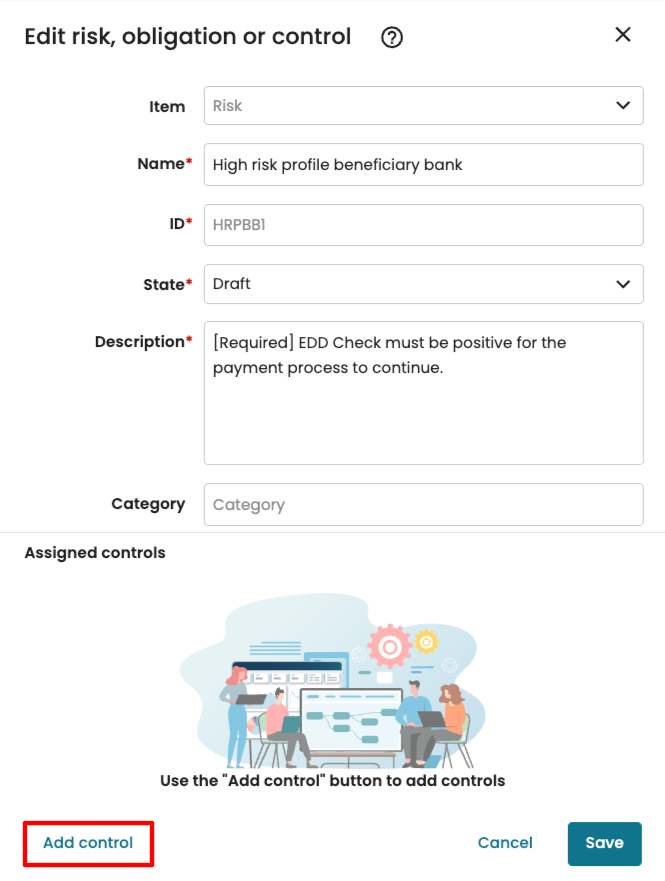
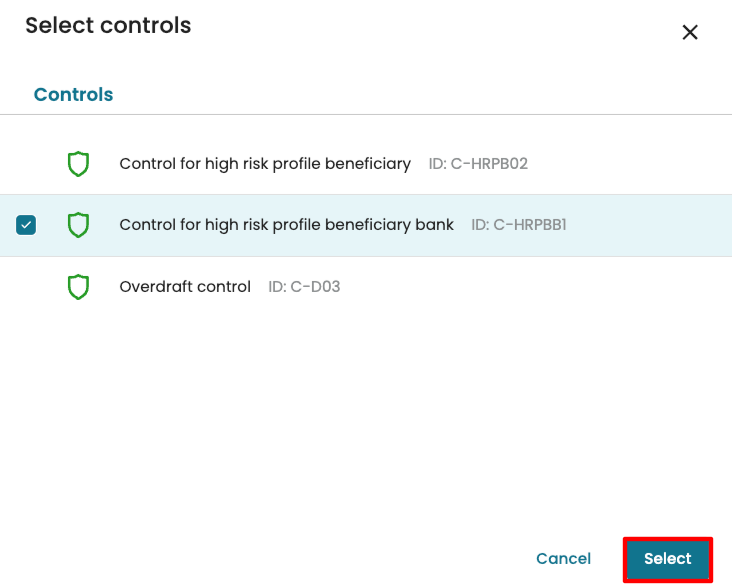
We see a list of controls that have already been saved. Click the control we wish to add and click Select.
The control now appears in the risk.
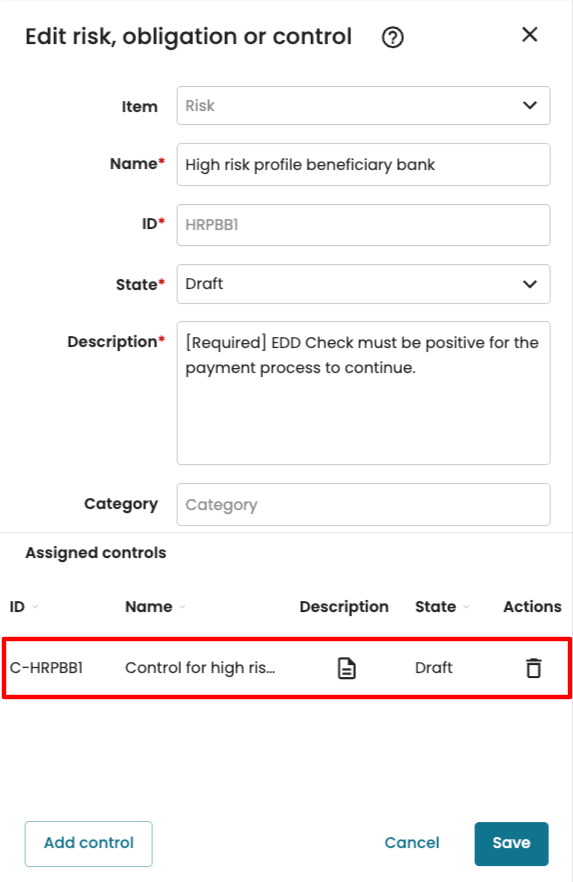
Click Save.
We add other controls to their risks. The screenshot below shows the updated Risk #2.
The screenshot below shows the updated Risk #3.
Operationalize a control
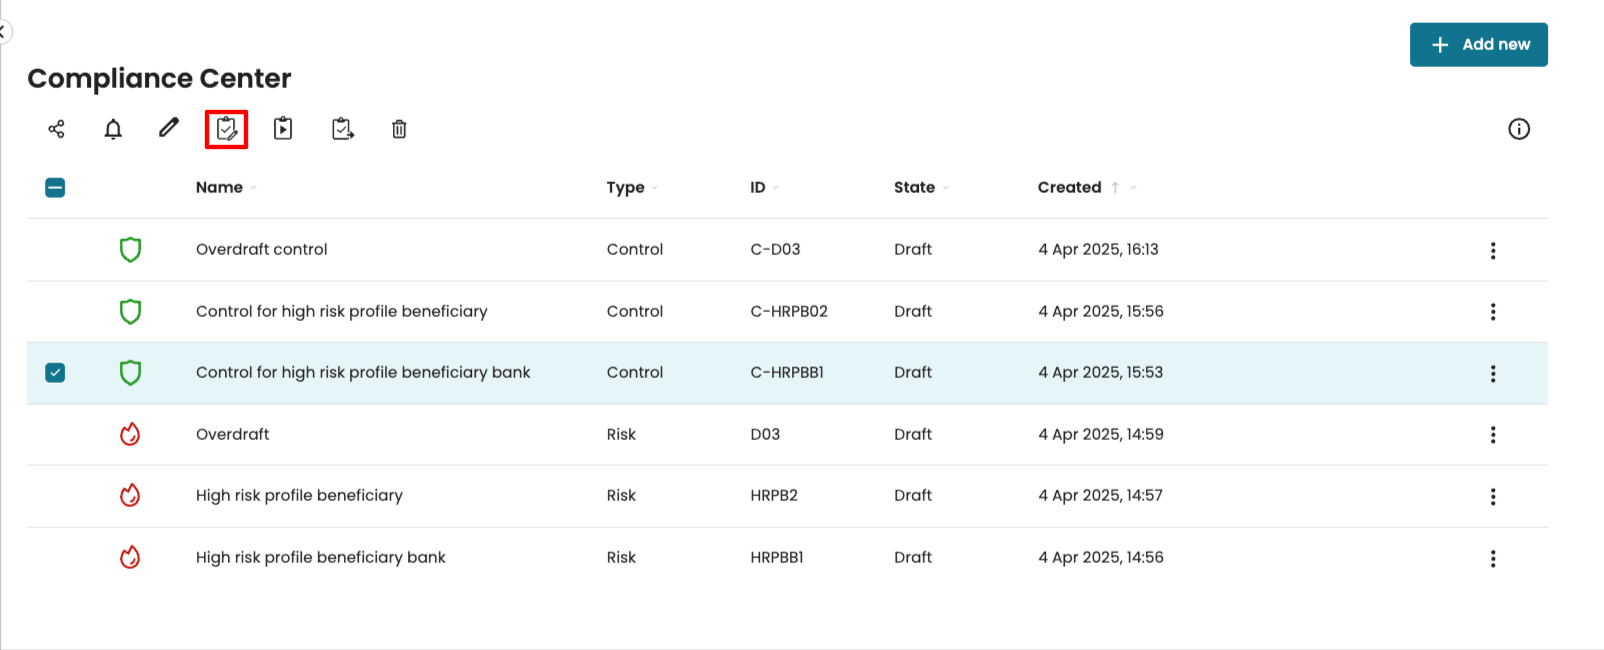
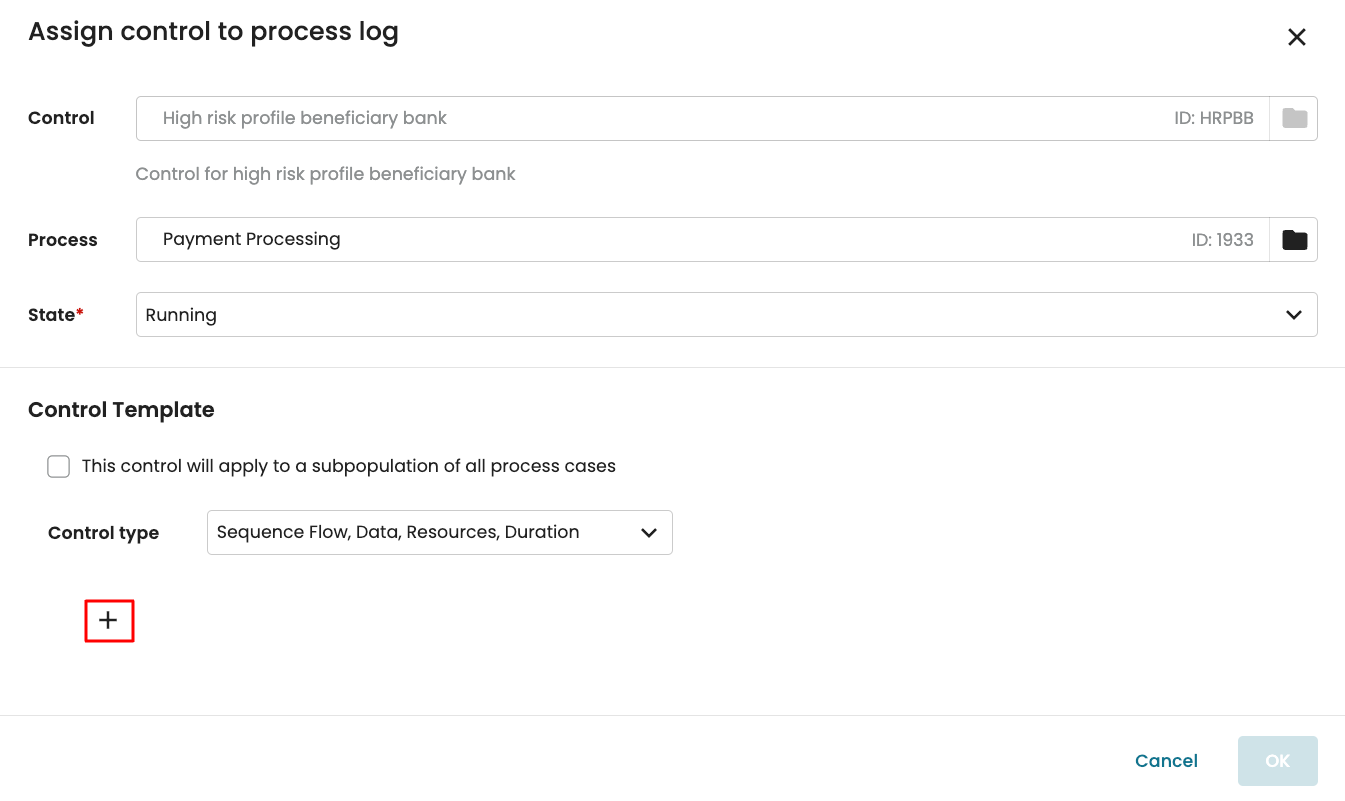
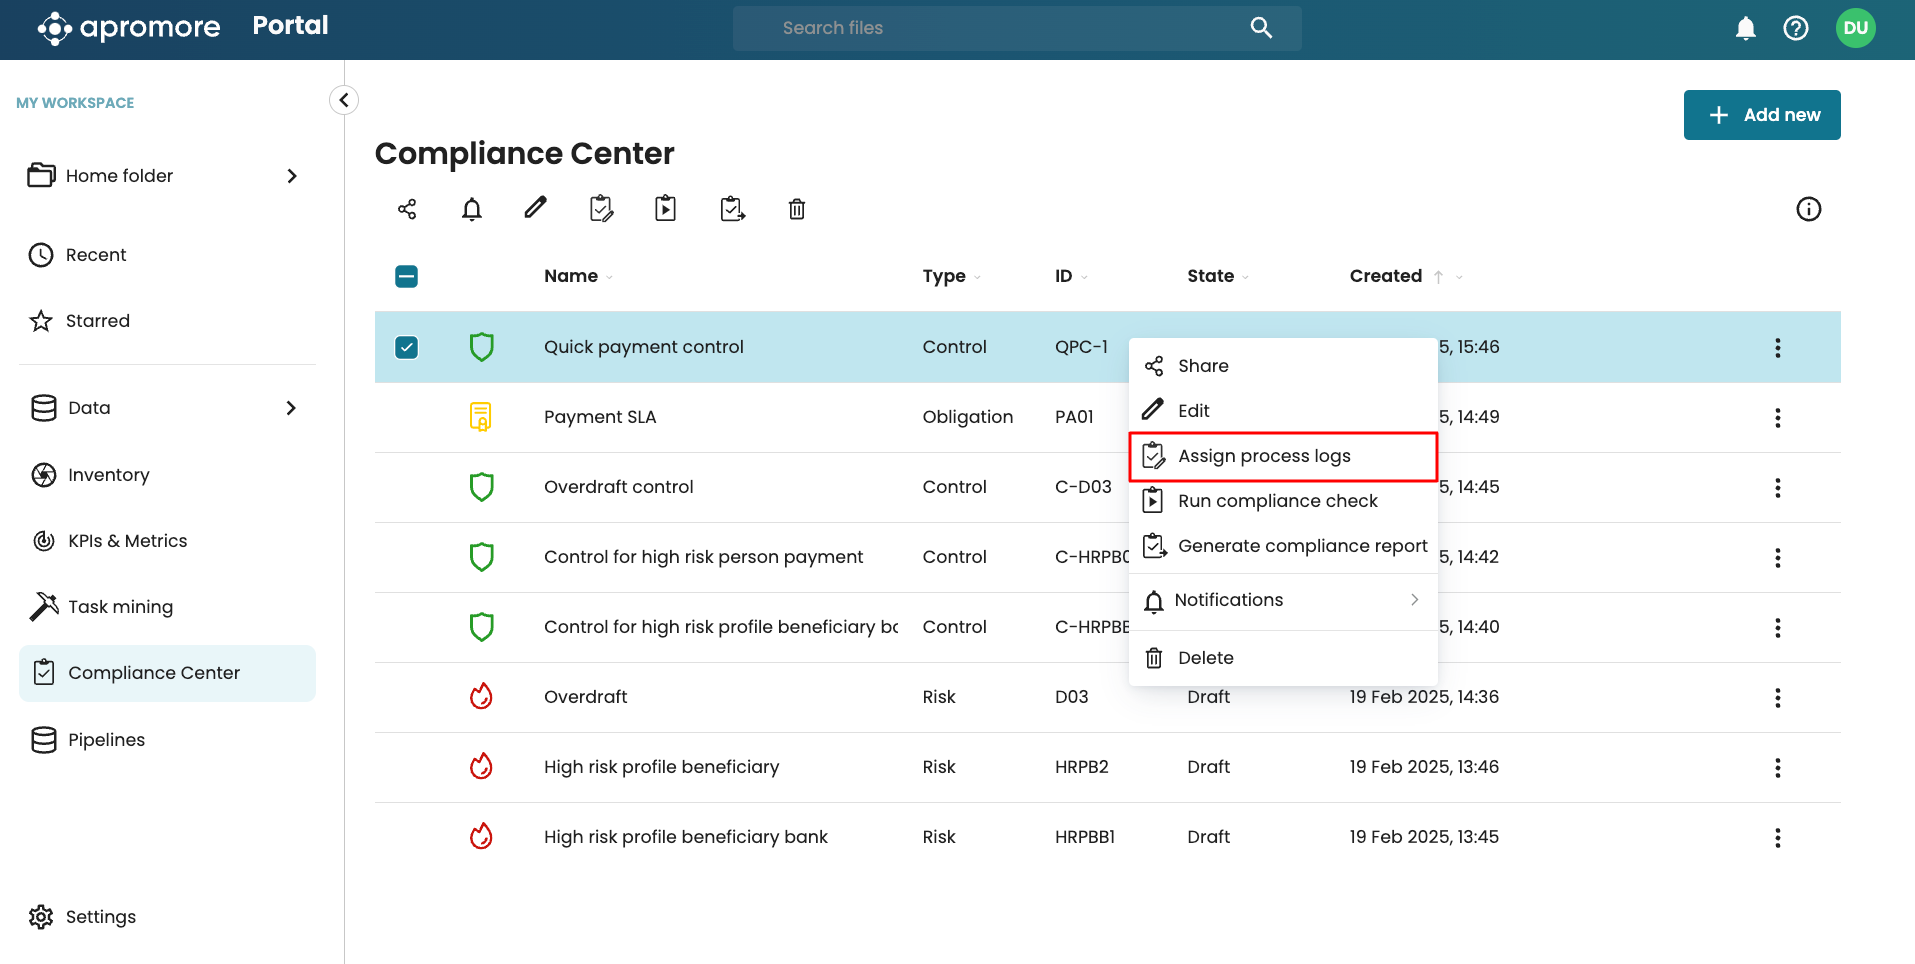
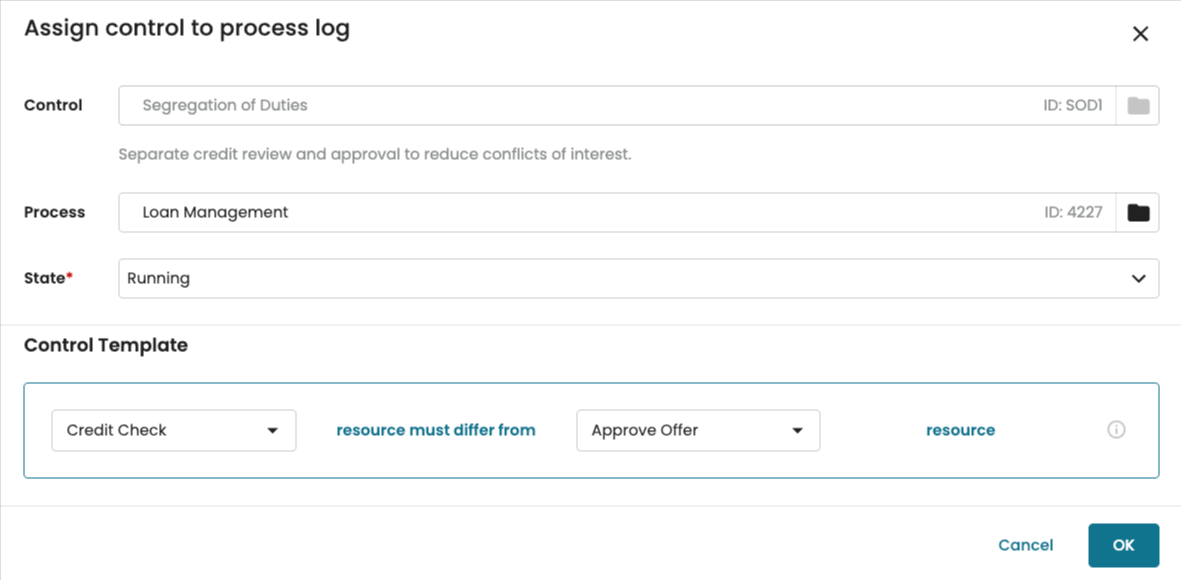
Now that we have defined the controls and have added them to the risks, we can assign the controls to a log or operationalize the control. This will instantiate the compliance rules based on the log data, making the controls operative. Click the control and click the Assign process logs icon.
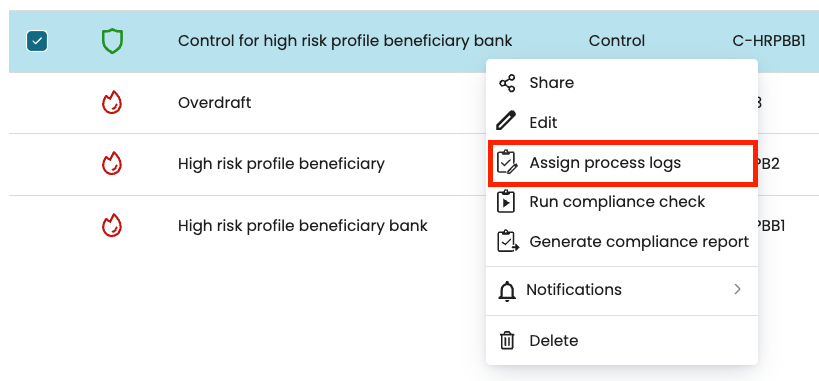
Alternatively, we can right-click the control and click Assign process logs.
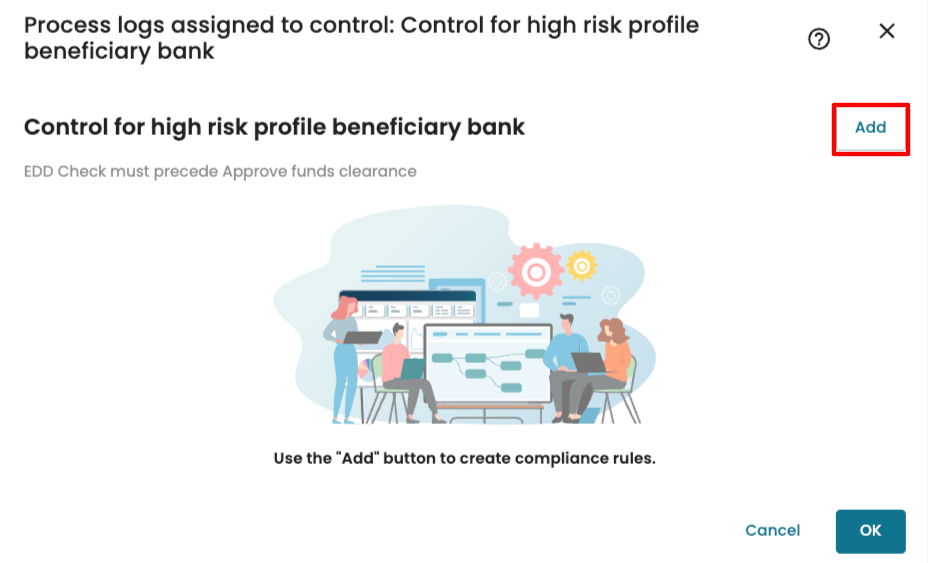
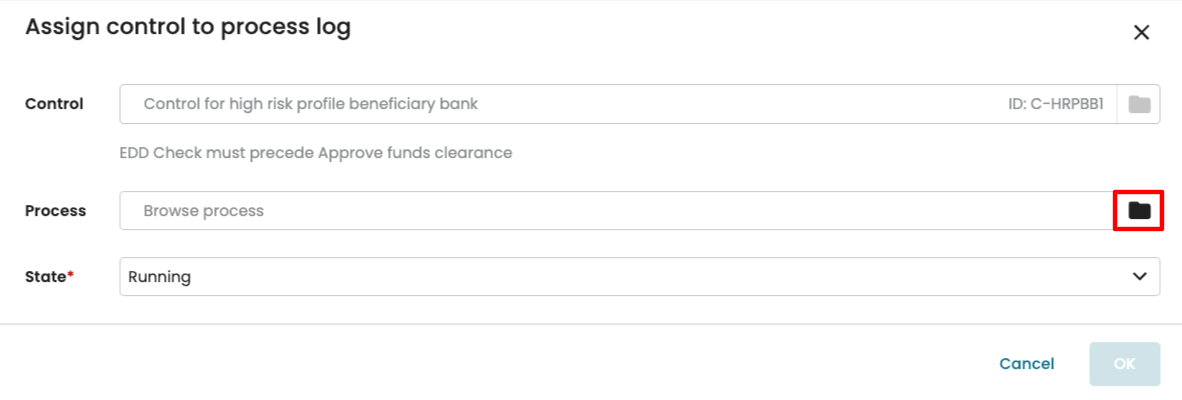
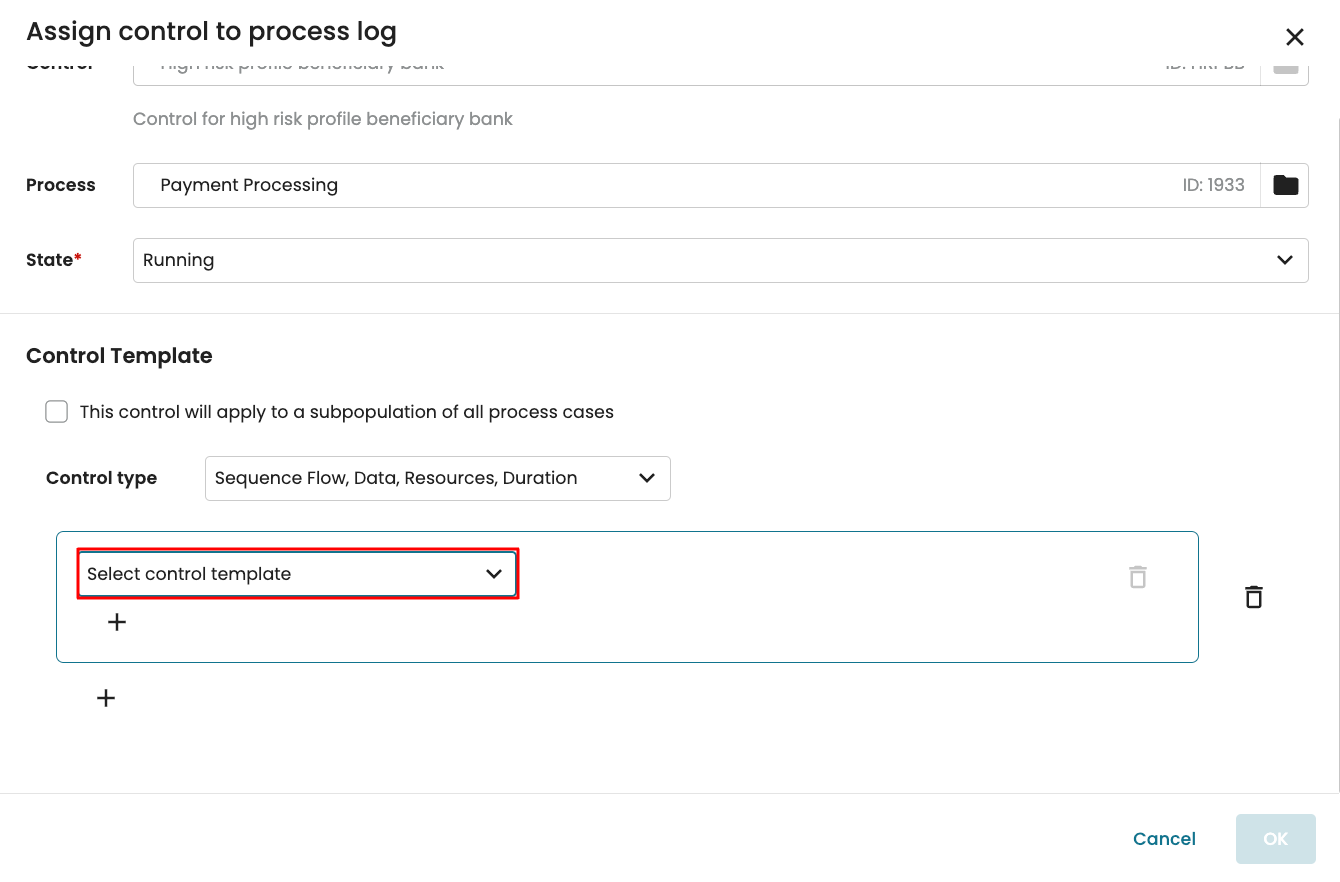
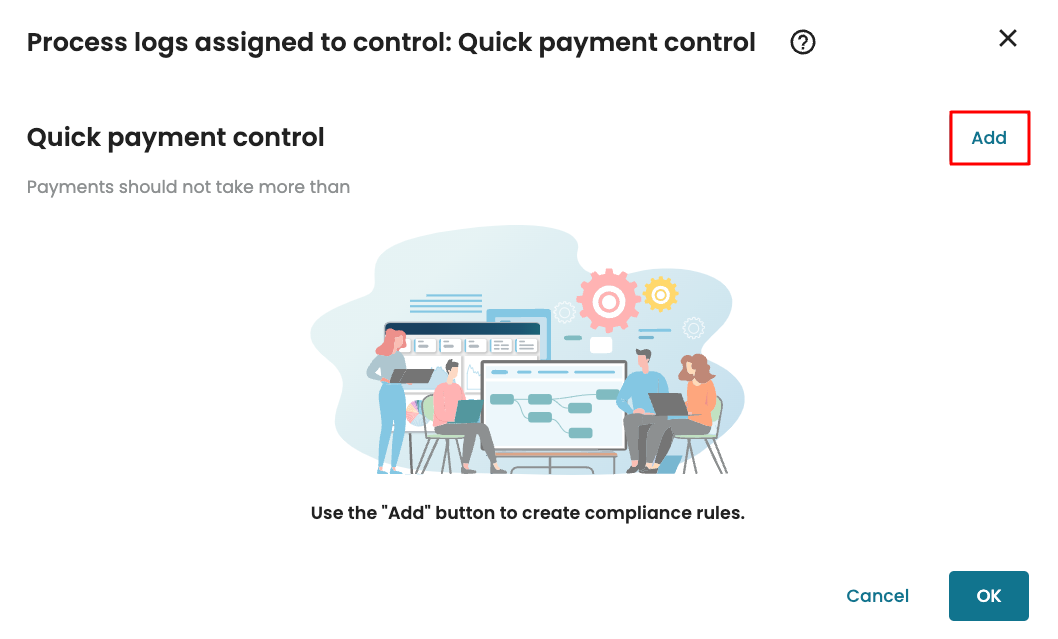
To assign the control to a log, click Add.
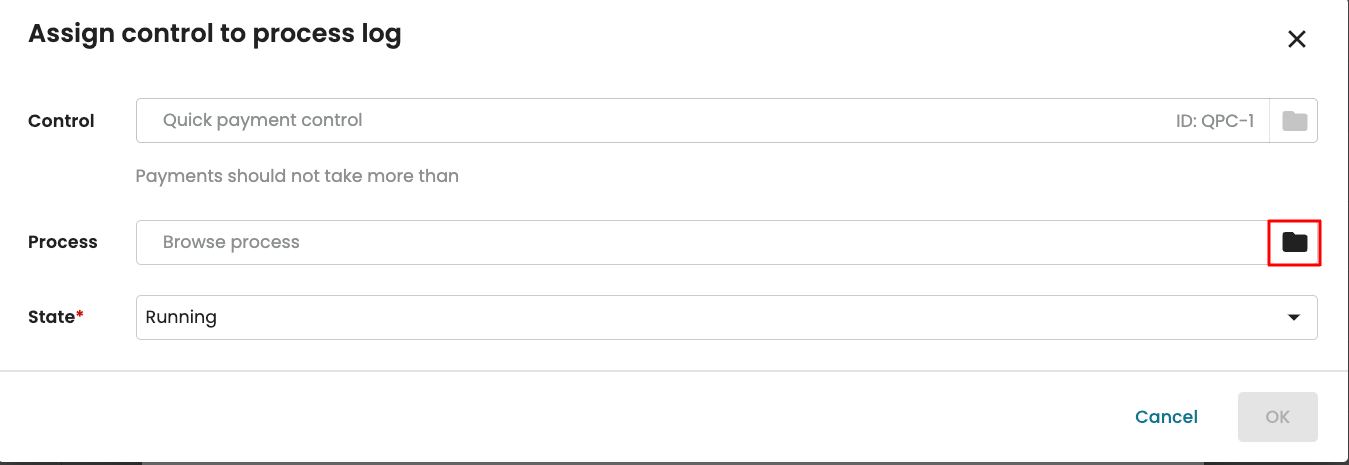
Click the folder icon to select the log.
Note
In this example, we use the default “Running” state. However, we can change it to any of the available compliance states for assigning a log: Running, Testing, or Paused. To learn more about compliance states, see Manage compliance states.
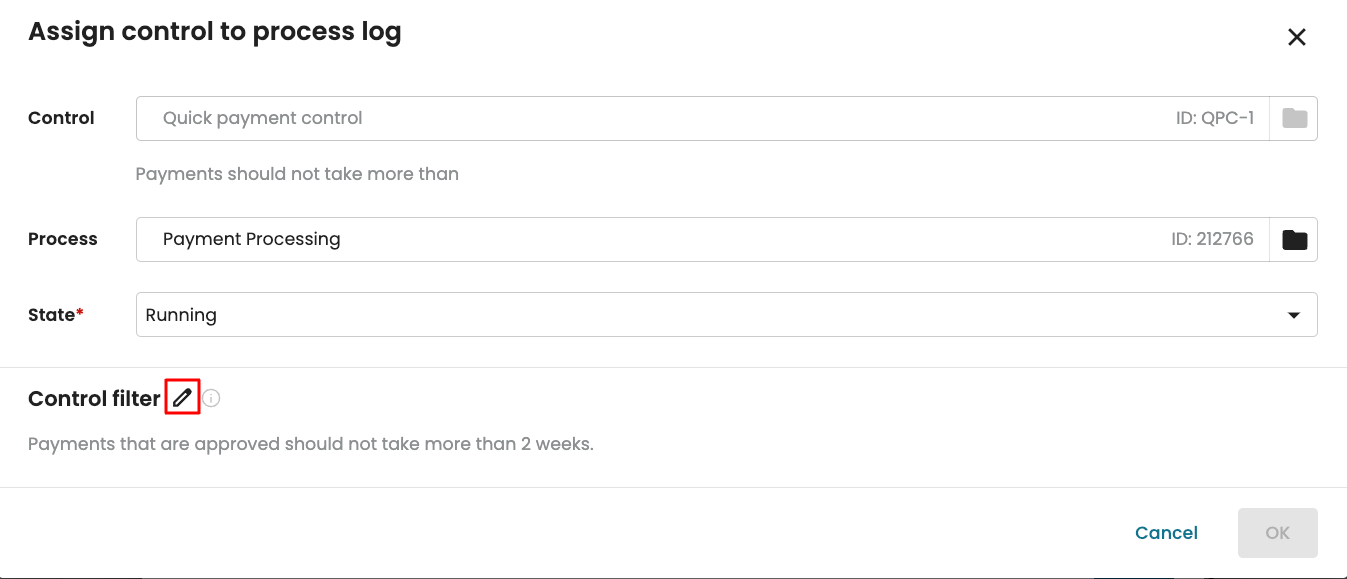
Since we checked “This control will apply to a subpopulation of all process cases” when creating the control, we are now prompted to define the population filter. We will retain only cases where “Approve funds clearance” occurred. Click the pen icon to define the filter.

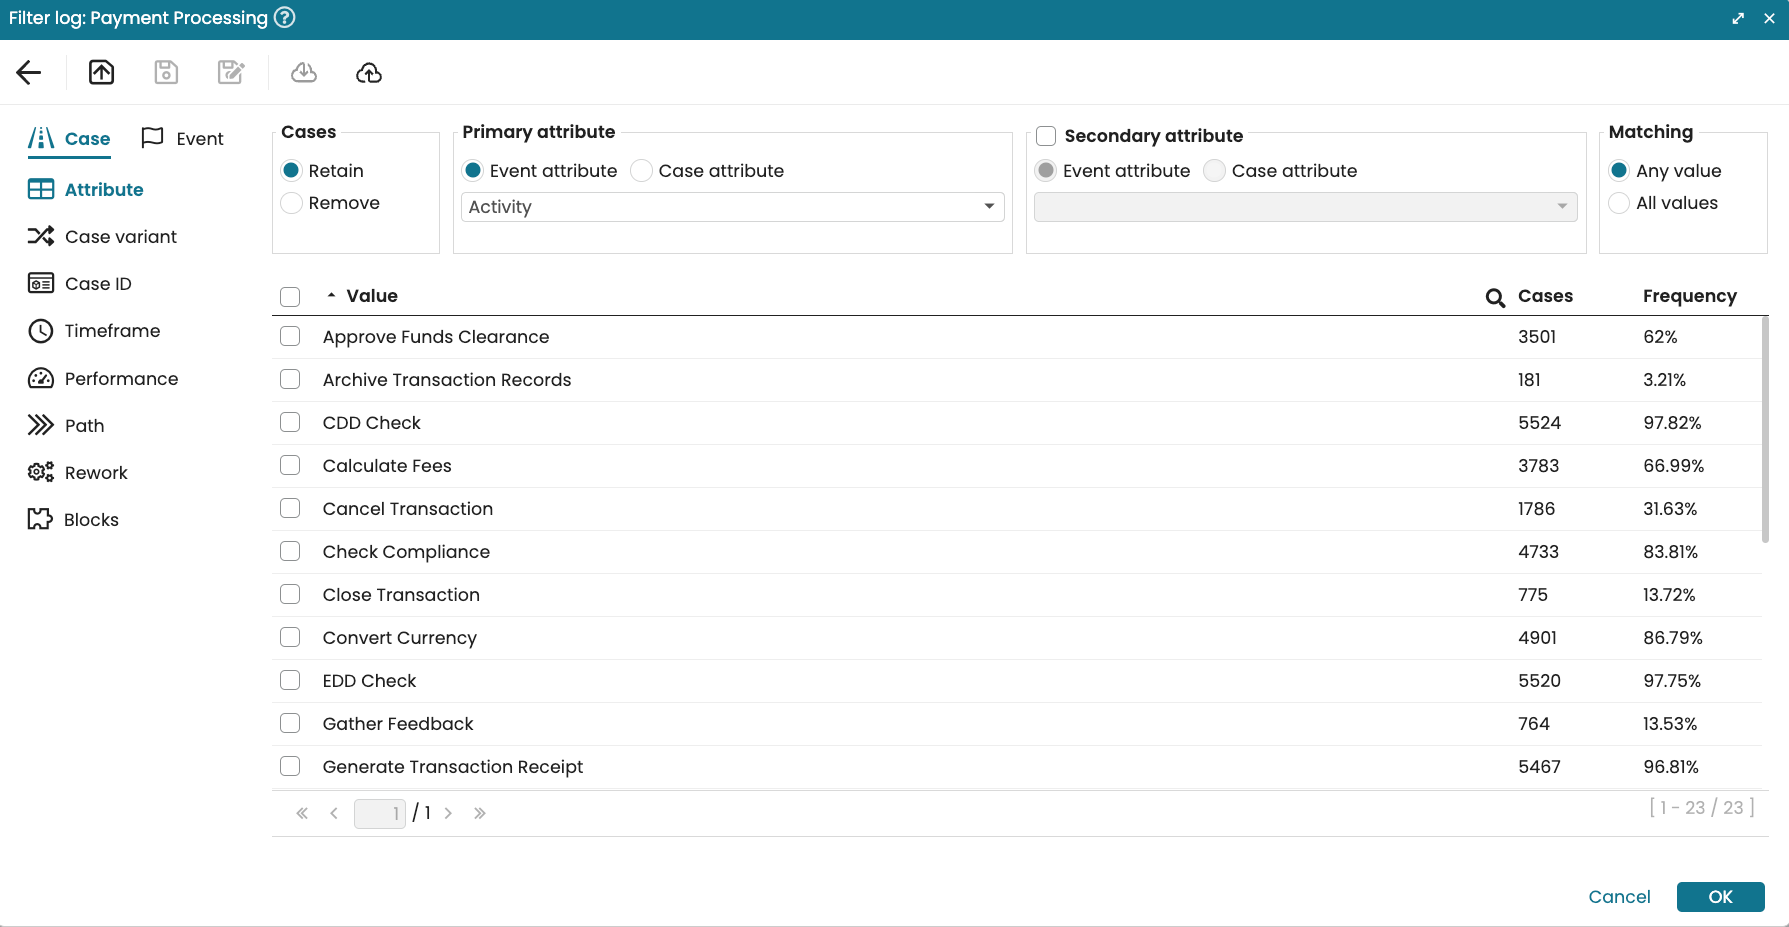
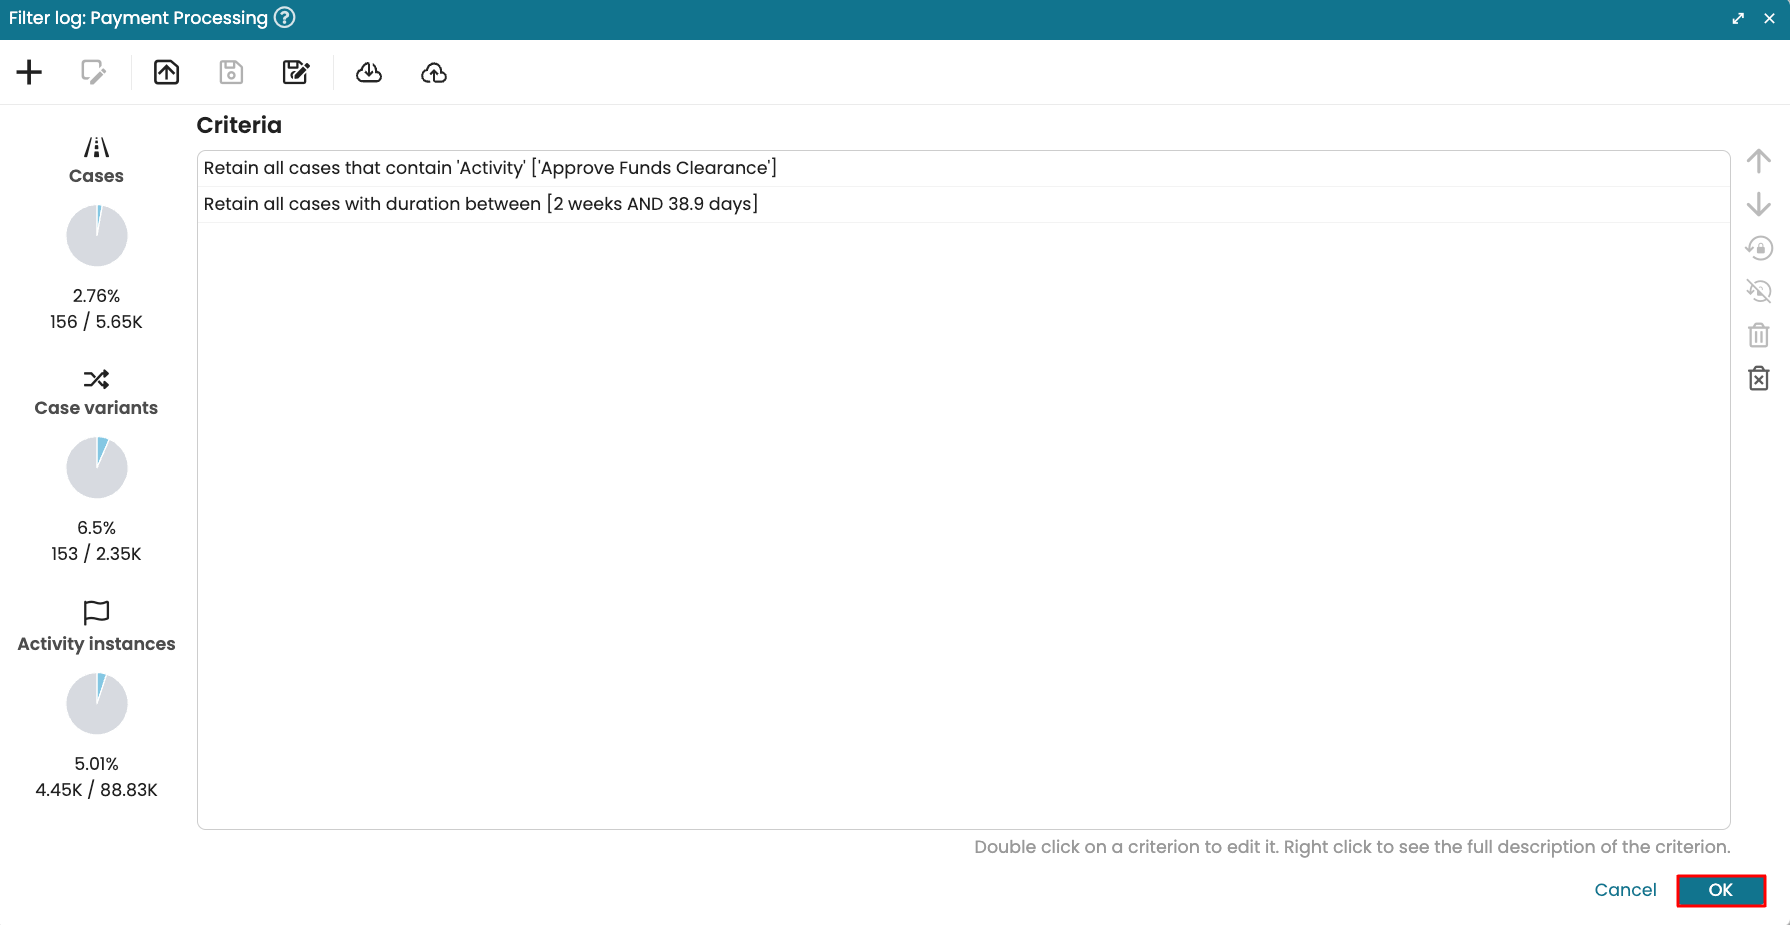
This opens the filter log window. Retain cases where “Approve funds clearance” and click OK.
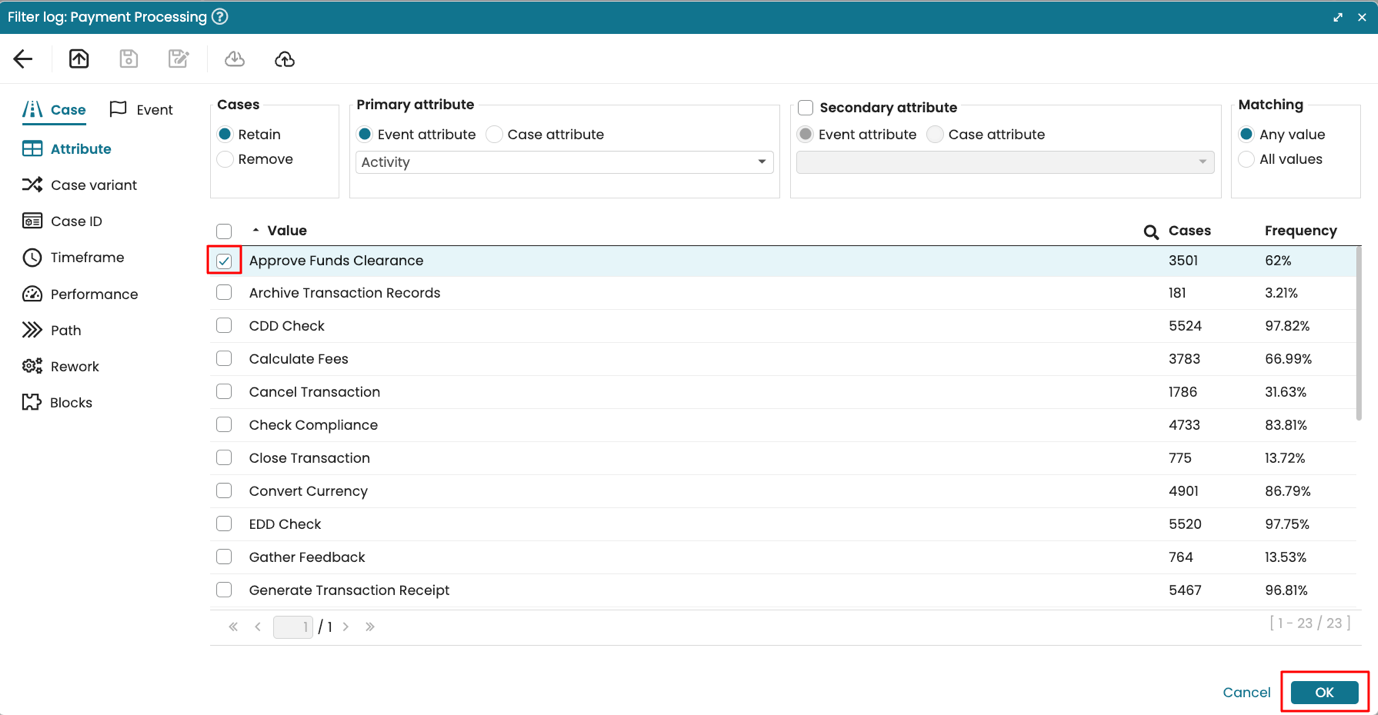
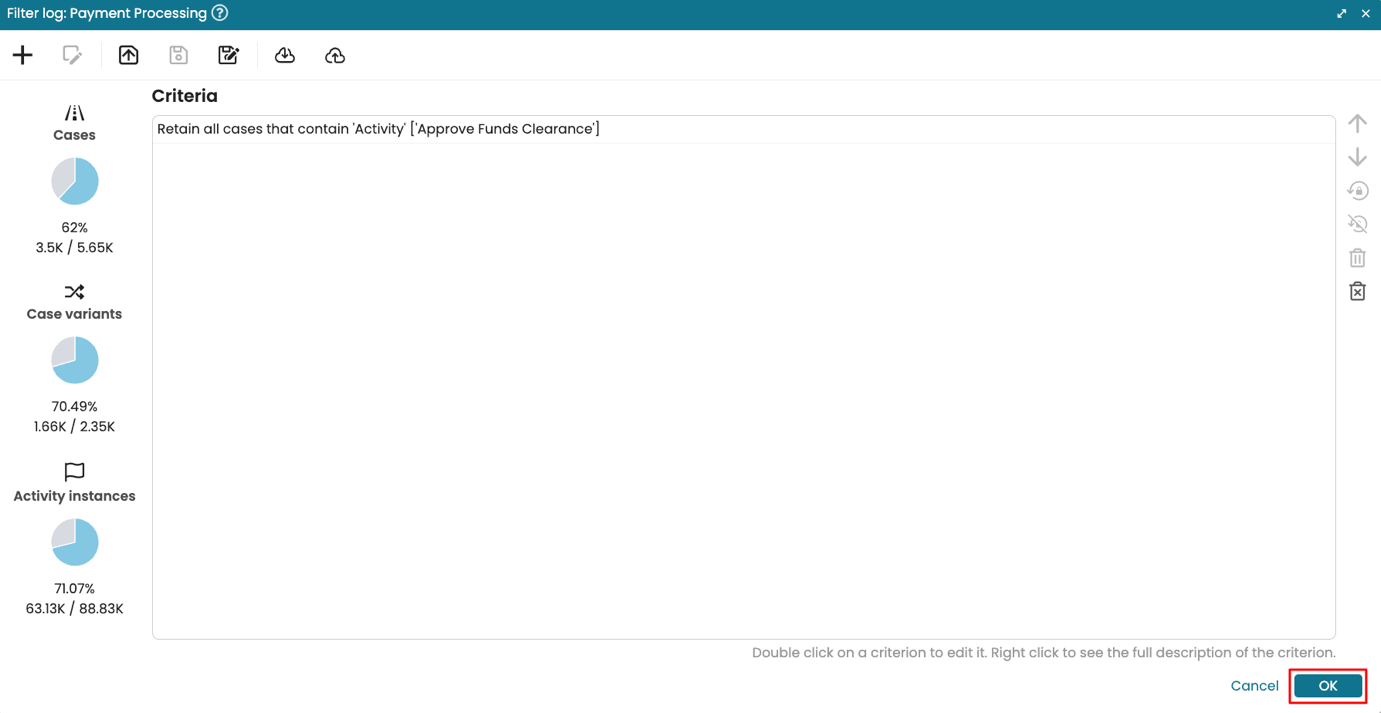
Click OK to confirm the filter condition.
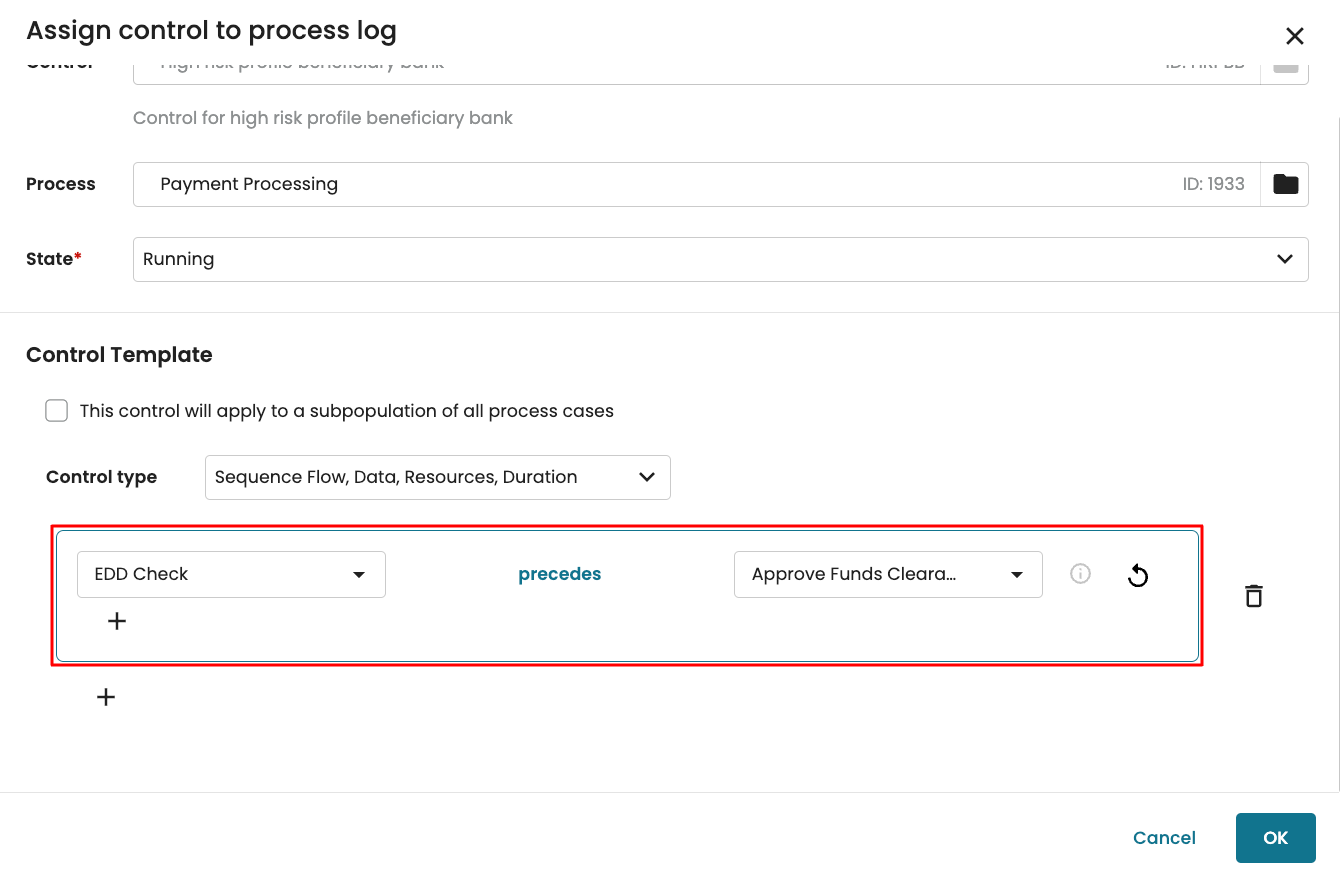
After selecting the log and defining the population filter, we are now prompted to fill in the control template based on the log data. Now, we fill the control template as “EDD Check” precedes “Approve funds clearance”. Click OK.
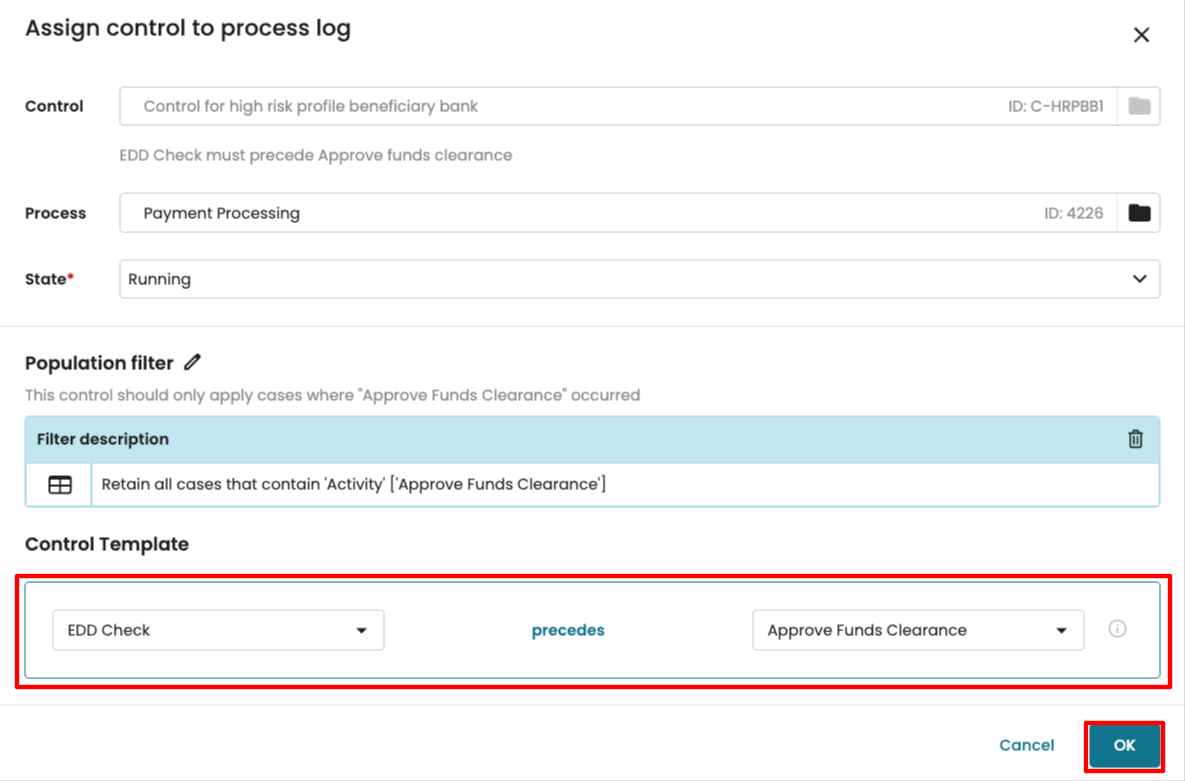
Click OK to save the compliance rule for the control.
For Risk #2, the rule is that “CDD Check” precedes “Approve funds clearance”.
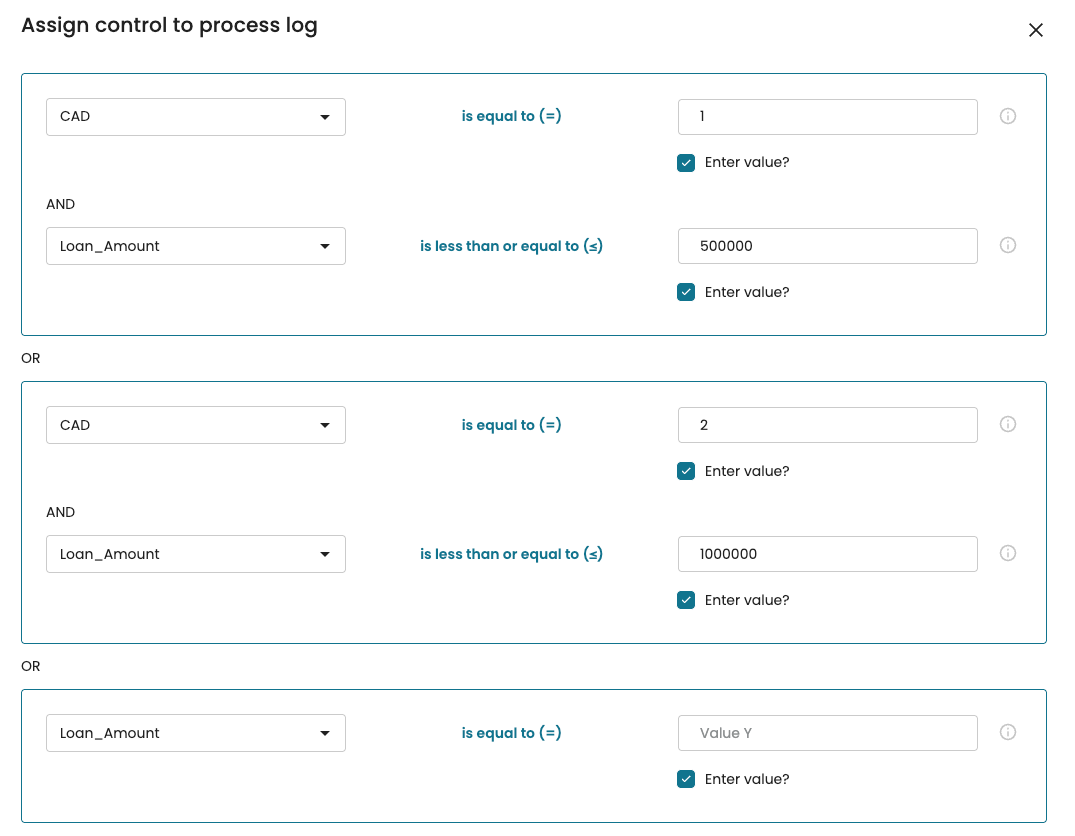
For Risk #3, the rule is that “Balance >= Payment_amount” or “Credit_Account” = 1.
Note
When comparing an attribute to a value, check the box Enter value? And type the value.
Assign controls without a template to log
If a control template was not defined when creating the control, we are prompted to create a control template when assigning the control to the log.
To demonstrate, we can create this control without specifying the control template.
We assign the control to a log. Since the control template was not previously defined, we see the + button where we can create the template. Click + to define the control template.
Click the Select control template dropdown to specify a template.
We select the “An activity must precede another” template.
After specifying a template, we can then operationalize the control based on the log data.
After saving the control assignment, the control will automatically be updated with the “An activity must precede another” template.
Assign controls to log using filters
When a control is created using a filter, we are prompted to define the filter when assigning the control to a log. Right-click the control and select Assign process logs.
Click Add to add a process log.
Click the folder icon and select an event log.
Because the control was created using a filter, the filter description appears. Click the pen icon to define a filter.
This opens the Filter log window where we can define the filter.
Note
Cases that satisfy the defined filter are the violation cases. Thus, the filter should be defined such that it retains cases that violate the control.
In our cases, we create a filter that:
Retain cases where “Approve Funds Clearance” occurred.
Retain cases where the case duration was greater than 2 weeks.
Click OK to confirm the filter criteria.
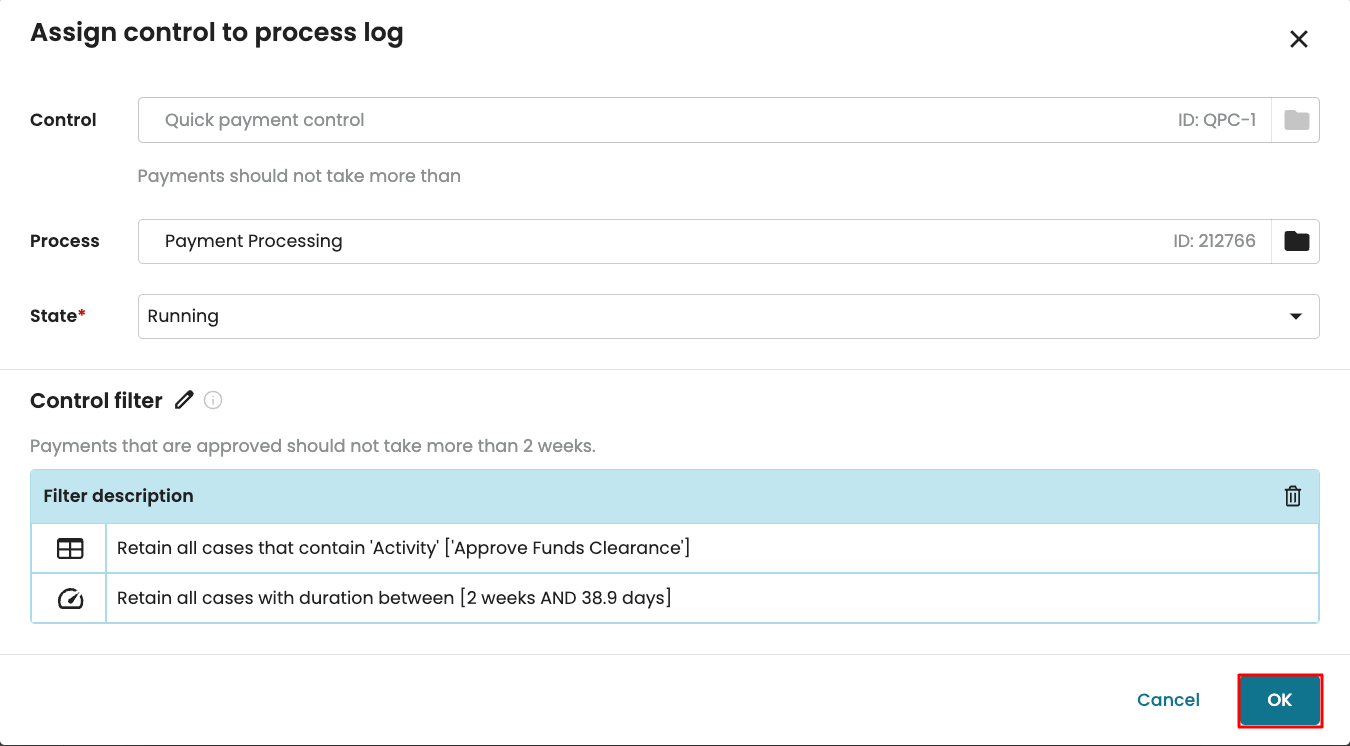
We see the defined control filter. Click OK to assign the control to the log.
Copy compliance rules across logs
After defining the control and assigning it to a log, we may want to apply the same compliance rule to a similar log. To make this faster, we can now copy an existing compliance rule when assigning it to other logs.
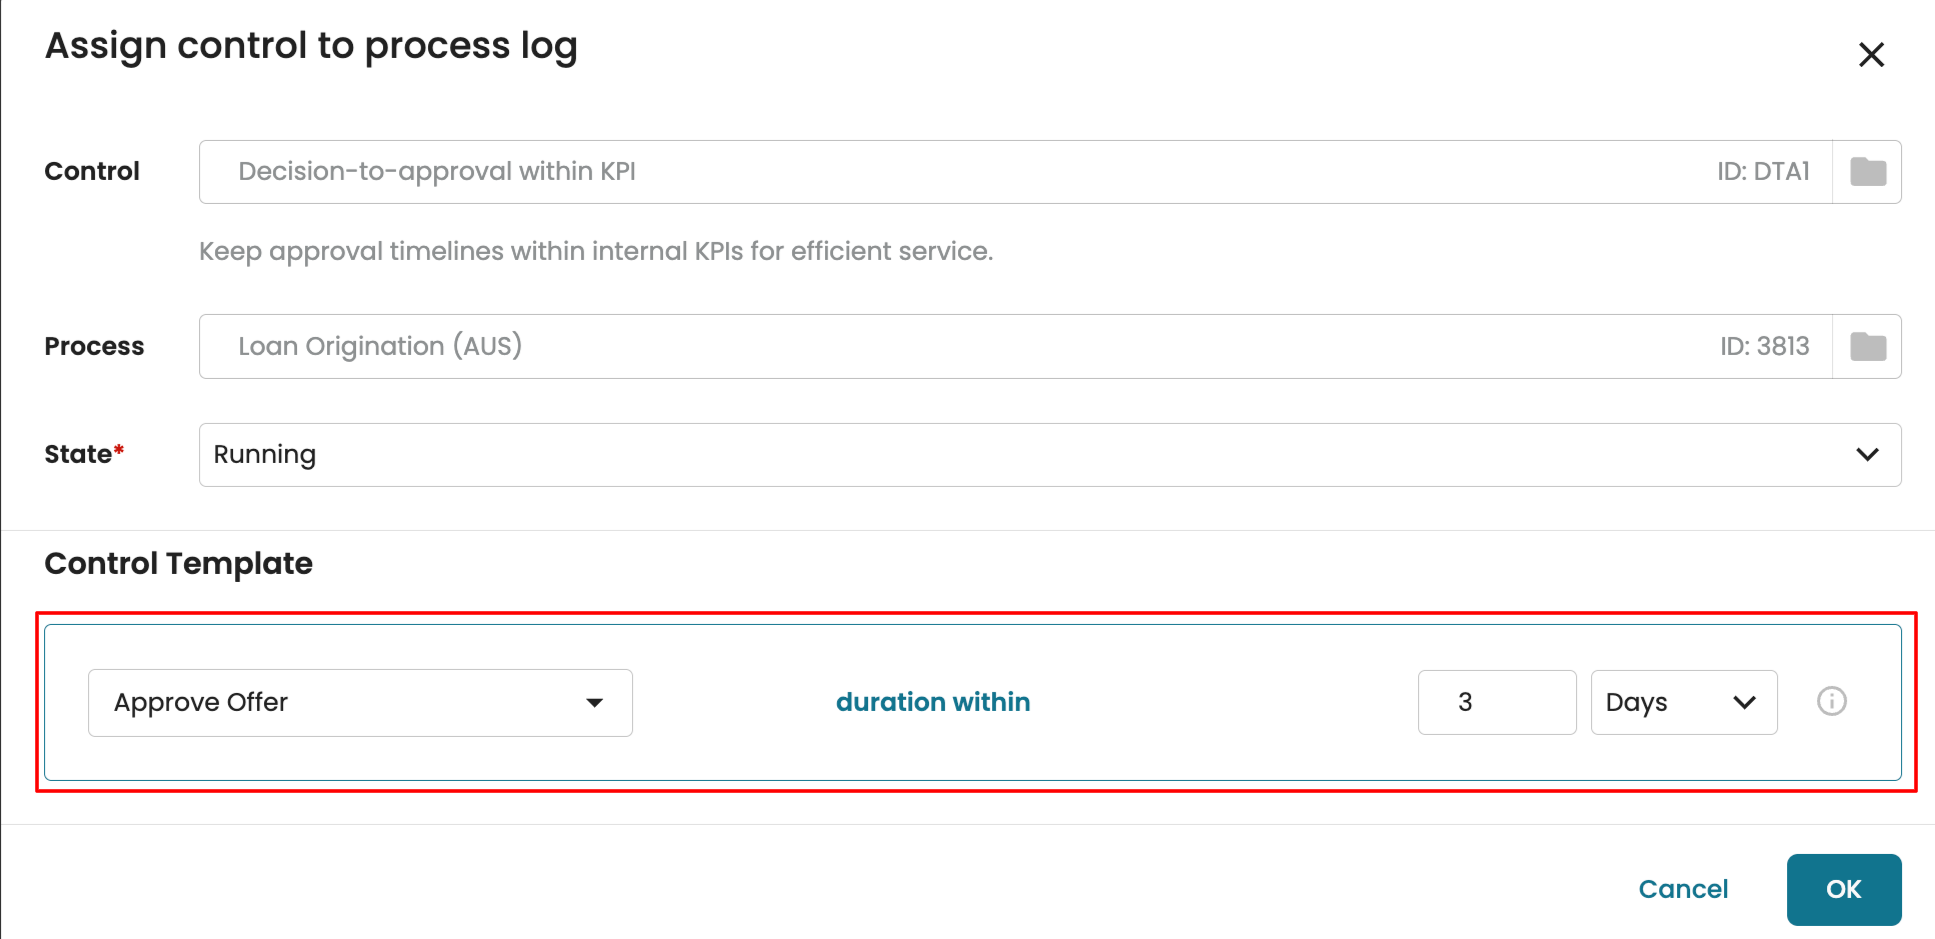
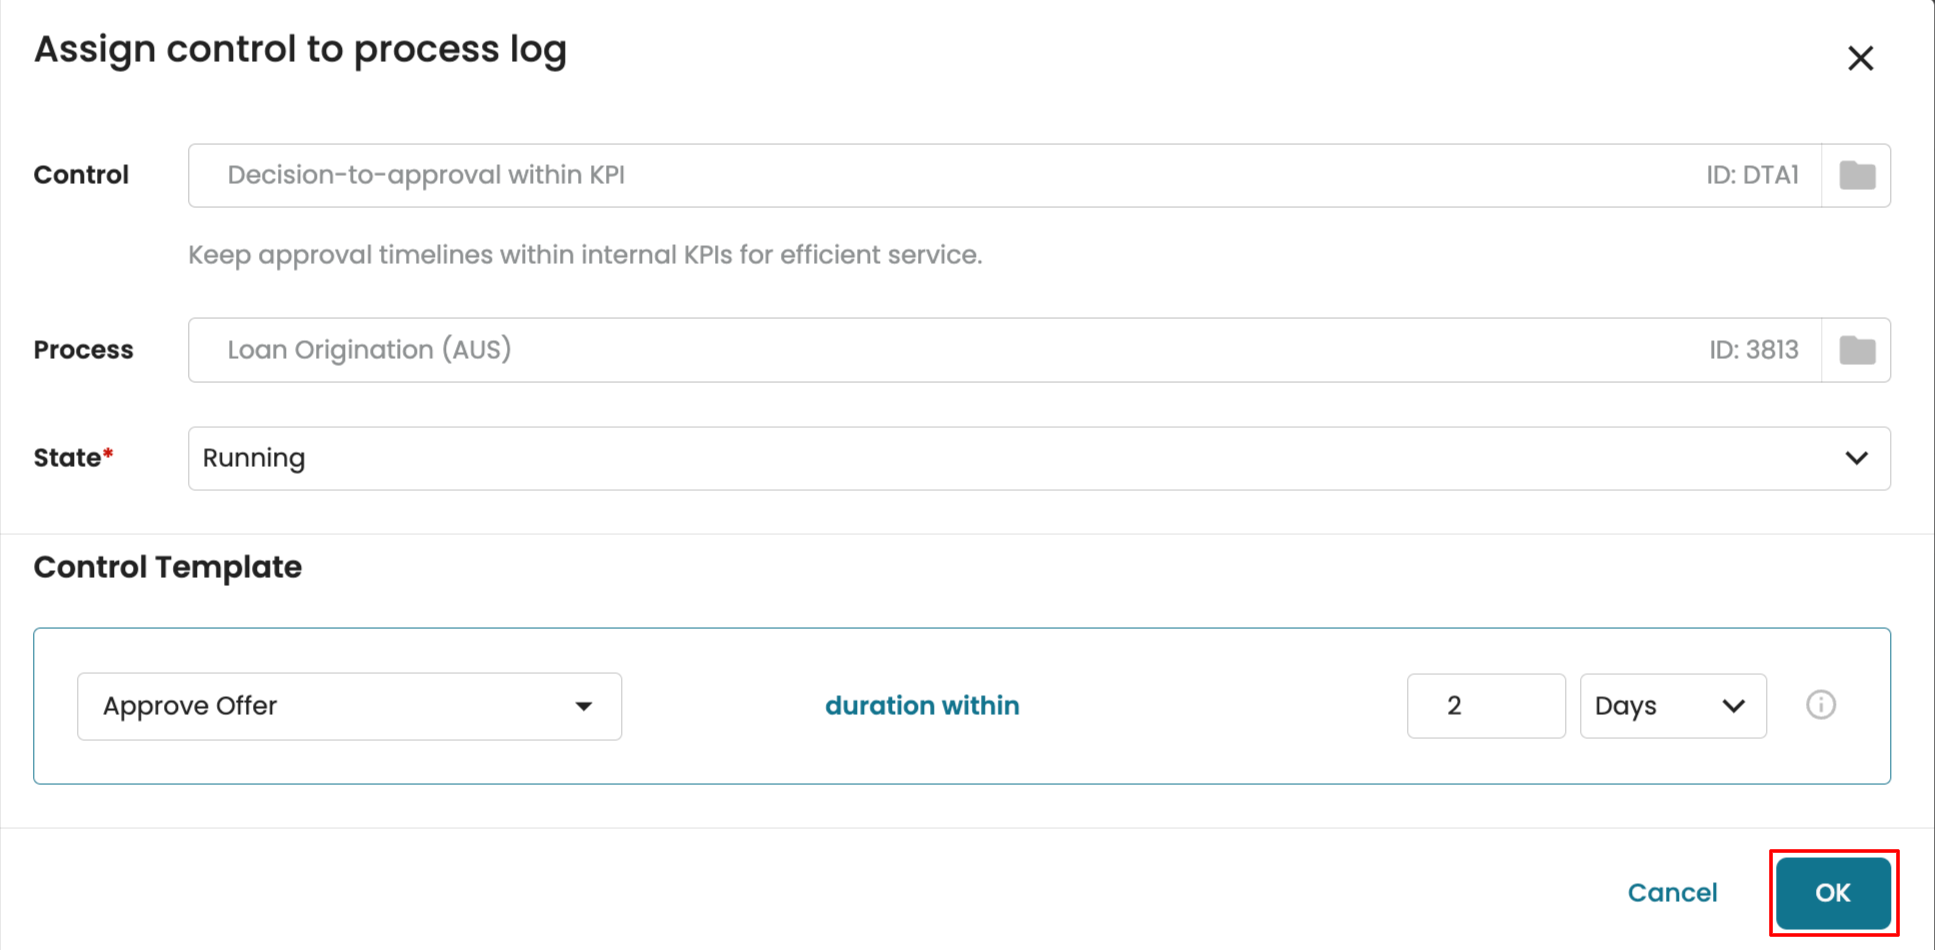
Imagine we have created a control in a loan origination process that checks that the time to approval does not exceed 3 days. However, for the same process in the Australia region, the time to approval is 2 days. When assigning the control to the Australian log, we can copy the existing compliance rule and adjust the value as needed.
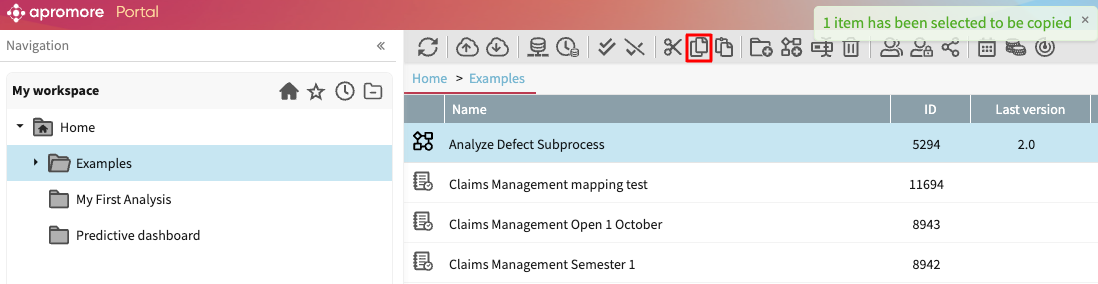
Select the control and click Assign to log.

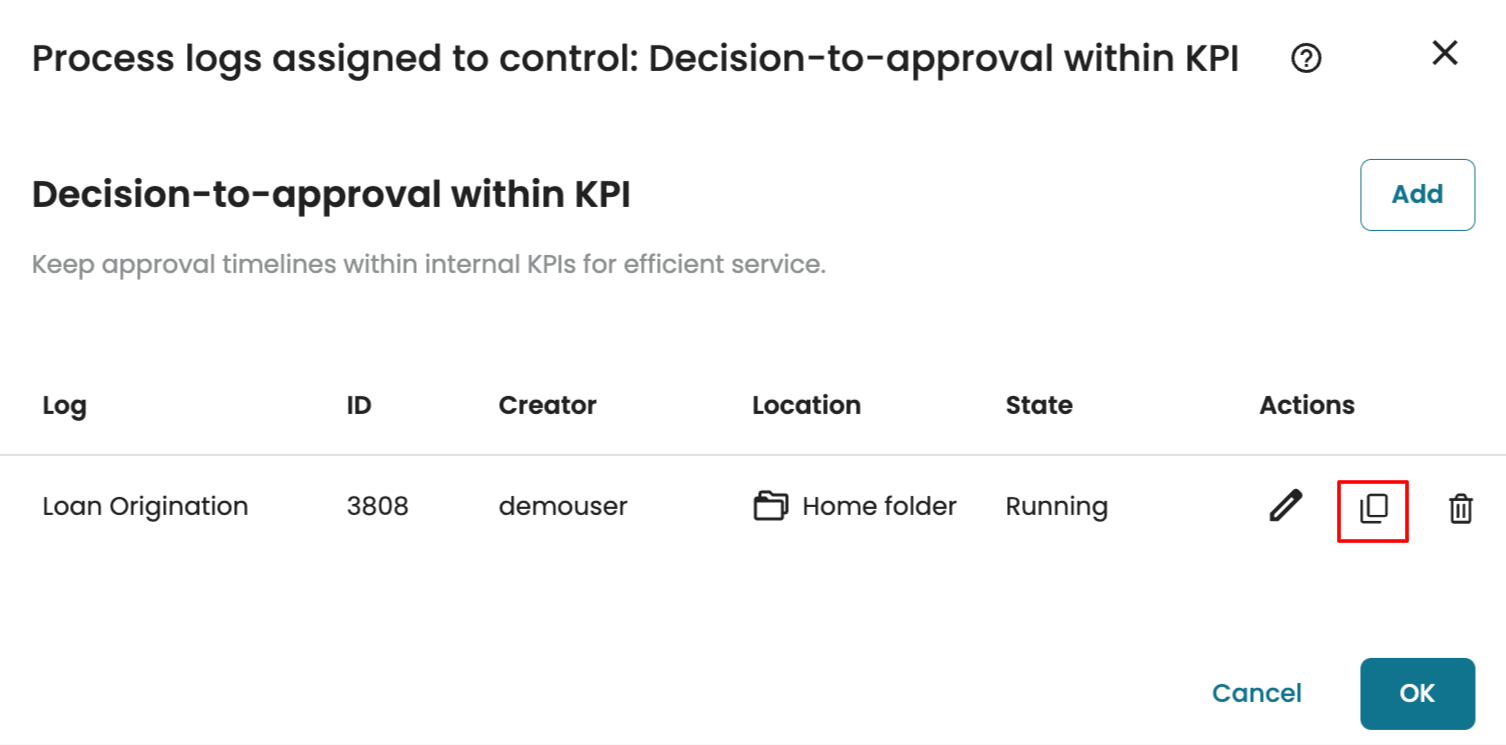
We see the existing control. Click the copy icon to copy the compliance rule in that control to a new log.
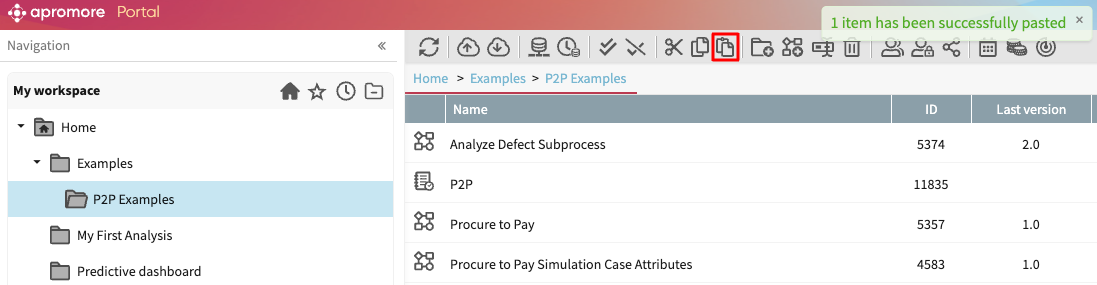
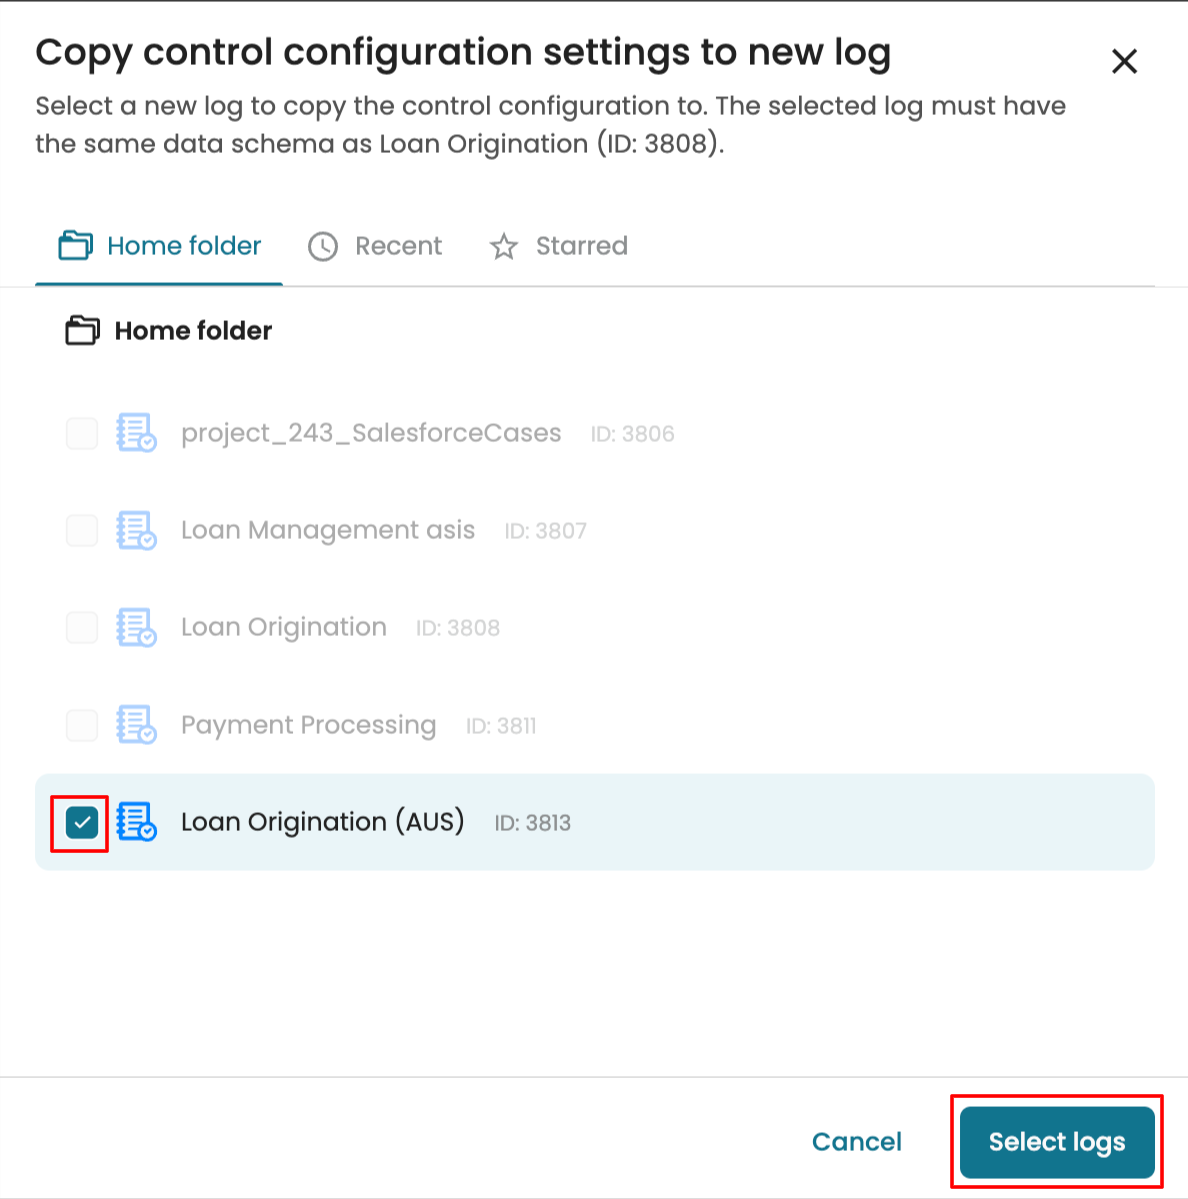
Select the log we wish to copy the compliance rule to. In our case, we copy to the Australian log. Click Select logs.
We see the same compliance rule copied.
We may tweak it based on our needs and click OK to save.
Note
To copy a compliance rule successfully, the target log must have the same schema as the source log.
Run compliance check
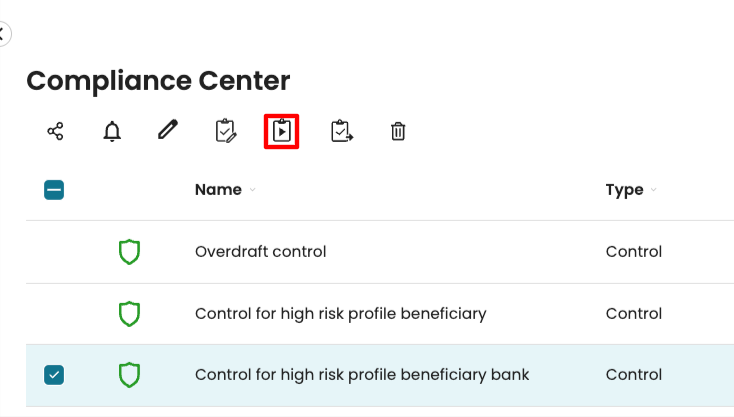
After creating a compliance rule for a control, the compliance check is automatically run in the background. However, it is also possible to run the compliance check manually. To do so, select a control, then click the icon Run compliance check in the top toolbar.
Apromore always performs the compliance checks in the background.
Note
When the event log is updated, the compliance check is automatically run on the updated log.
Enable notifications for compliance check outcome
To enable us to respond promptly to compliance check outcomes, we can opt-in to receive email notifications once a check is complete. We can also specify whether or not to receive in-platform or email notifications on specific compliance items. For instance, we may want checks on the “Overdraft control” to send notifications while checks on the “Quick payment control” to not send notifications.
Note
Notifications can be turned on for either a control, risk, or obligation.
When notifications are turned on for a control, we would be notified when a compliance check on that control is completed. However, because compliance checks can’t be run directly on risks or obligations, we will only receive a notification if the risk or obligation is linked to a control—and a compliance check is run on that control.
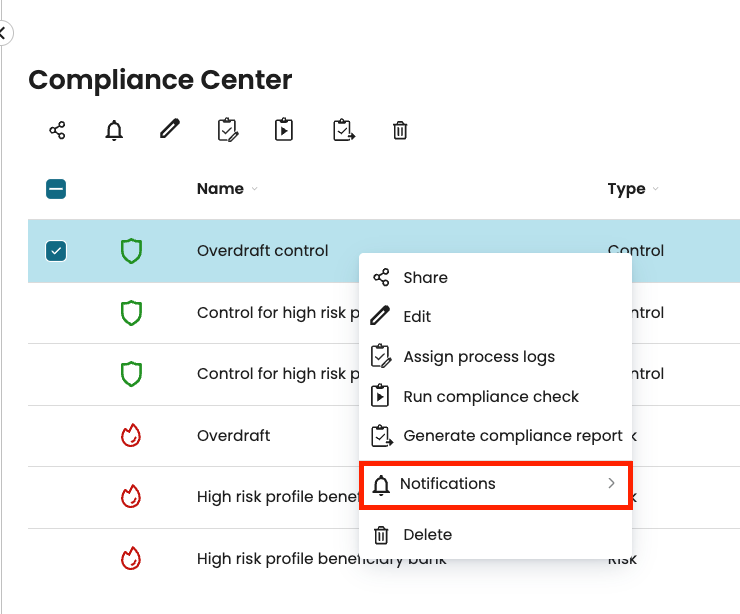
To turn on email notifications for a compliance item, right-click the item and click Notifications.
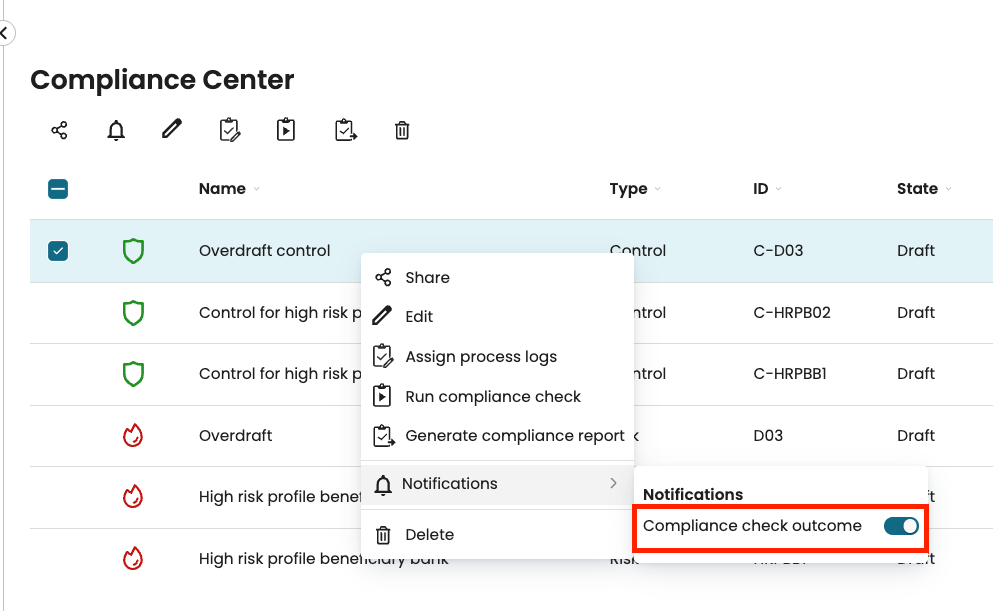
Toggle on Compliance check outcome.
Note
This only enables in-platform notifications. To receive email notifications, we enable the option in our Notification Settings. To learn more, see Notification settings.
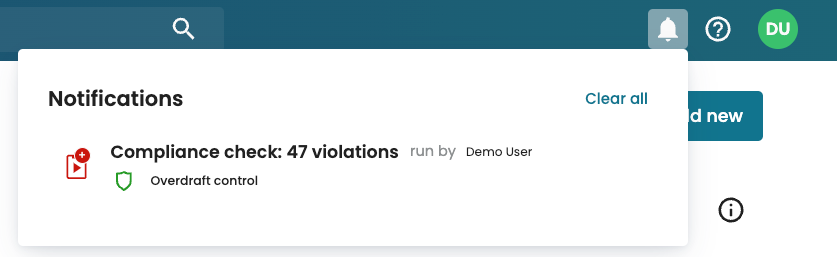
Now, after the compliance check, we receive an in-platform notification from the bell icon.
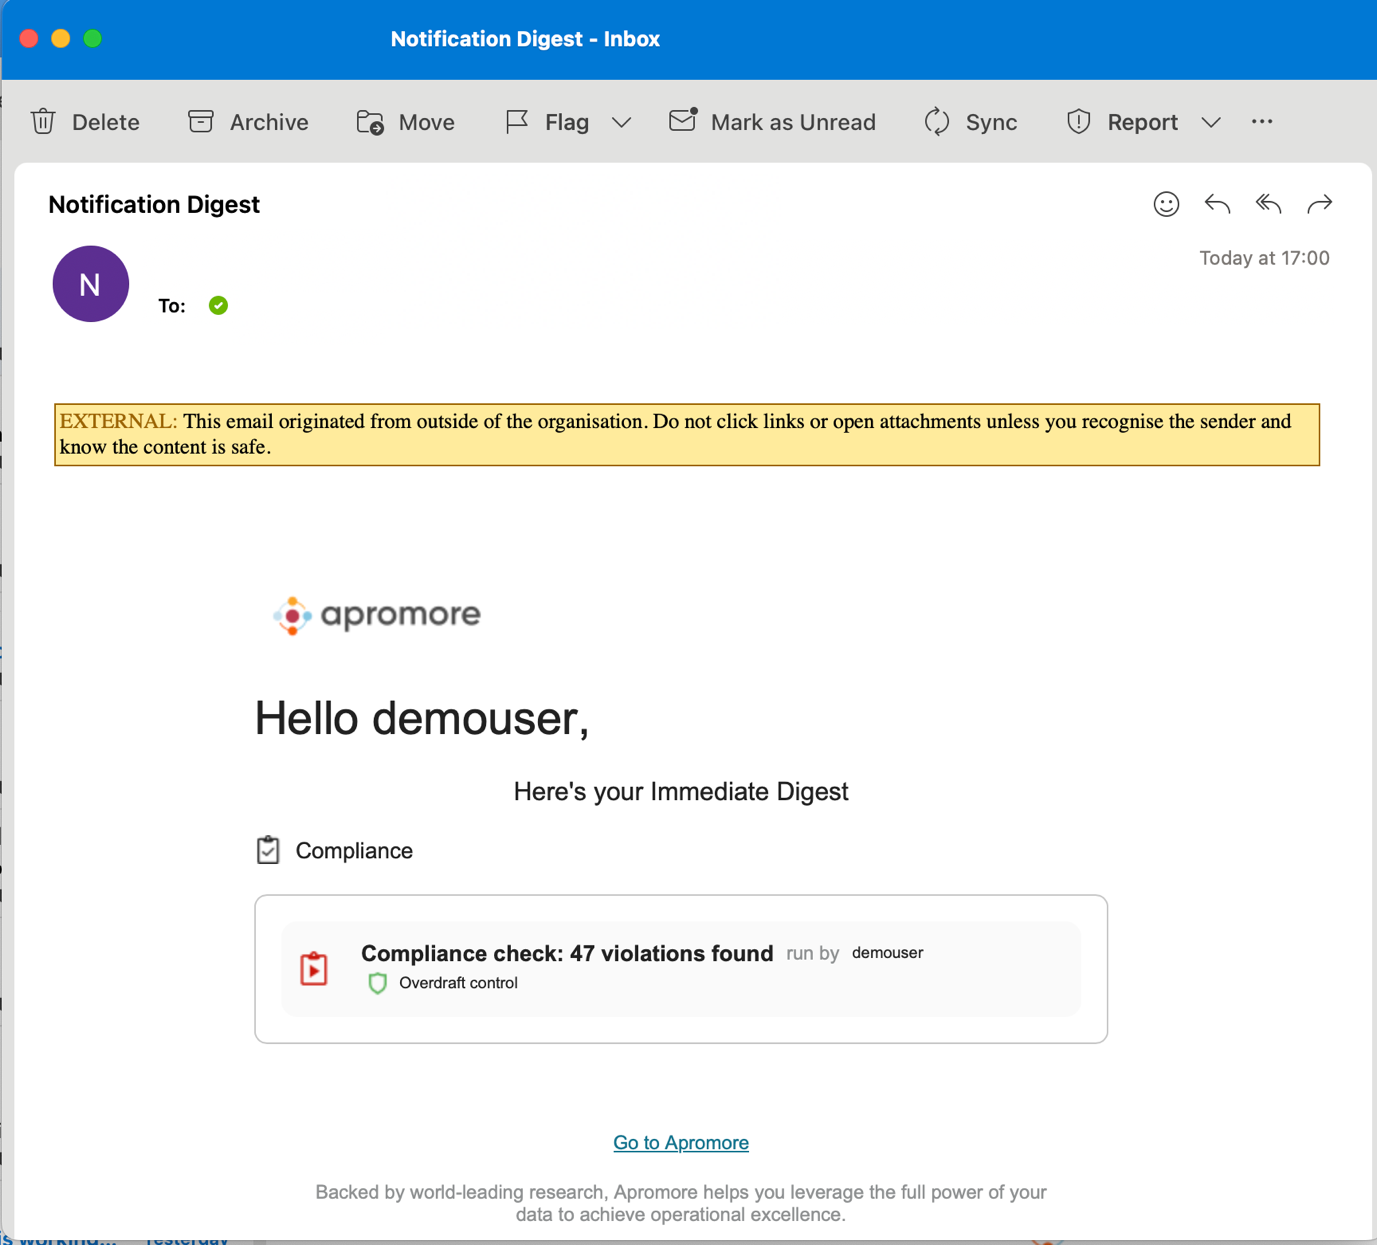
We also receive an email notification.
Copy a control and its configurations
When creating controls, we may often need to create similar controls for different purposes. For instance, we may want to create a similar control for another department or region. To help speed up this process, we can copy an existing control in the Compliance Center.
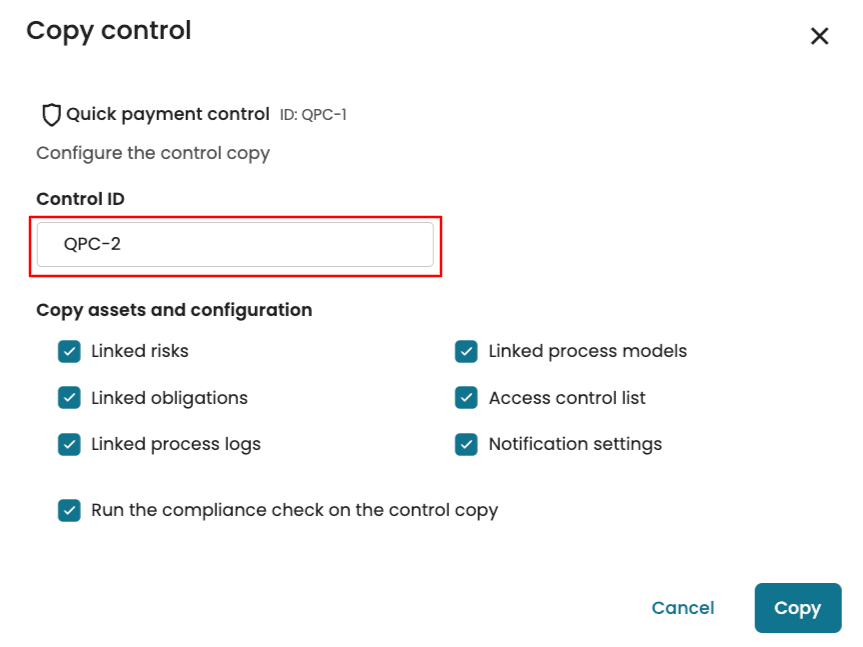
When copying a control, we can specify what assets and configurations are included. The following can be copied:
Linked risks.
Linked obligations.
Linked process logs.
Linked process models.
Access control list (the copied control will be shared with the same user or group as the original).
Notification settings.
Run the compliance check on the control copy (when selected, a compliance check will immediately run on the copied version).
To copy a control, in the Compliance Center, select the control. Right-click and click Copy.
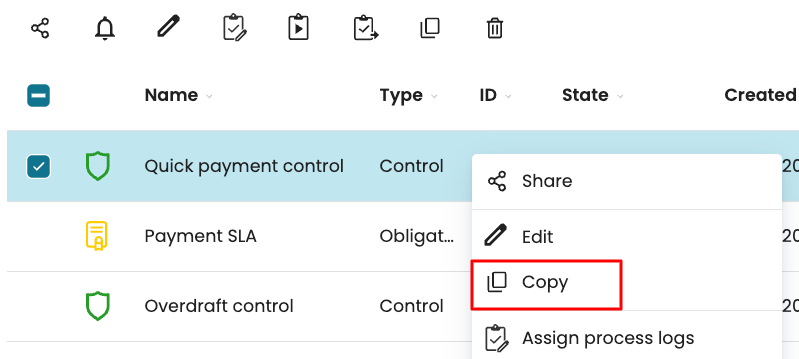
Alternatively, we can click the copy icon on the toolbar.
Define the ID of the new control.
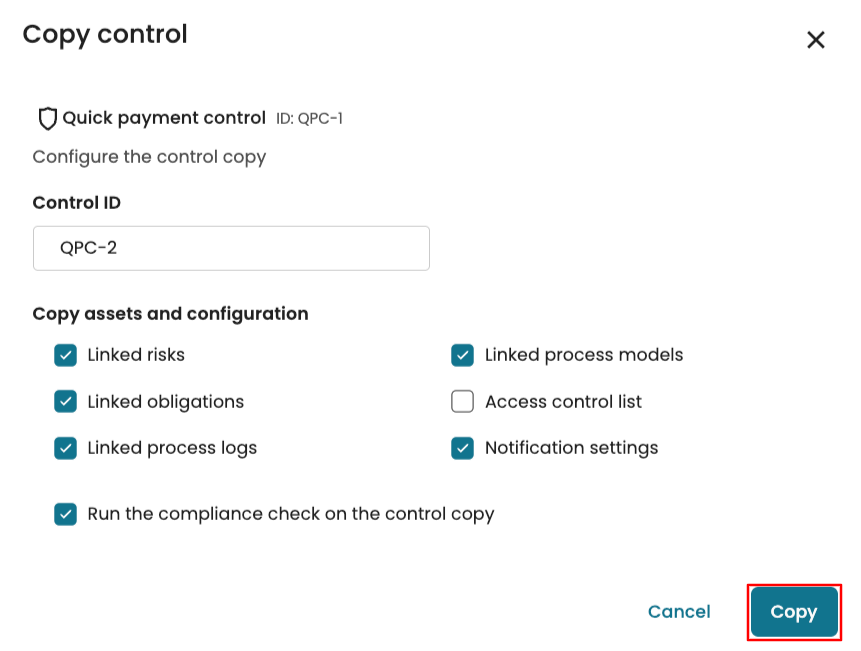
Specify what asset and configuration the copied version should inherit. For instance, if we do not want the control to be shared with anyone, we can uncheck “Access control list”. Click Copy.
Now, we see the copied version of the control.
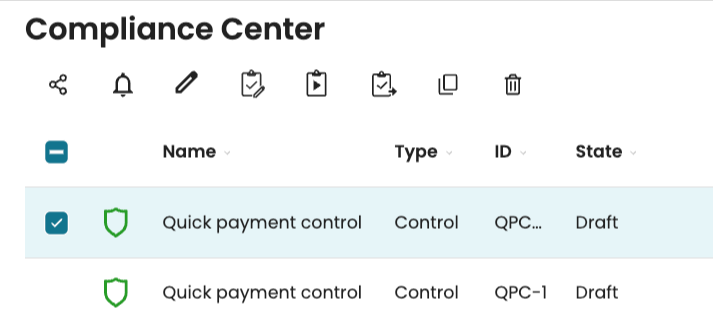
We can edit it to change its name, template, and any other settings.
View compliance check results
We can view the results of the compliance checks in the dashboard as a tile, table, or compliance chart.
Note
Due to a database migration introduced in version 10.5, Compliance Center widgets in the Classic Dashboard only display violation results created before v10.5. Any violations generated after the upgrade will not appear in Classic Dashboard widgets.
We recommend using the New Dashboard to create a compliance results dashboard and view the most up-to-date violation data. To learn more about adding compliance widgets in the New Dashboard, see Add a compliance tile and Add a compliance table.
View result as a tile
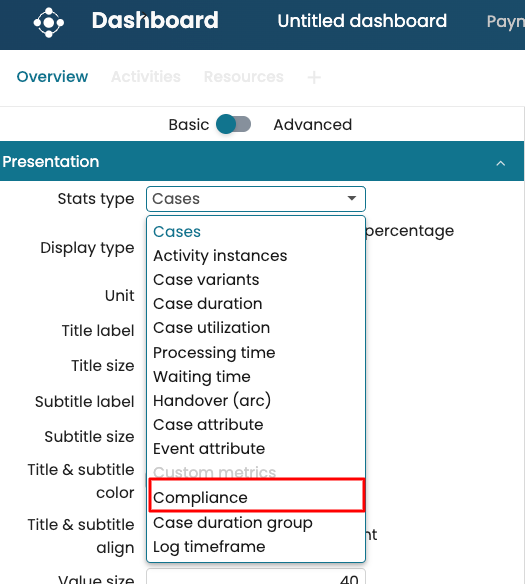
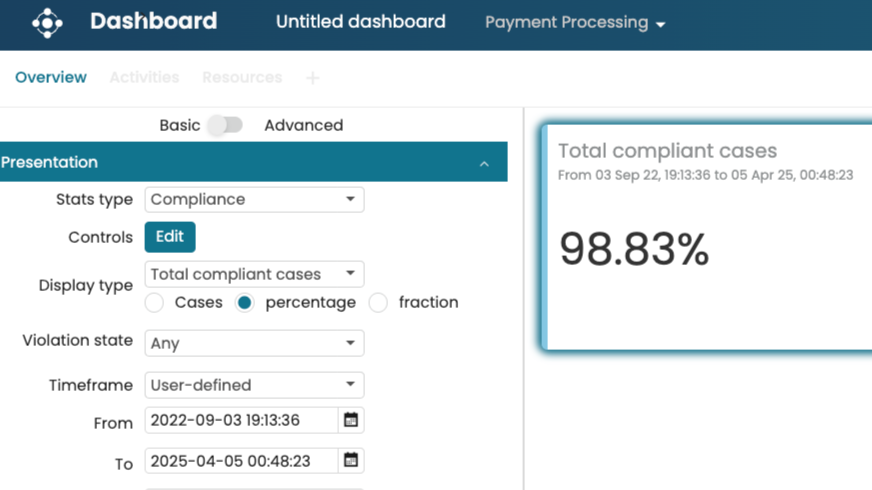
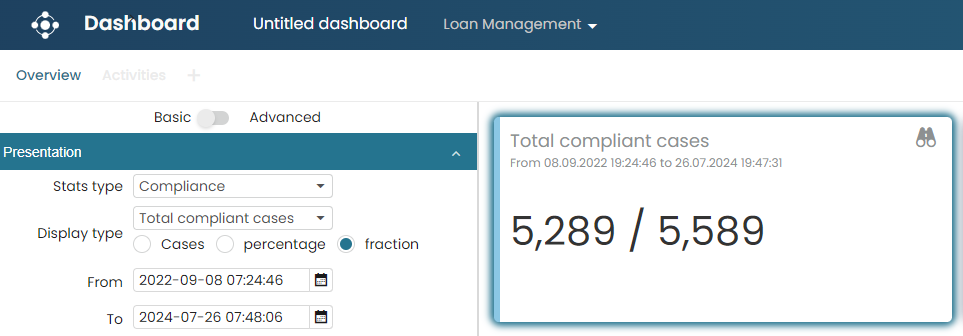
Create a dashboard from the event log and add a tile. In the Stats type drop-down, click Compliance.
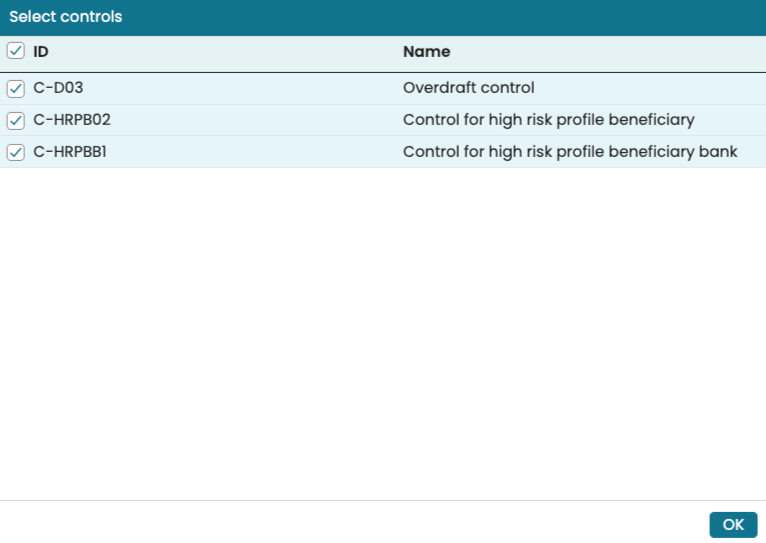
Click Edit to select the control result that would be included in the tile.
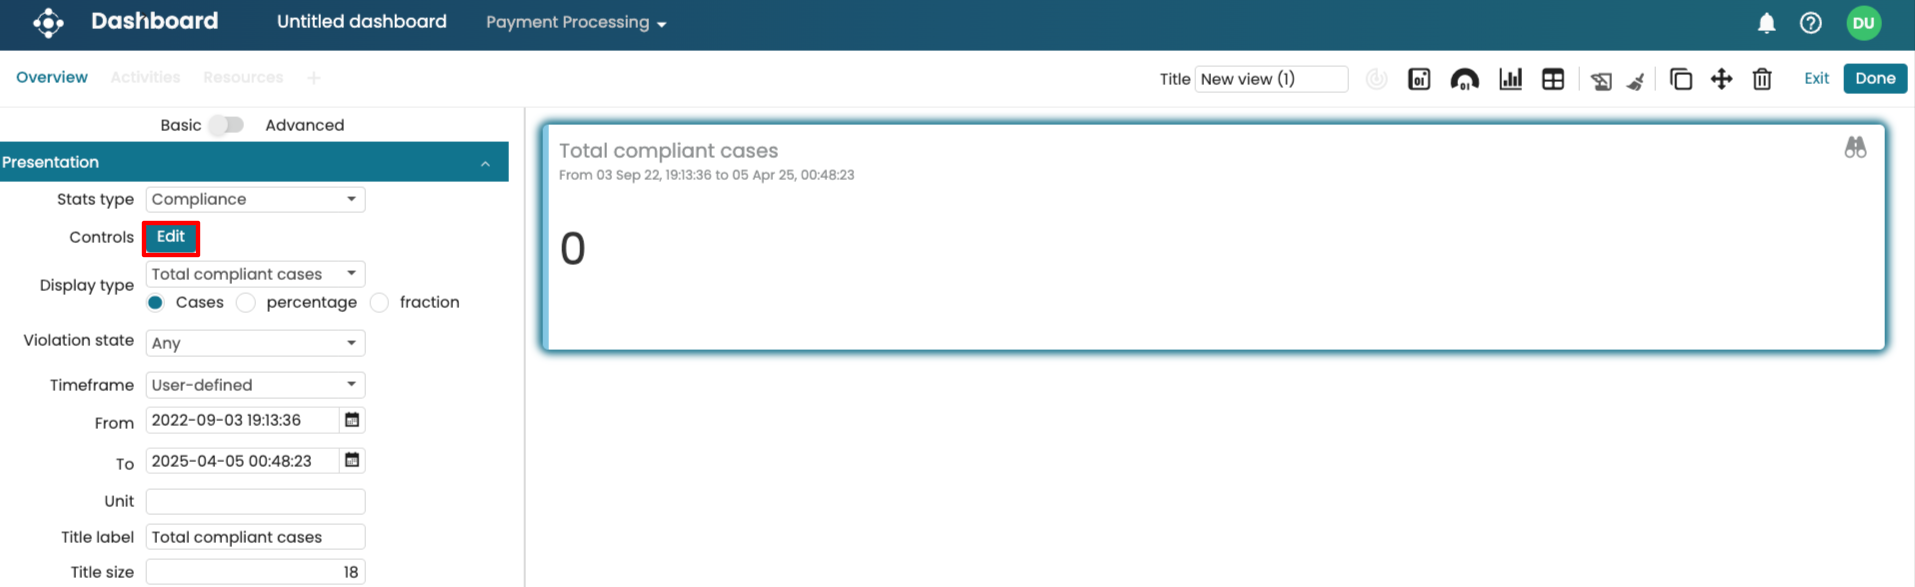
This displays the total compliant cases.
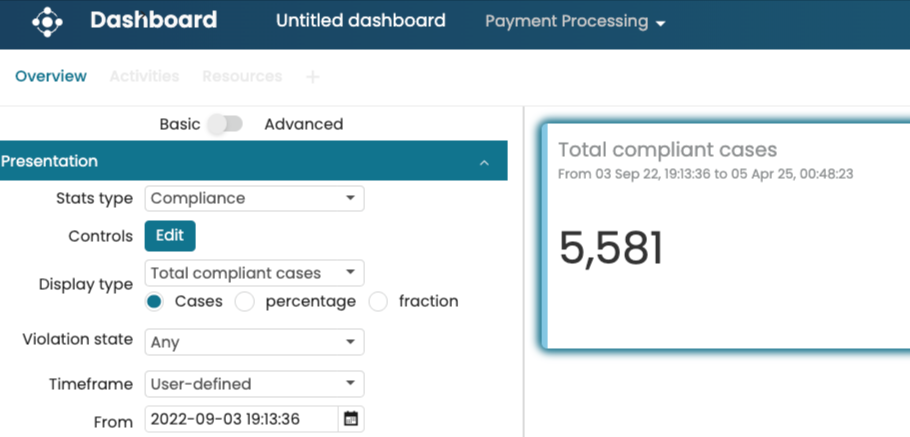
We can also view the percentage by clicking Percentage.
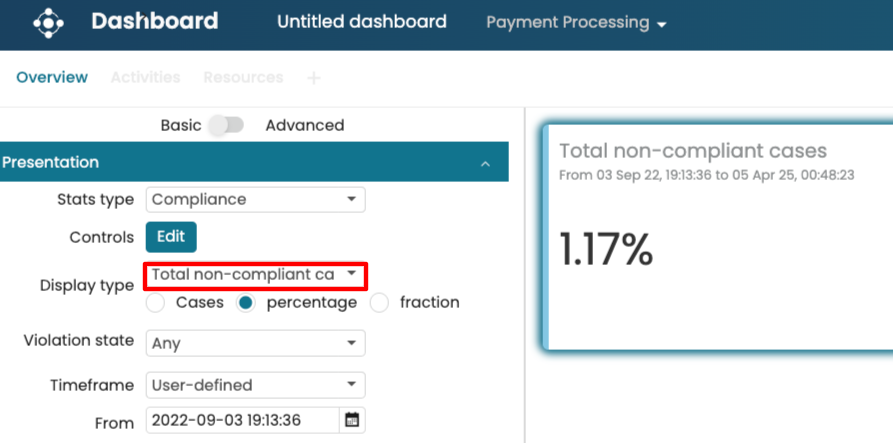
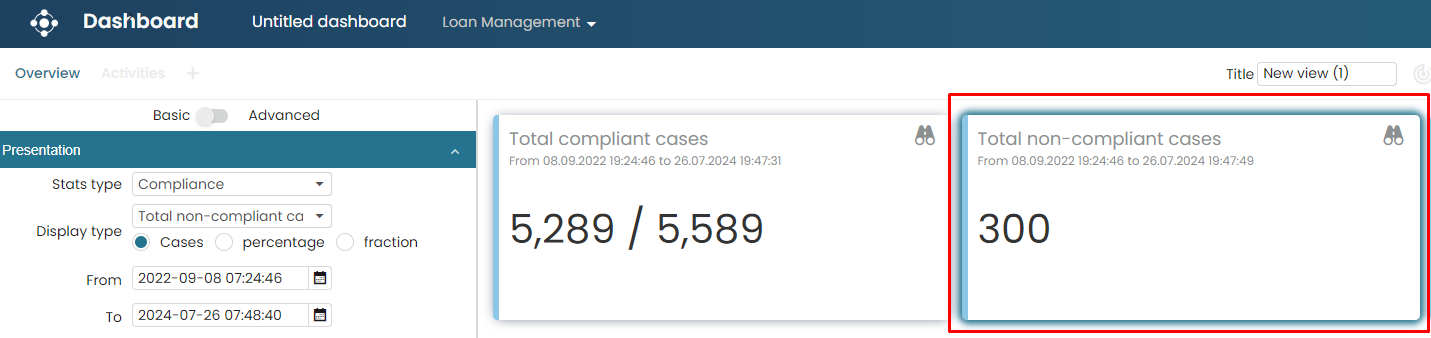
We can also view the total non-compliant cases by changing the drop-down to Total non-compliant cases.
We can view the total number of violations that were detected.
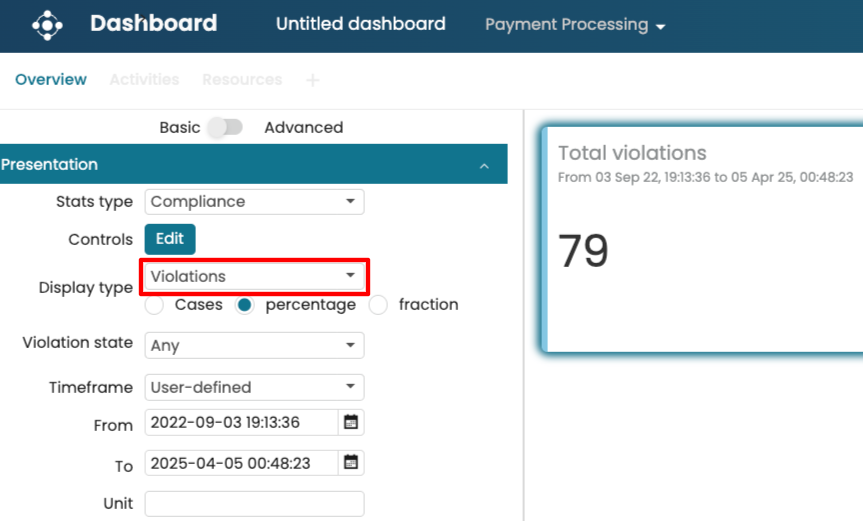
We can modify the timeframe of when the violations were detected by changing the From and To values. This timeframe is completely independent of the log timeframe, as it relates to when the compliance checks were performed.
In addition, we can display the result based on violation states.
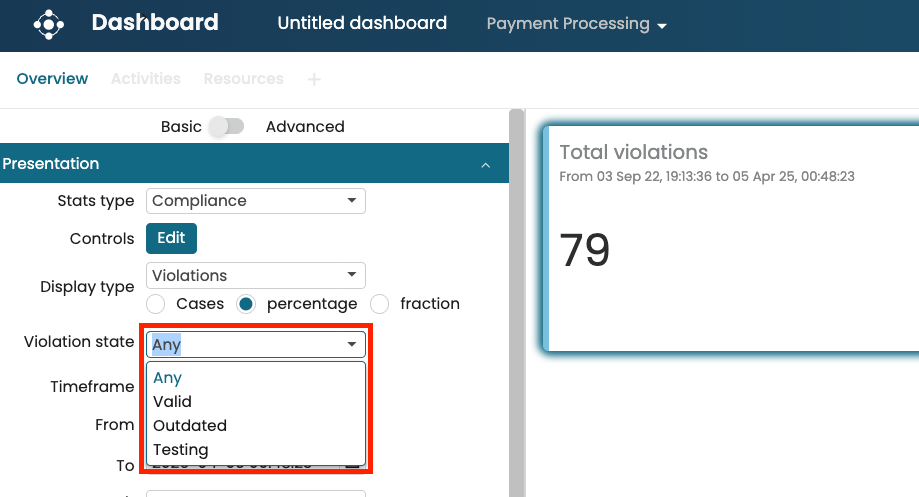
To learn more about adding and managing states, see Manage compliance states.
View result as a table
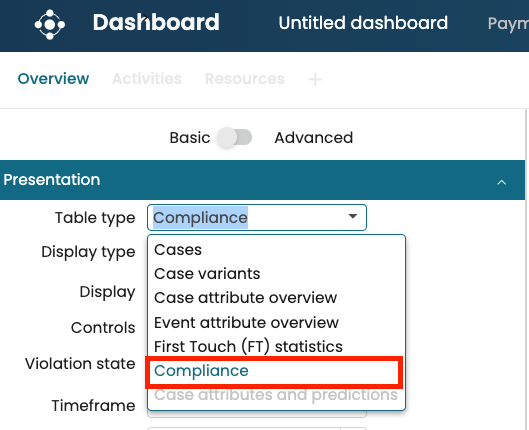
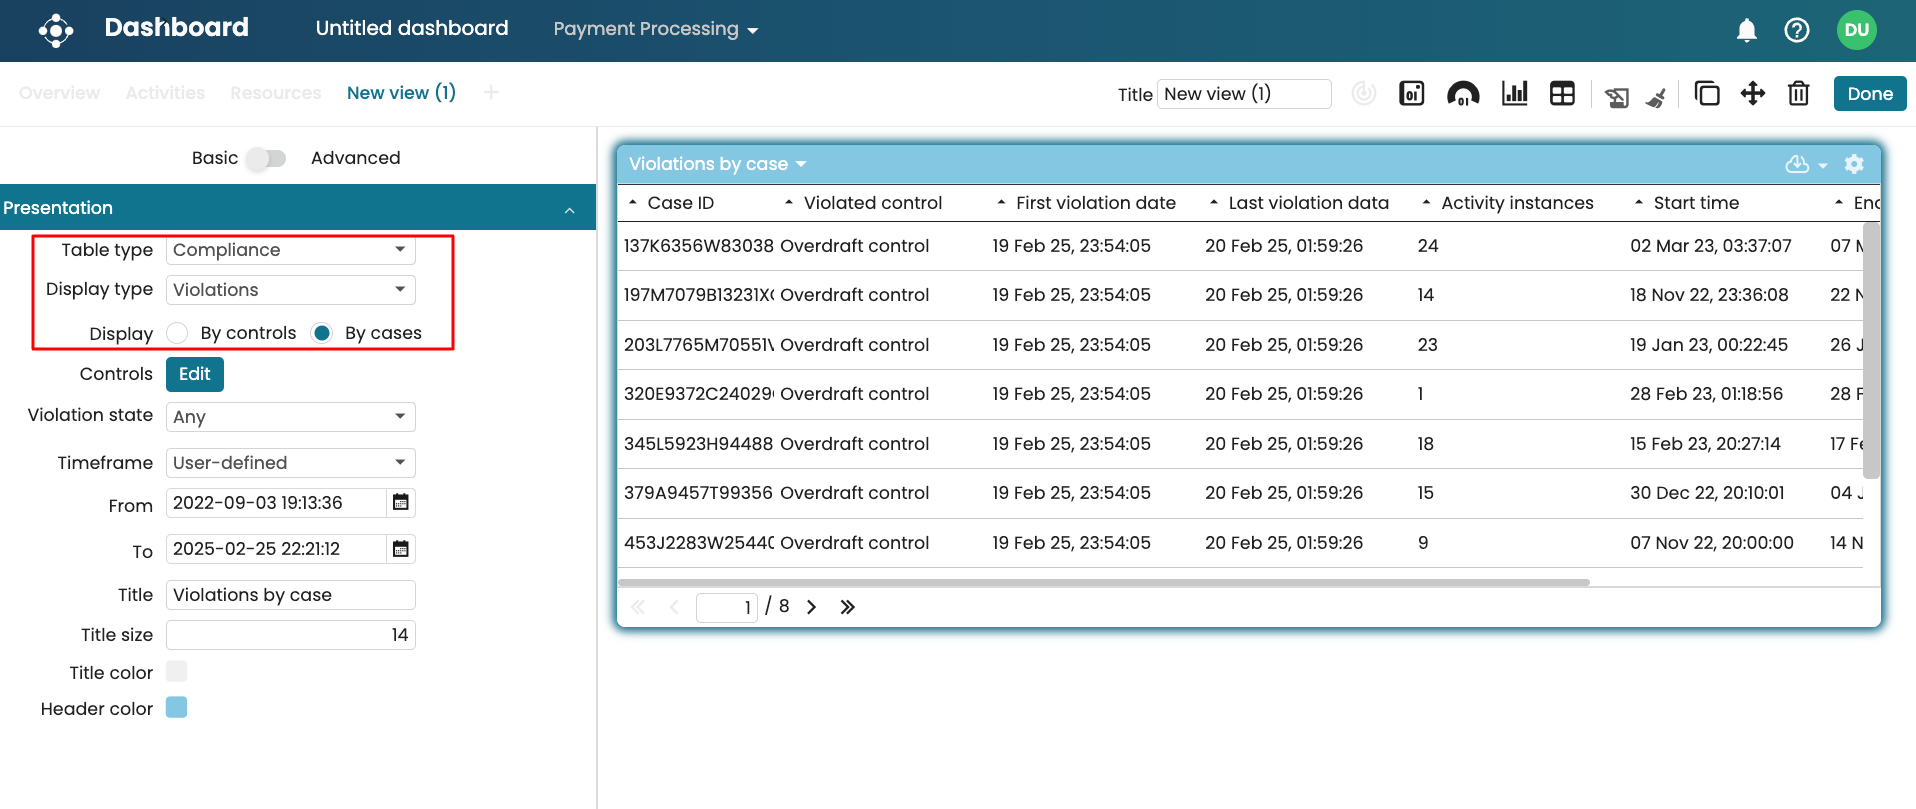
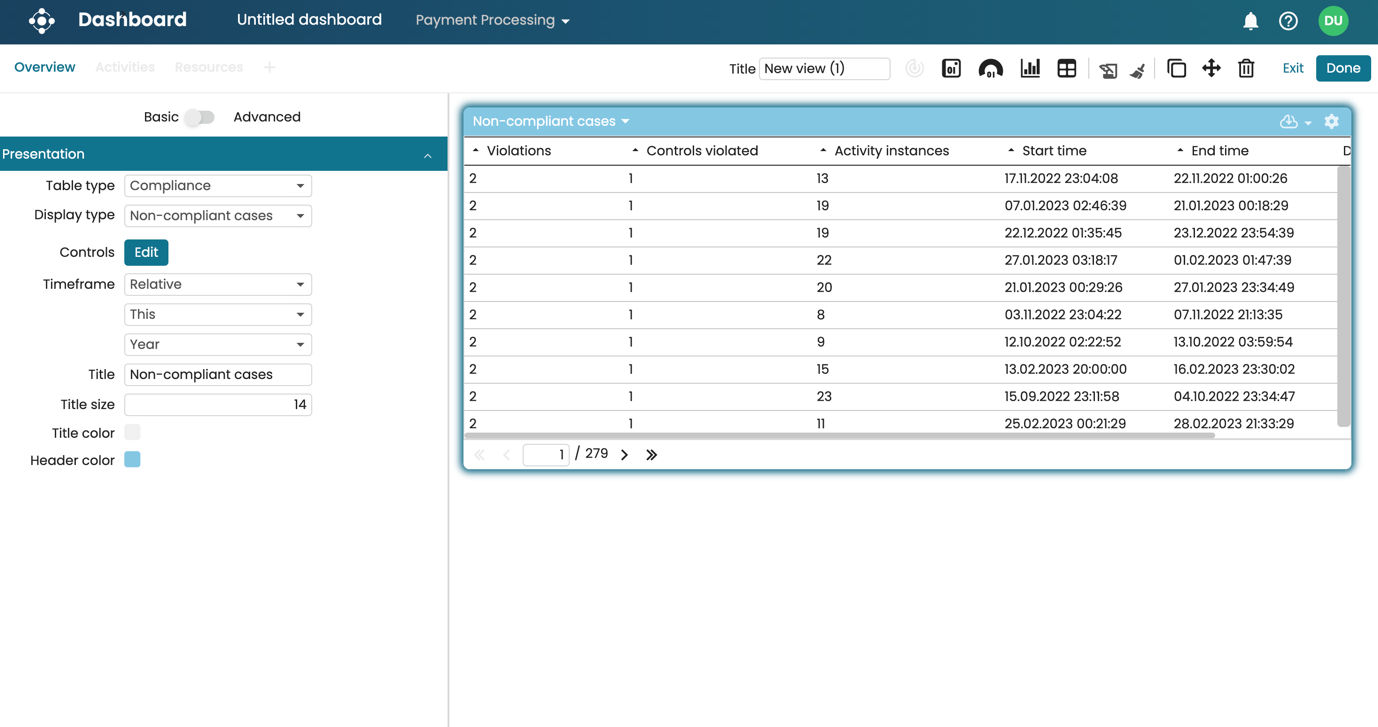
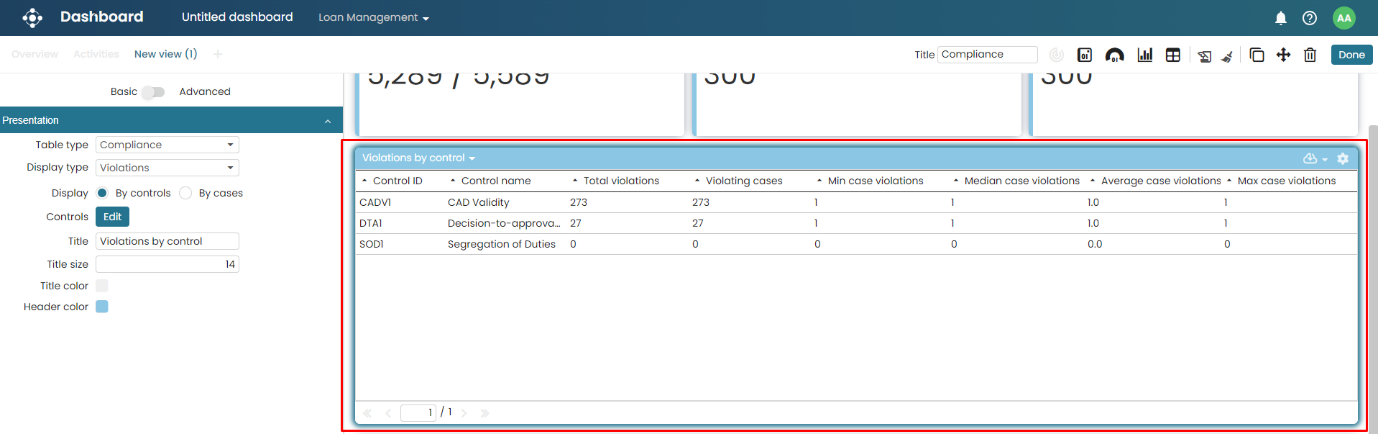
We can also view the compliance results as a dashboard table by creating a compliance table. This table can display the list of compliant or non-compliant cases or the list of violations. To do this, create a table in the dashboard and select Compliance as the table type.
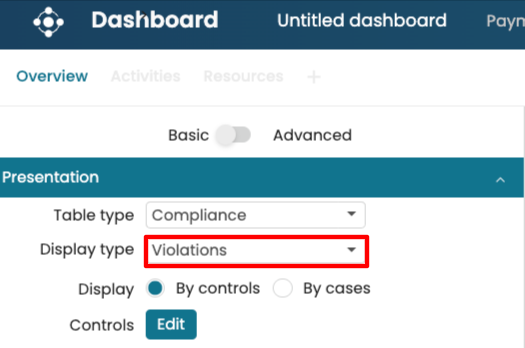
Select Violations to list the violations by control.
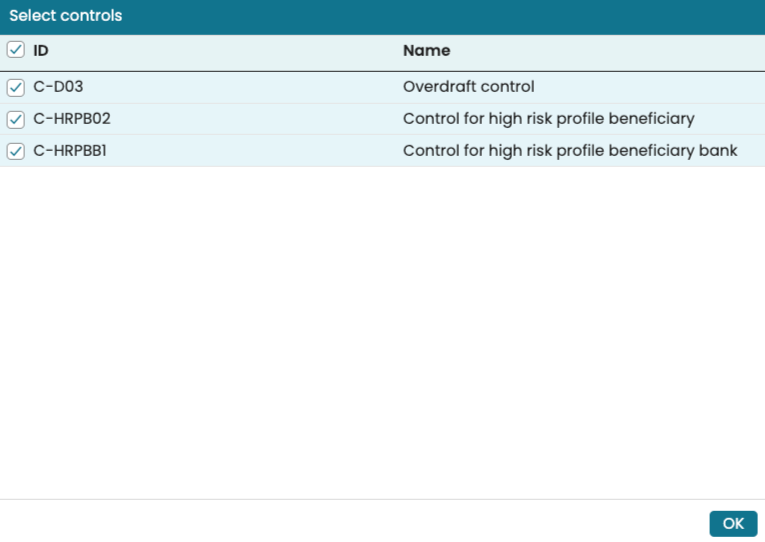
Click Edit and select the controls we are interested in. Click OK to confirm the selection.
Now, the table shows a set of statistics regarding the violations per control.

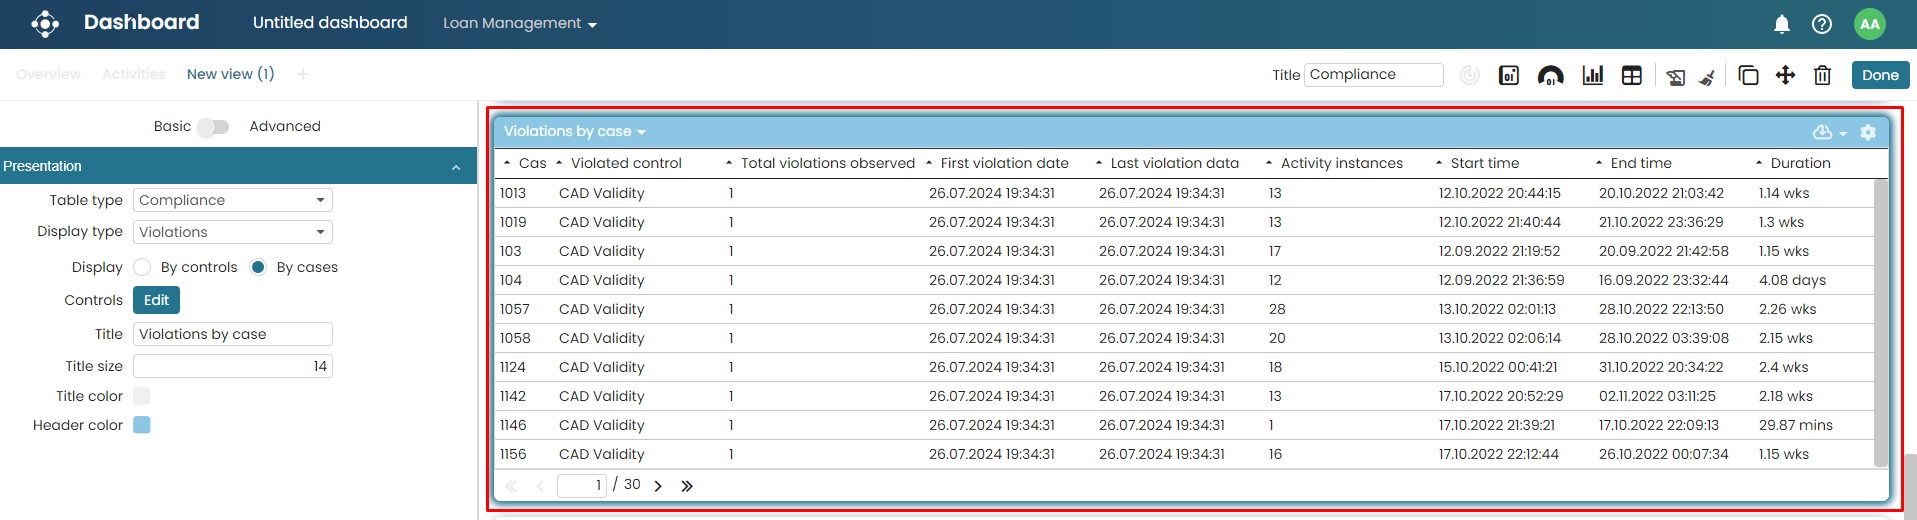
If we display violations By cases, the table will list all the case IDs that violate the controls.
When reviewing a compliance table that lists violations by case, we may want to investigate the underlying reasons for each breach. To allow us to perform these investigations, we can drill down into a specific case directly from the compliance table. To view a violating case, create a table displaying the violations by case.
Click Done to save the dashboard and exit the editing mode.
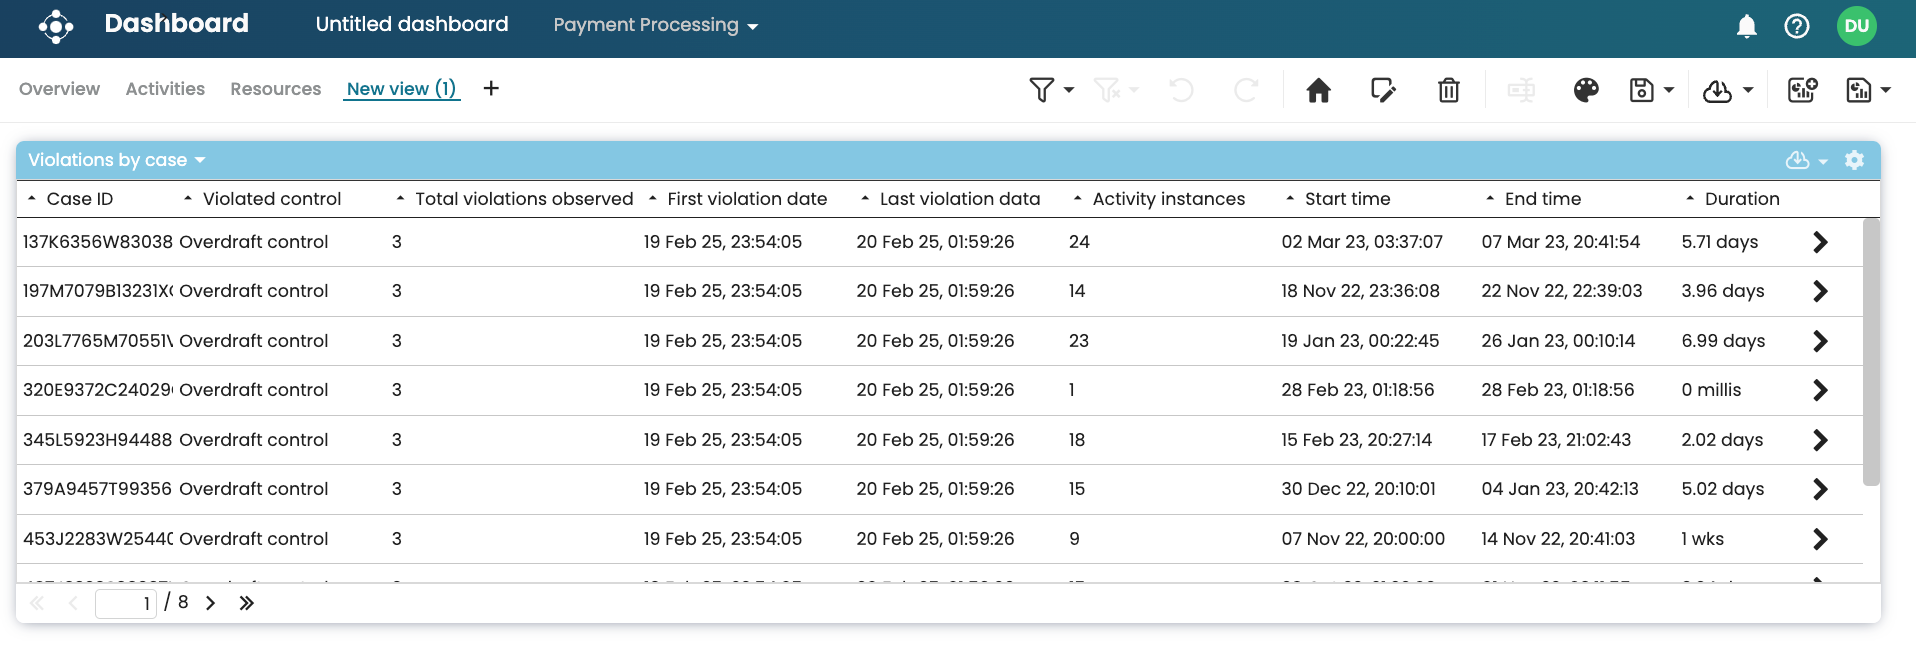
We see the number of violations observed in each case. To open the case in Process Discoverer for further analysis, click the investigate arrow > for the case.
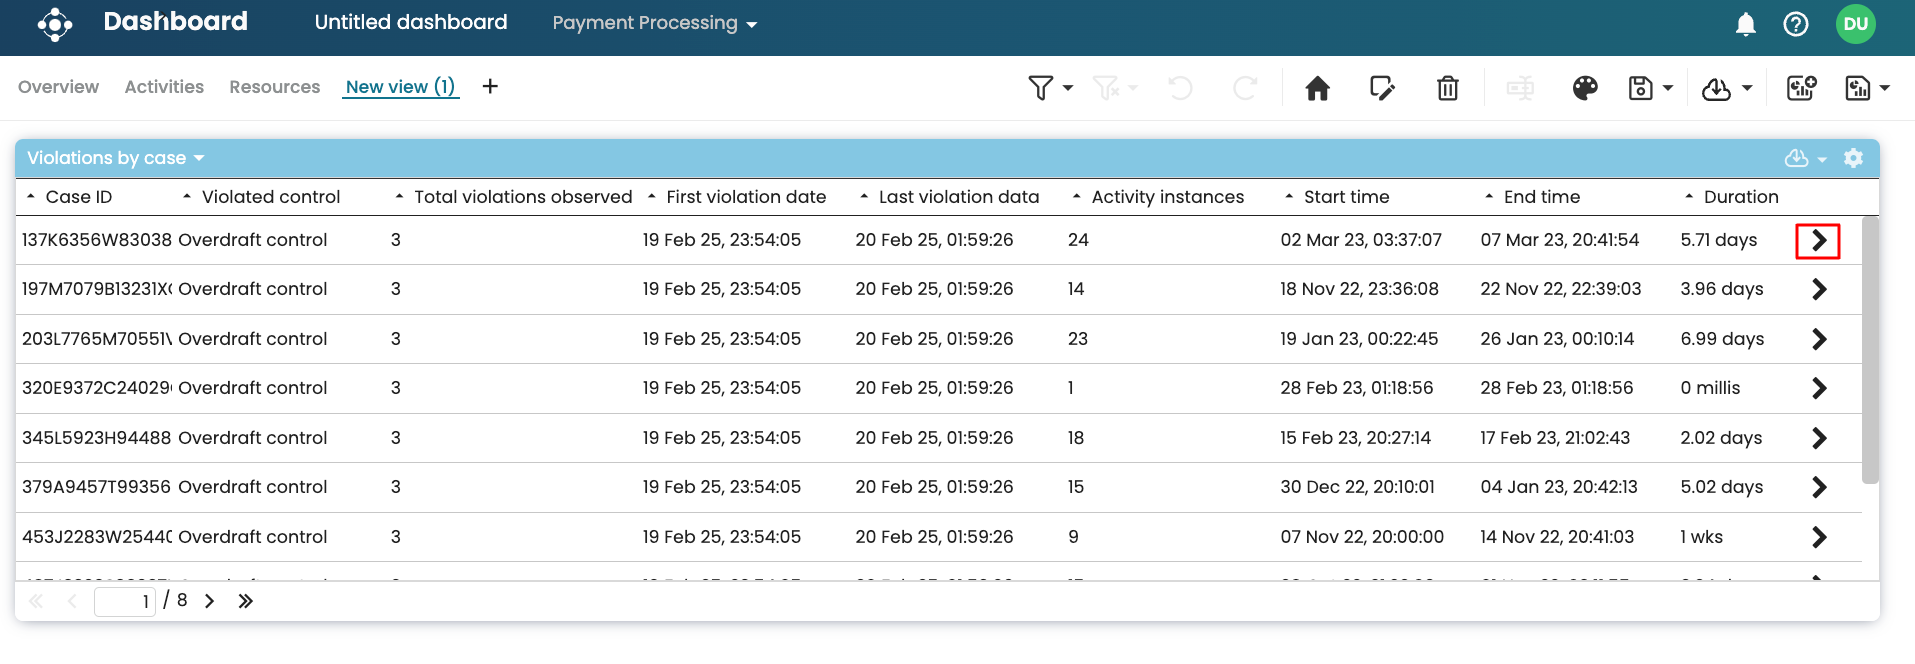
Note
The investigate arrow also appears when we display a non-compliant cases table.
This opens the case in Process Discoverer where we can learn more about the case and understand the flow of events in the case.
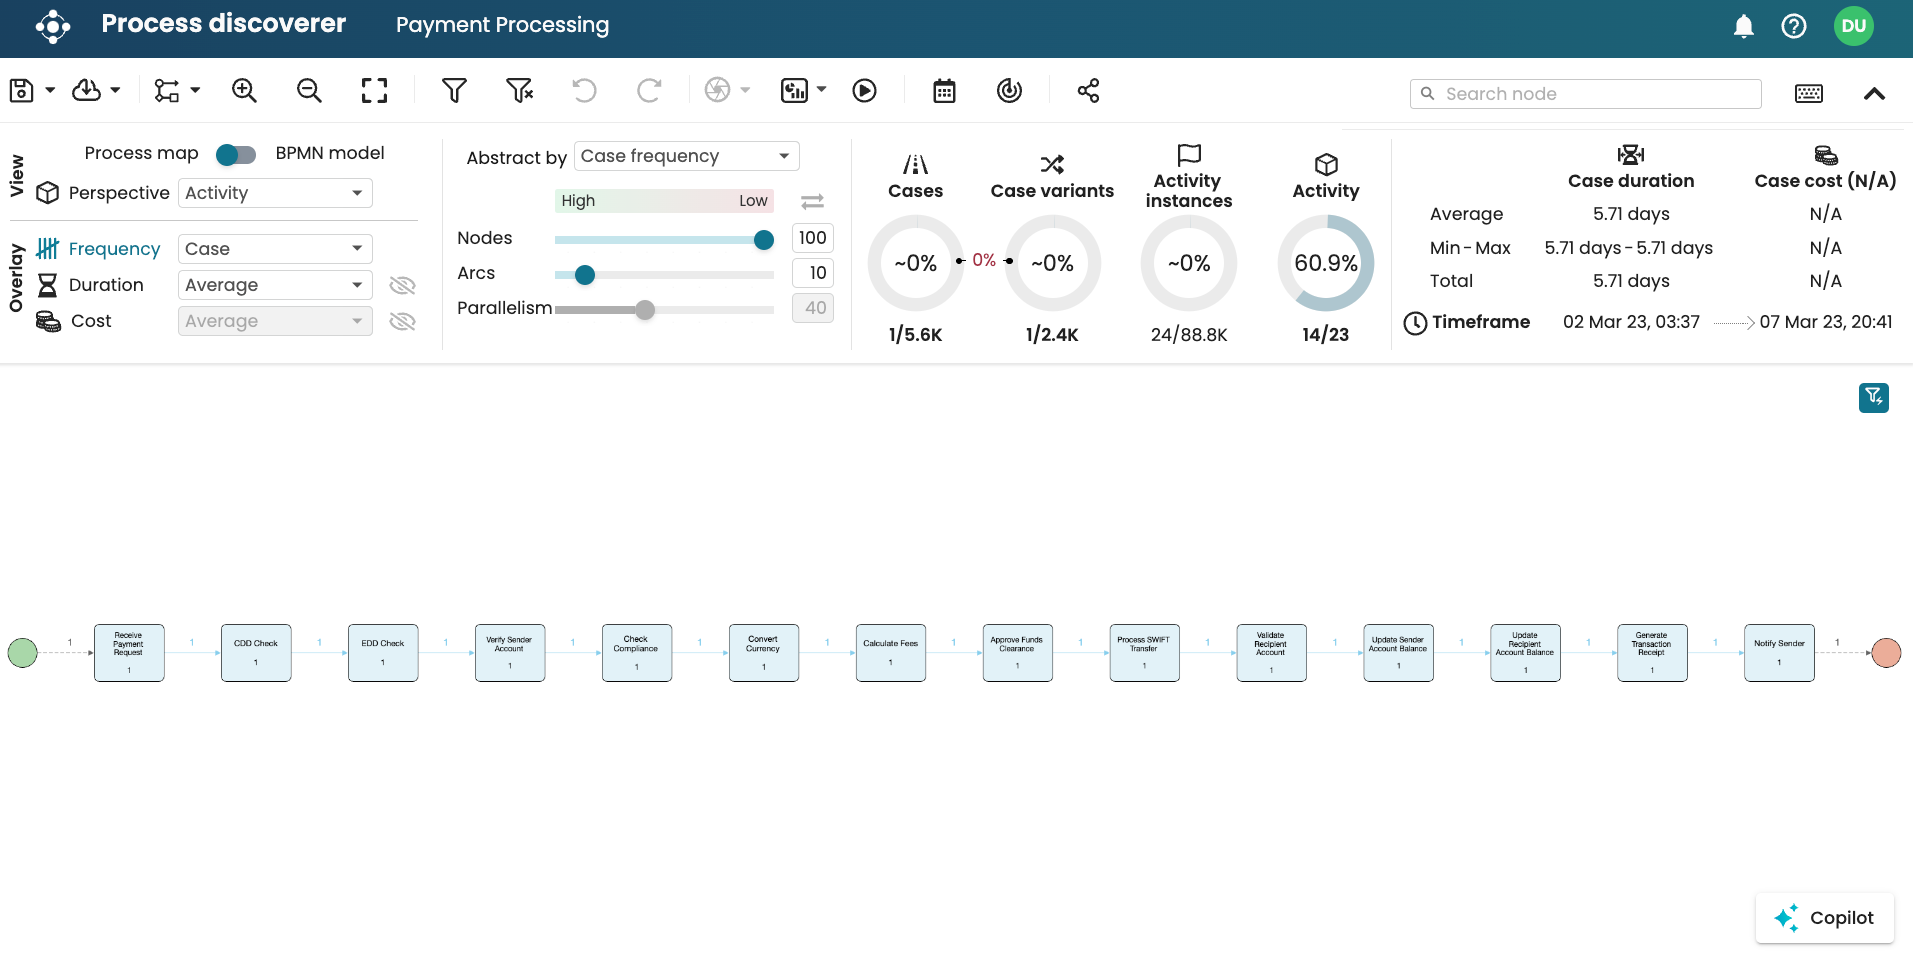
Note
We can also investigate violating cases in the Violations page. To learn more, see Investigate violating cases.
When running multiple compliance checks, we may wish to display a compliance table/chart that focuses on results found within a specific period. For instance, imagine a scenario where an event log was updated today, and a compliance check was run. We can display only the compliance events that were discovered today rather than those earlier discovered. This can be done by specifying a timeframe in the compliance table/chart.
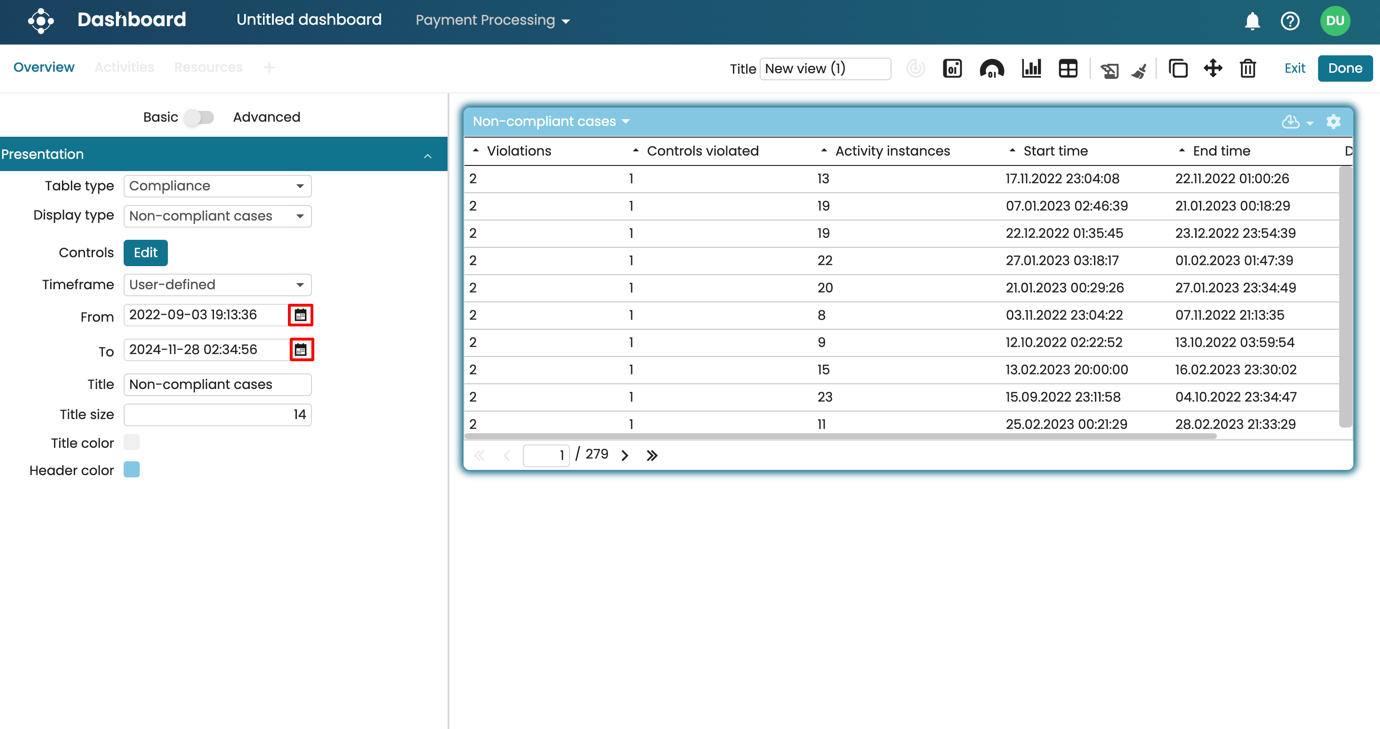
Let’s create a compliance table for a control showing non-compliant cases.
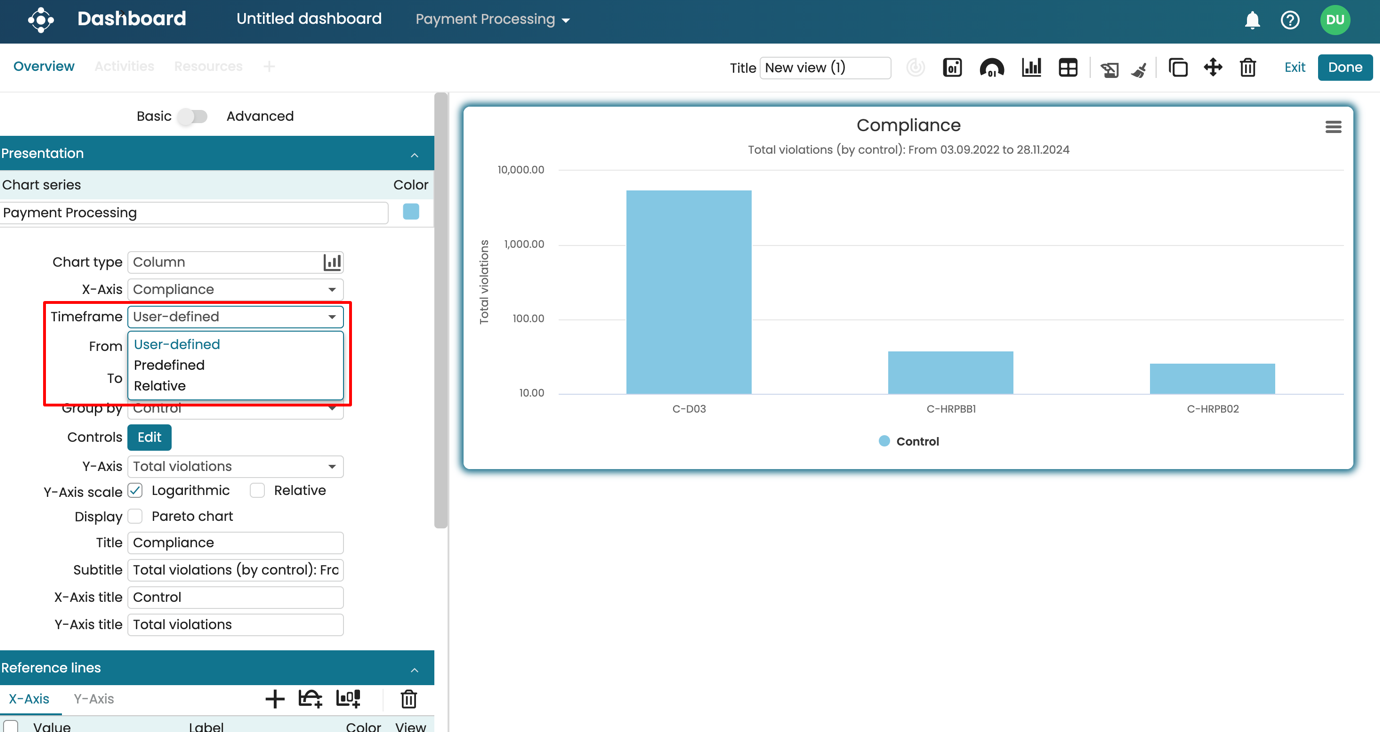
We specify a timeframe using three methods:
User-defined: You specify a timeframe using a start date to an end date.
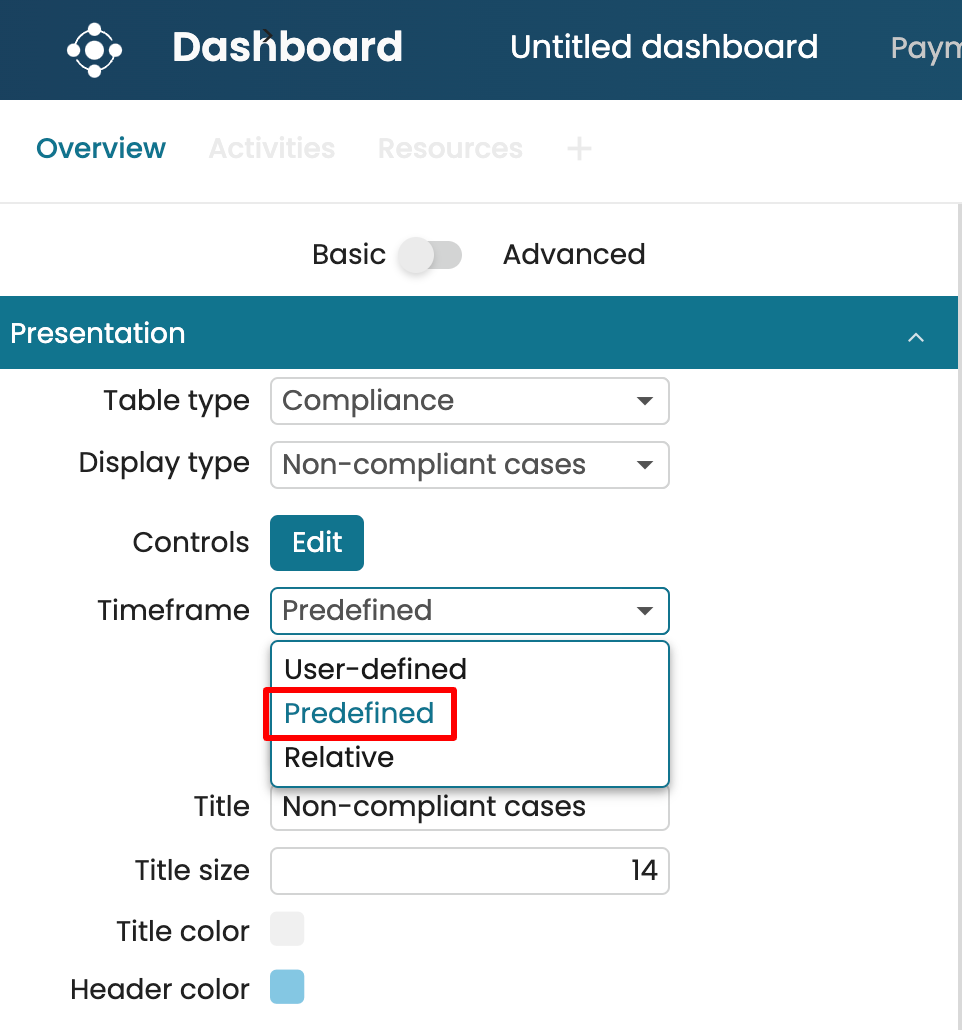
Predefined: You specify a timeframe using a specific interval. For example, the compliance result of Q1 2024. When specifying a predefined timeframe, we must select the interval to use, which can be Year, Semester, Quarter, Month, or Week.
Relative: You specify a timeframe with respect to the current date. For instance, the compliance result for the last month.
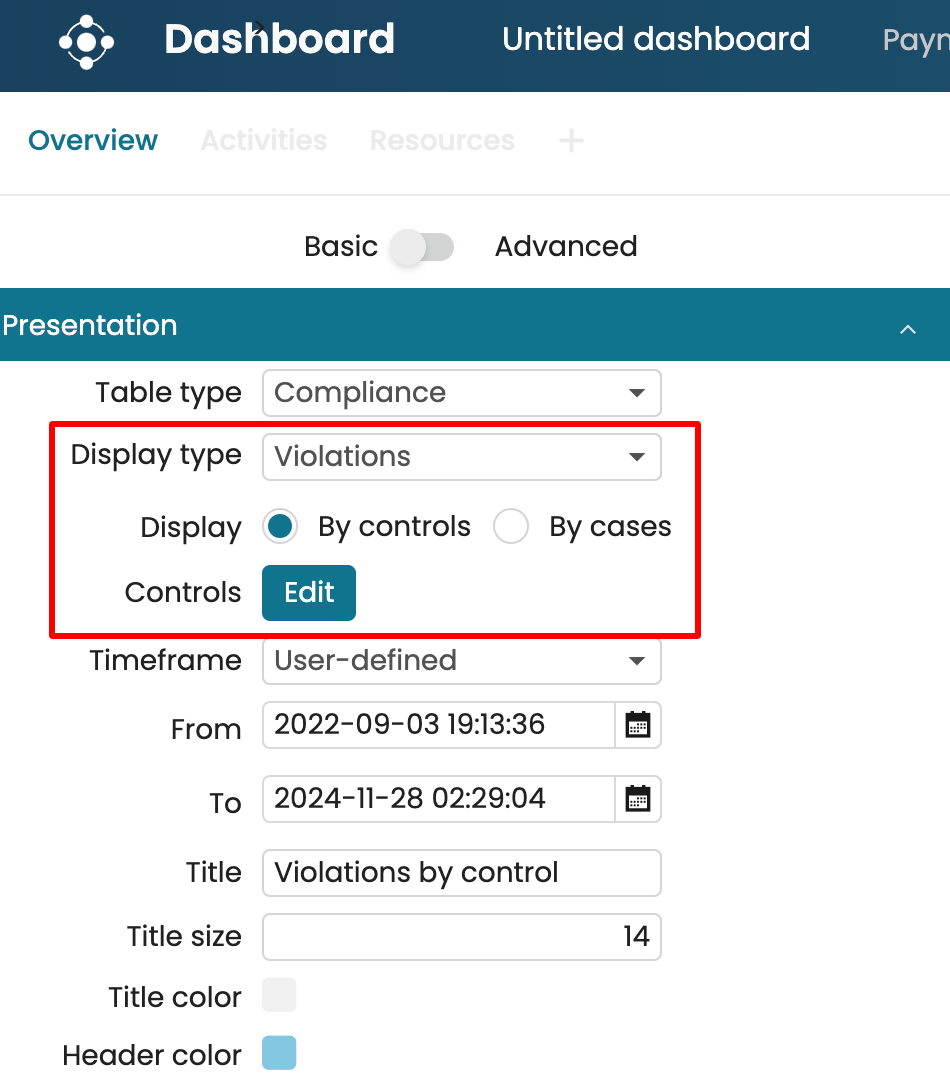
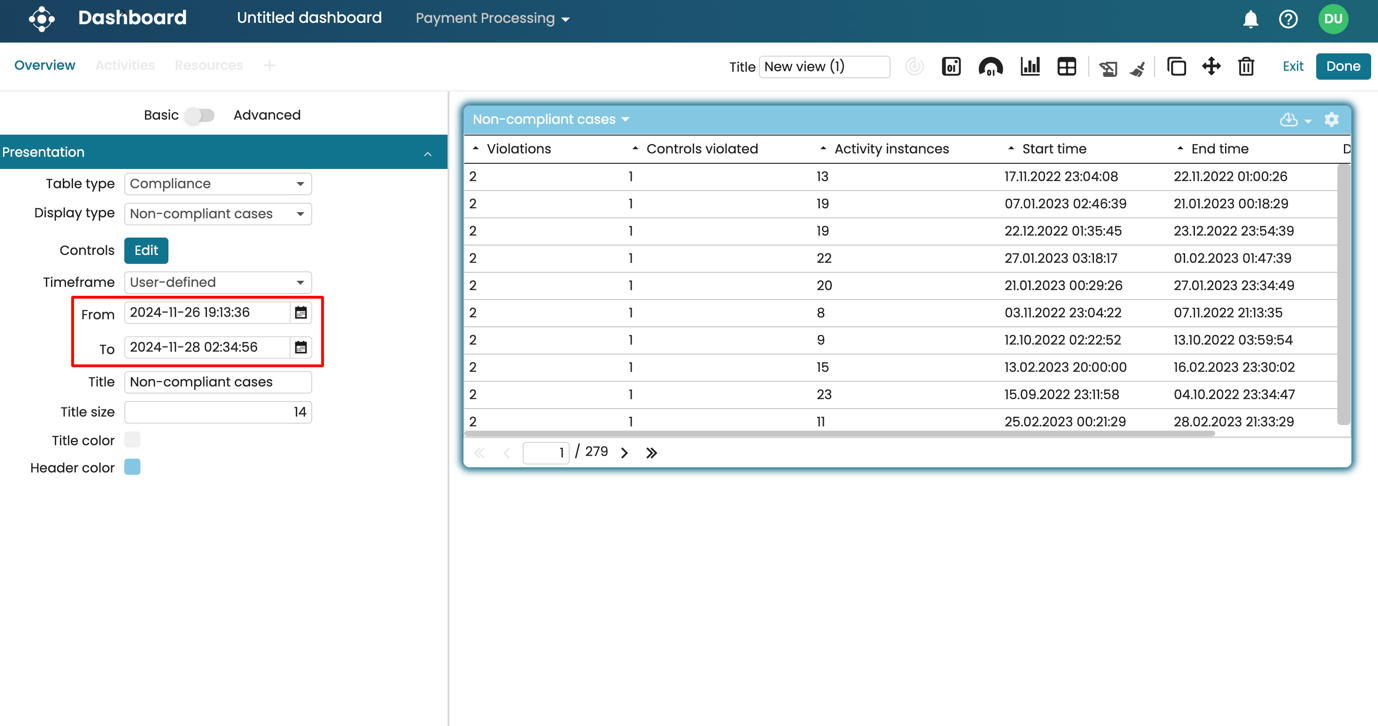
By default, the User-defined timeframe is selected. Click the calendar icon to edit the From or To date.
For instance, we can specify the time from 26th November 2024 to 28th November 2024.
Note
The timeframe refers to when the compliance check was run, not when the event in the log occurred. Therefore, if an event happened earlier but was not identified in any previous compliance check, it will appear in the compliance result if it is discovered within the specified timeframe.
We can also specify a predefined timeframe. Say, we wish to display the compliance result for Q4 2024. In the Timeframe dropdown, click Predefined.
In the dropdown below, select the predefined timeframe. In our case, we select Quarter.
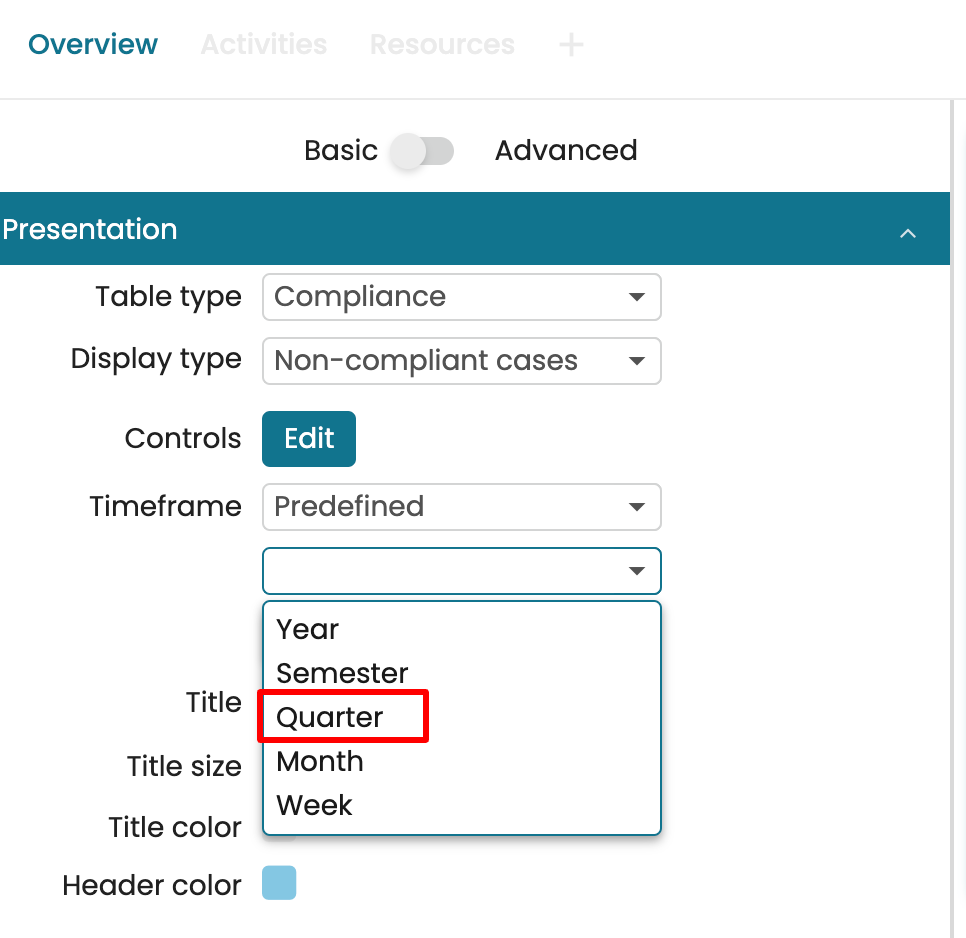
Click Intervals and select the specific quarter(s). In our case, we select 2024 Q4.
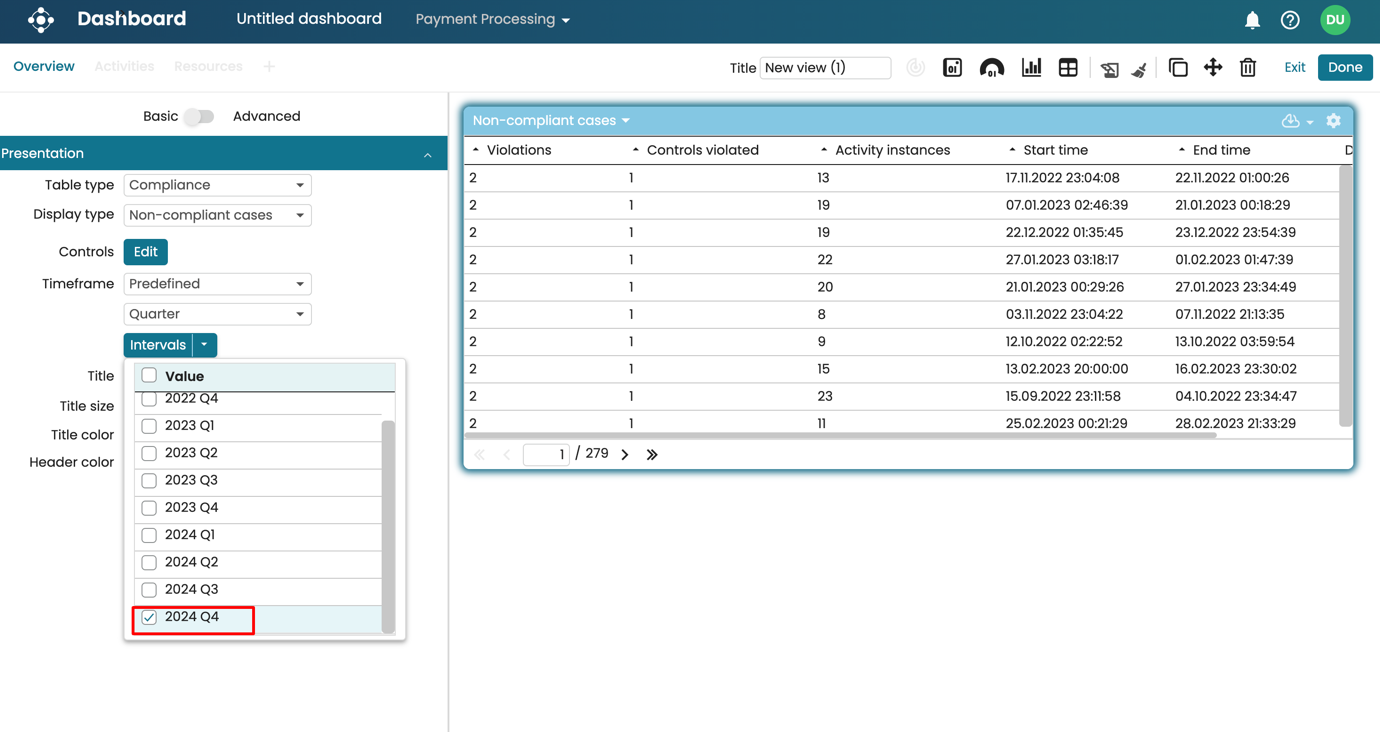
Note
We can select multiple intervals.
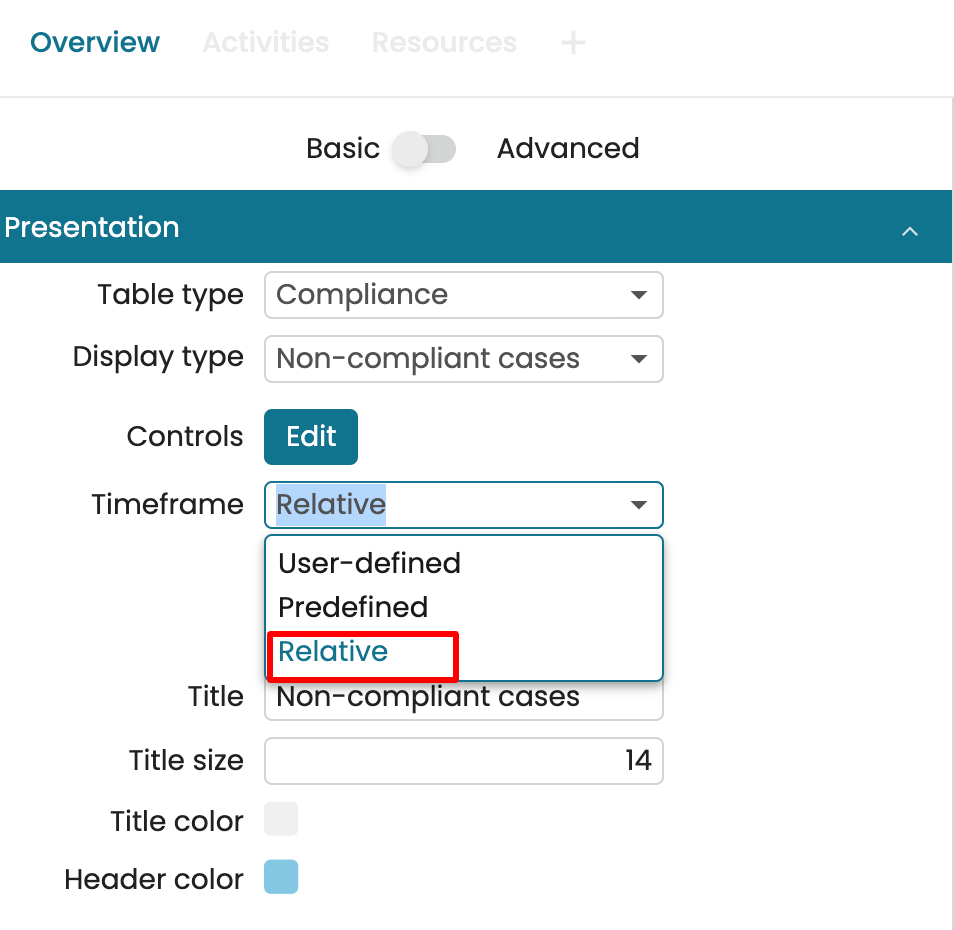
Lastly, we can define a timeframe using a relative timeframe. For instance, we may wish to display the results from this year. In the timeframe dropdown, Select Relative.
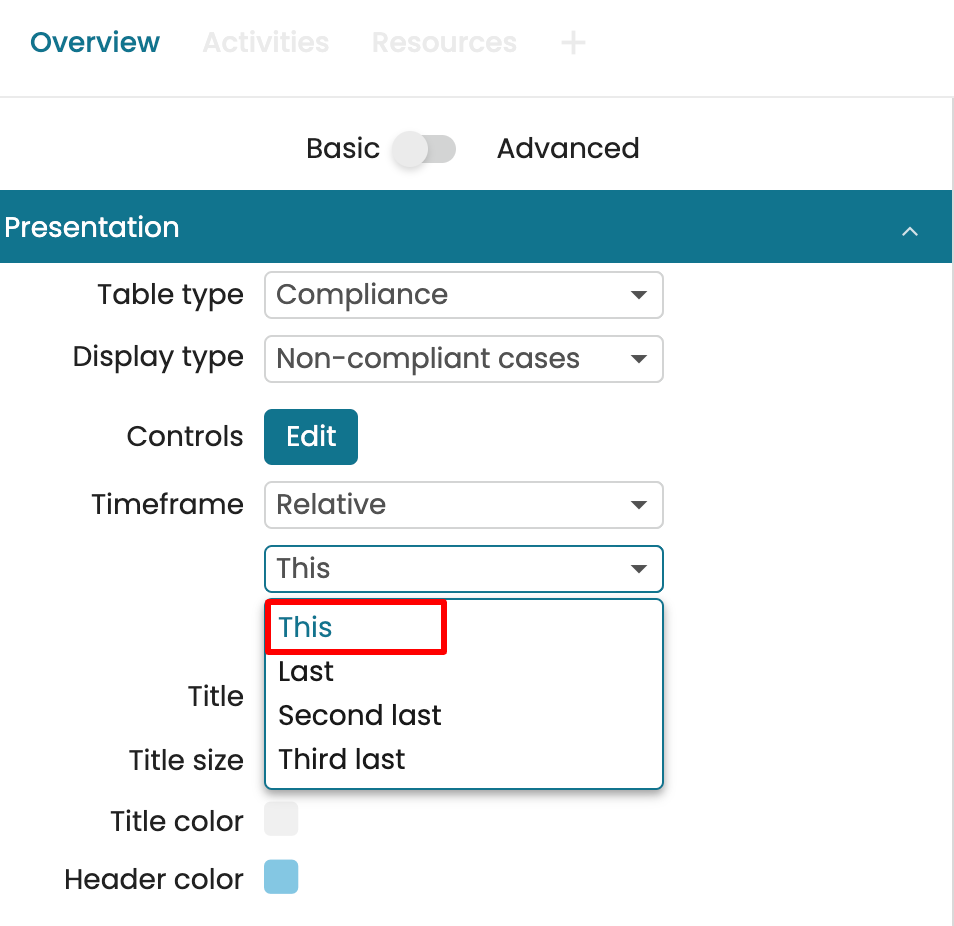
We can specify the relative timeframe with the dropdowns. In our case, we select This.
And select Year.
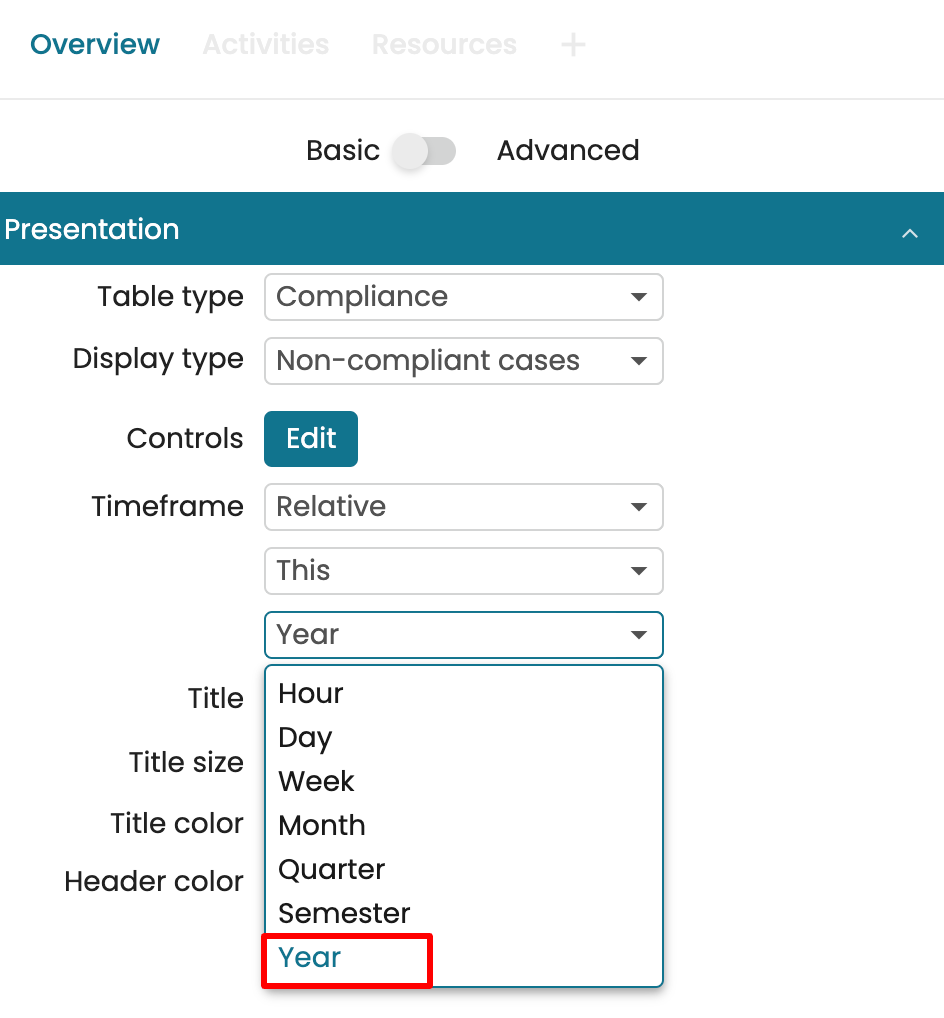
This displays the compliance result of the last year with respect to today.
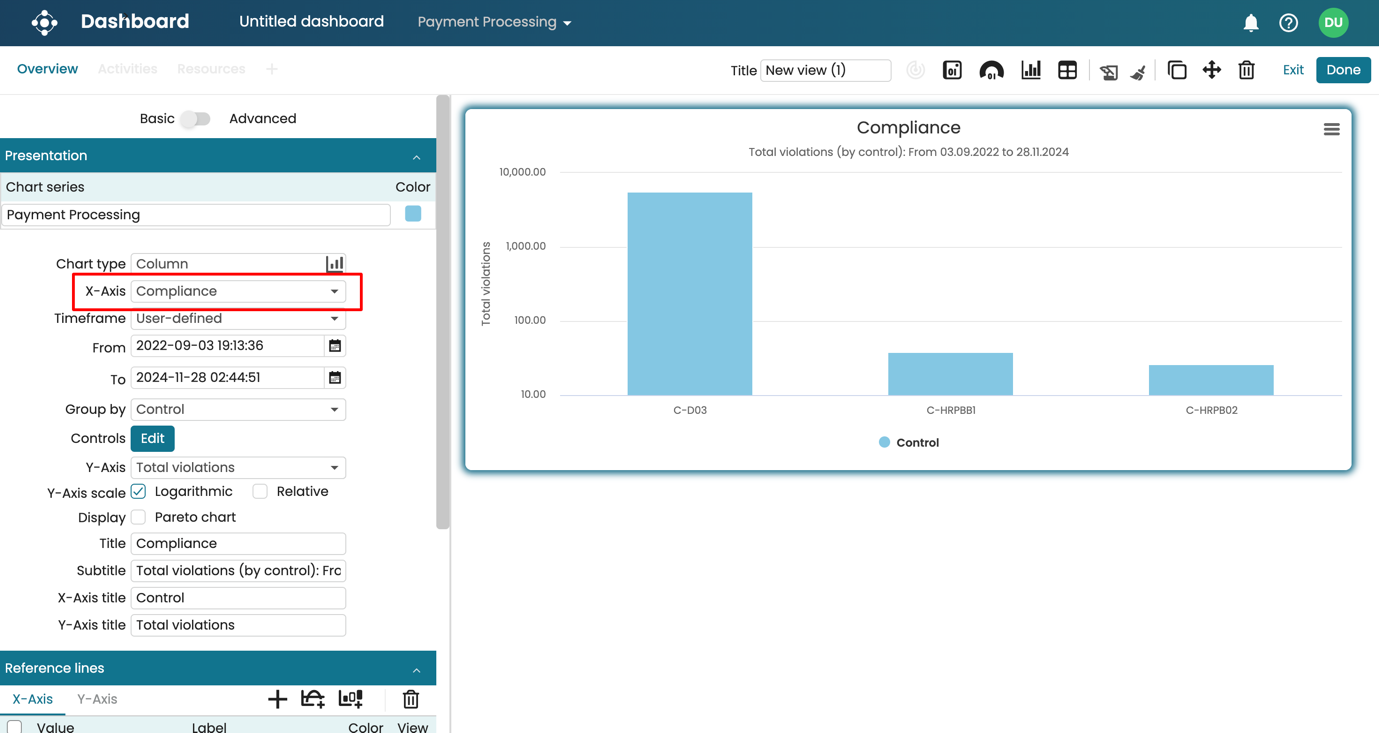
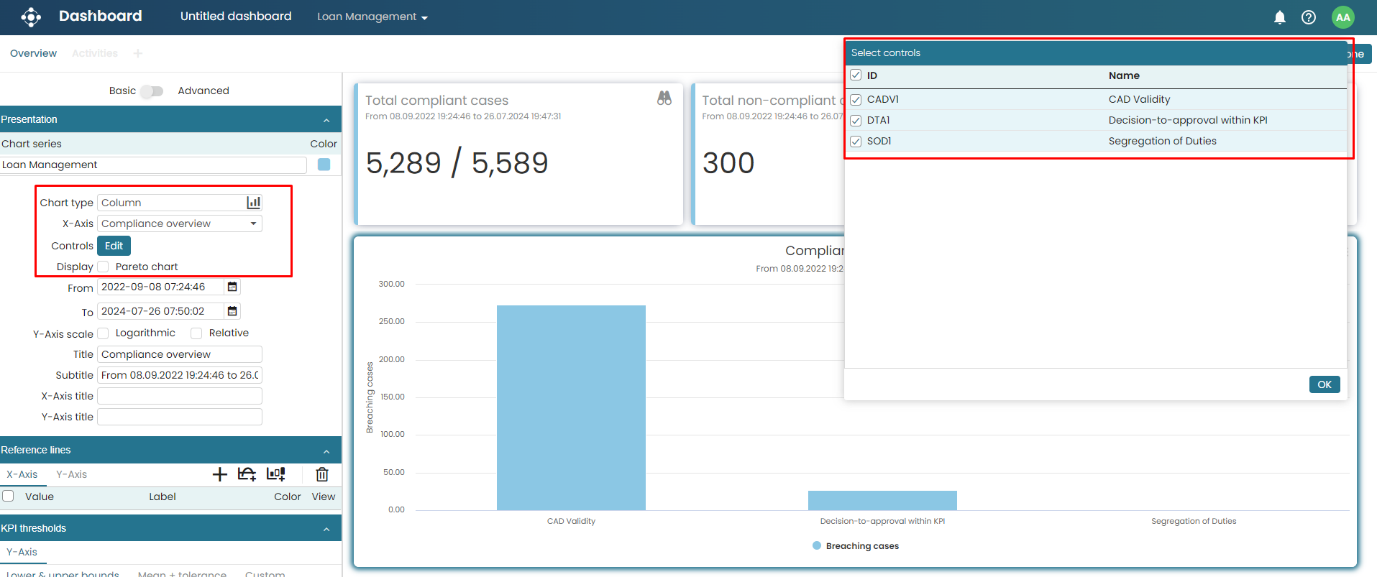
View result as a chart
Lastly, we can also display the compliance result as a chart. By selecting the X-axis of the chart as “Compliance”. Then, as for the table, click on Edit and select the controls of interest. For each control selected, the chart will create a data point (in the example below, a column) reporting the total number of cases violating that specific control.
We can also specify the timeframe using a user-defined timeframe, predefined timeframe, or relative time frame.
Upload compliance items as a file
Instead of creating compliance items manually, one at a time, it is also possible to upload a risk and control register file in CSV format.
To showcase this additional functionality, let us consider the following example. Loan application processes are subject to several risks and obligations, which have corresponding controls to keep the process complaint. Among these, we can find the following:
Risk (LAR1): When a customer applies for a loan, the credit officer performing the credit check to determine the eligibility for the loan could be the same credit officer who will approve the offer of credit. Violating this risk might lead to employee theft as well as the inability of the applicant to repay the loan.
Control (SOD1): Segregation of duties.
Risk (LAR2): The credit offer is approved by a credit officer whose CAD level (Credit Authorization Delegation) is below the required one. For regulations, depending on the loan amount, the credit officer approving the offer must have a given CAD level; e.g., for loans of $500,000 to $1,000,000, the CAD level must be 2 or higher.
Control (CADV1): CAD Validity
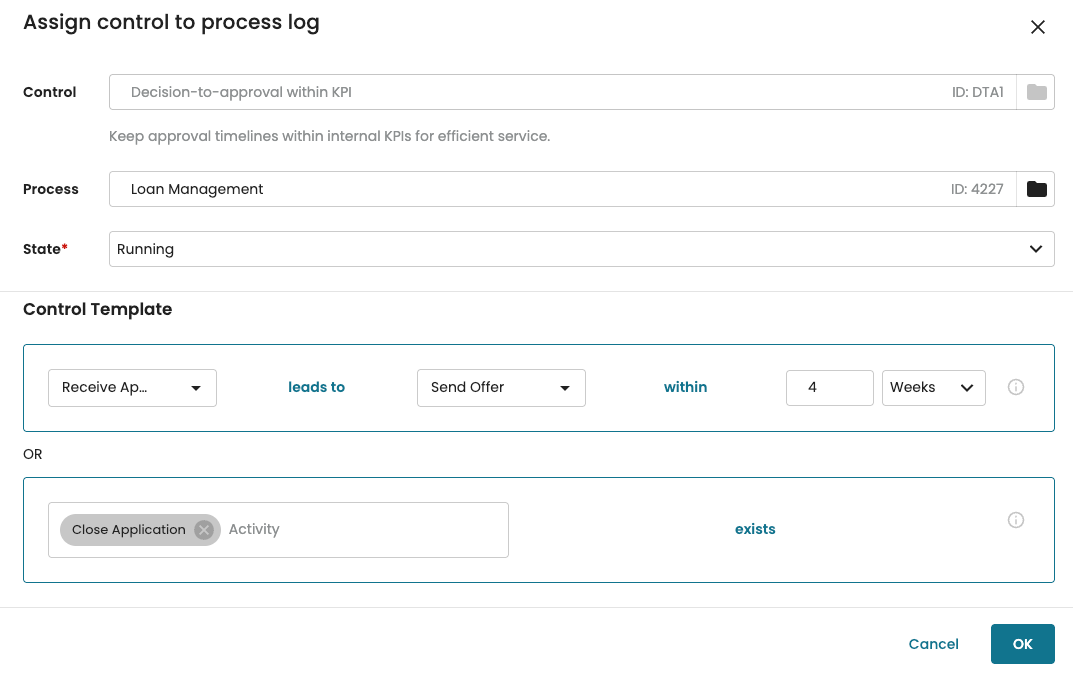
Obligation (LAO1): The bank has an SLA to process the loan application and provide an offer or a rejection to the applicant within four weeks of the application submission.
Control (DTA1): Decision-to-approval within KPI
If we organize these compliance items into a register in CSV format, as shown below, we can then import it automatically. This will also automatically link the controls to the risks and obligations.

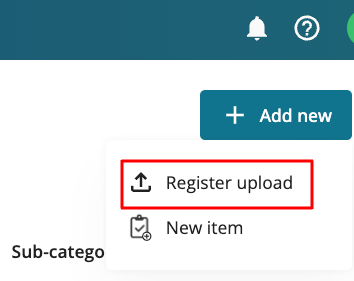
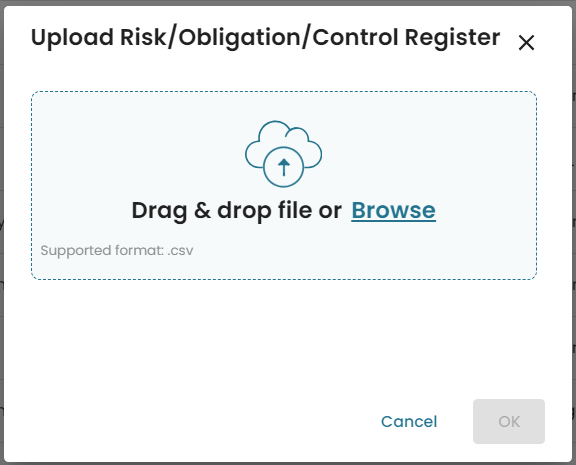
To upload the created CSV file as a risk and control register. Within the compliance center, click Add new > Register upload.
A modal window to upload a file will open. Select the correct file. Ensure it is in CSV UTF-8 format. Click OK to proceed.
Another modal window will open, allowing us to map each column of the register to its corresponding field. When doing so, some fields will be mandatory: name, description, type (when uploading a register containing a mix of compliance item types), and Item ID. All other fields are optional to map, and they represent fields that are already present in the system because they were uploaded previously in other registers. However, another important field to map is the “Linked ID”, which represents a link between risks and obligations with controls.
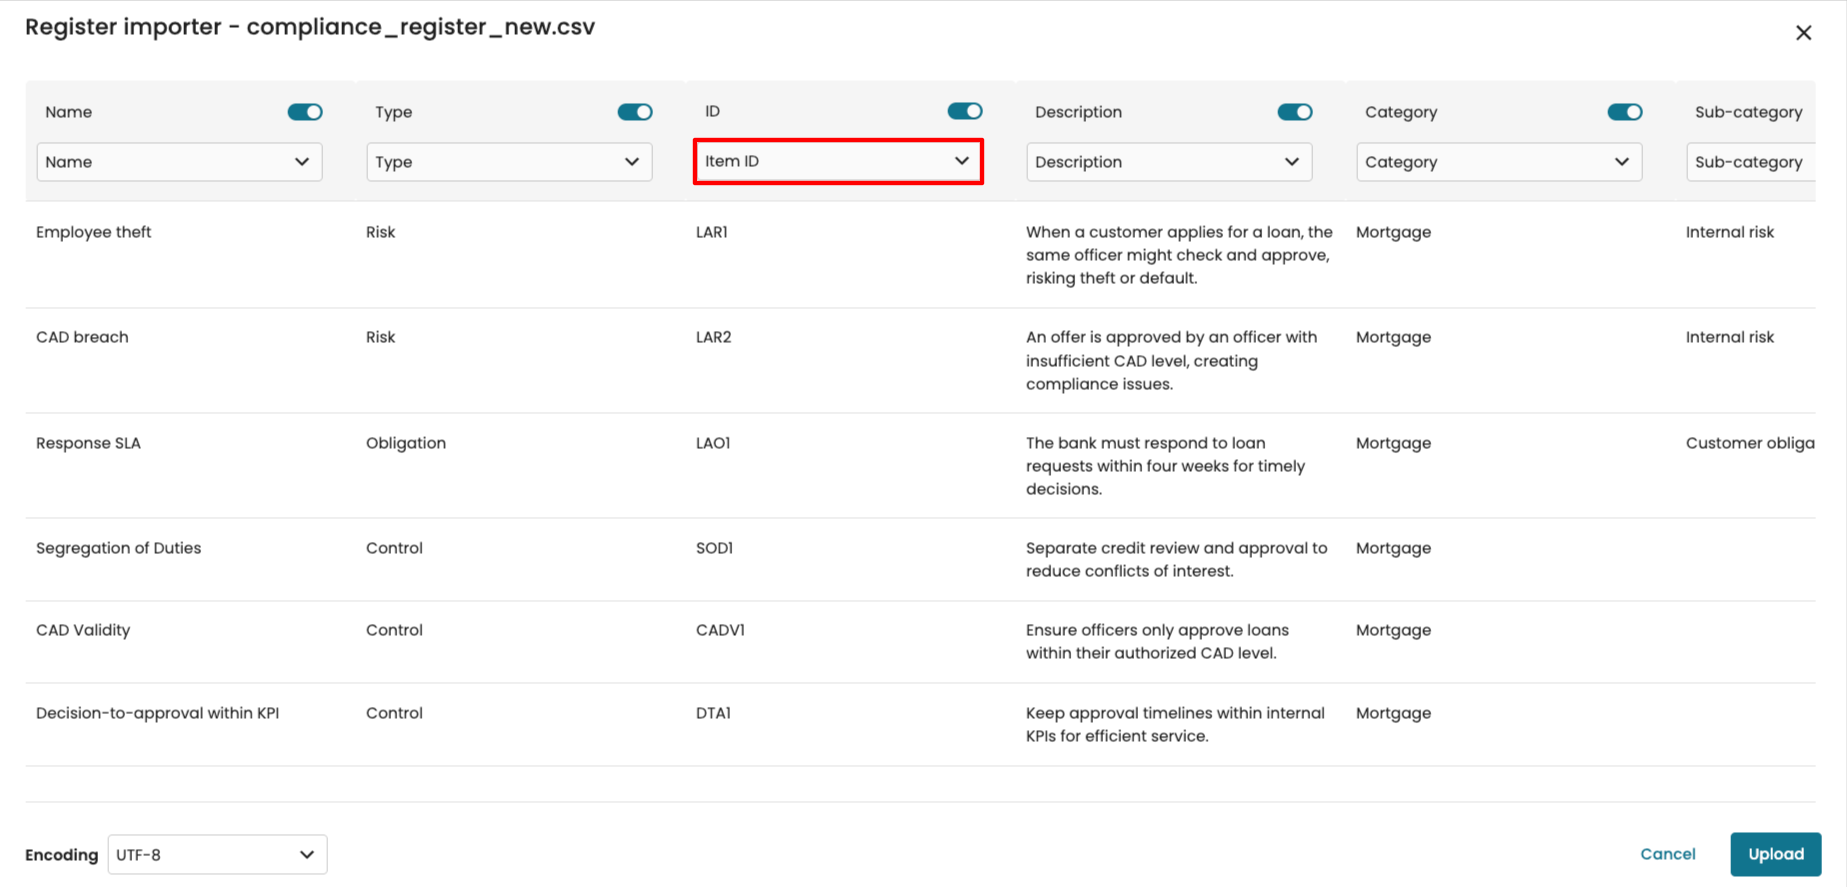
If a Linked ID field is available (i.e., a field linking each risk and obligation to a control and/or vice versa via their IDs), the mapping between risks and obligations and controls will be done automatically.
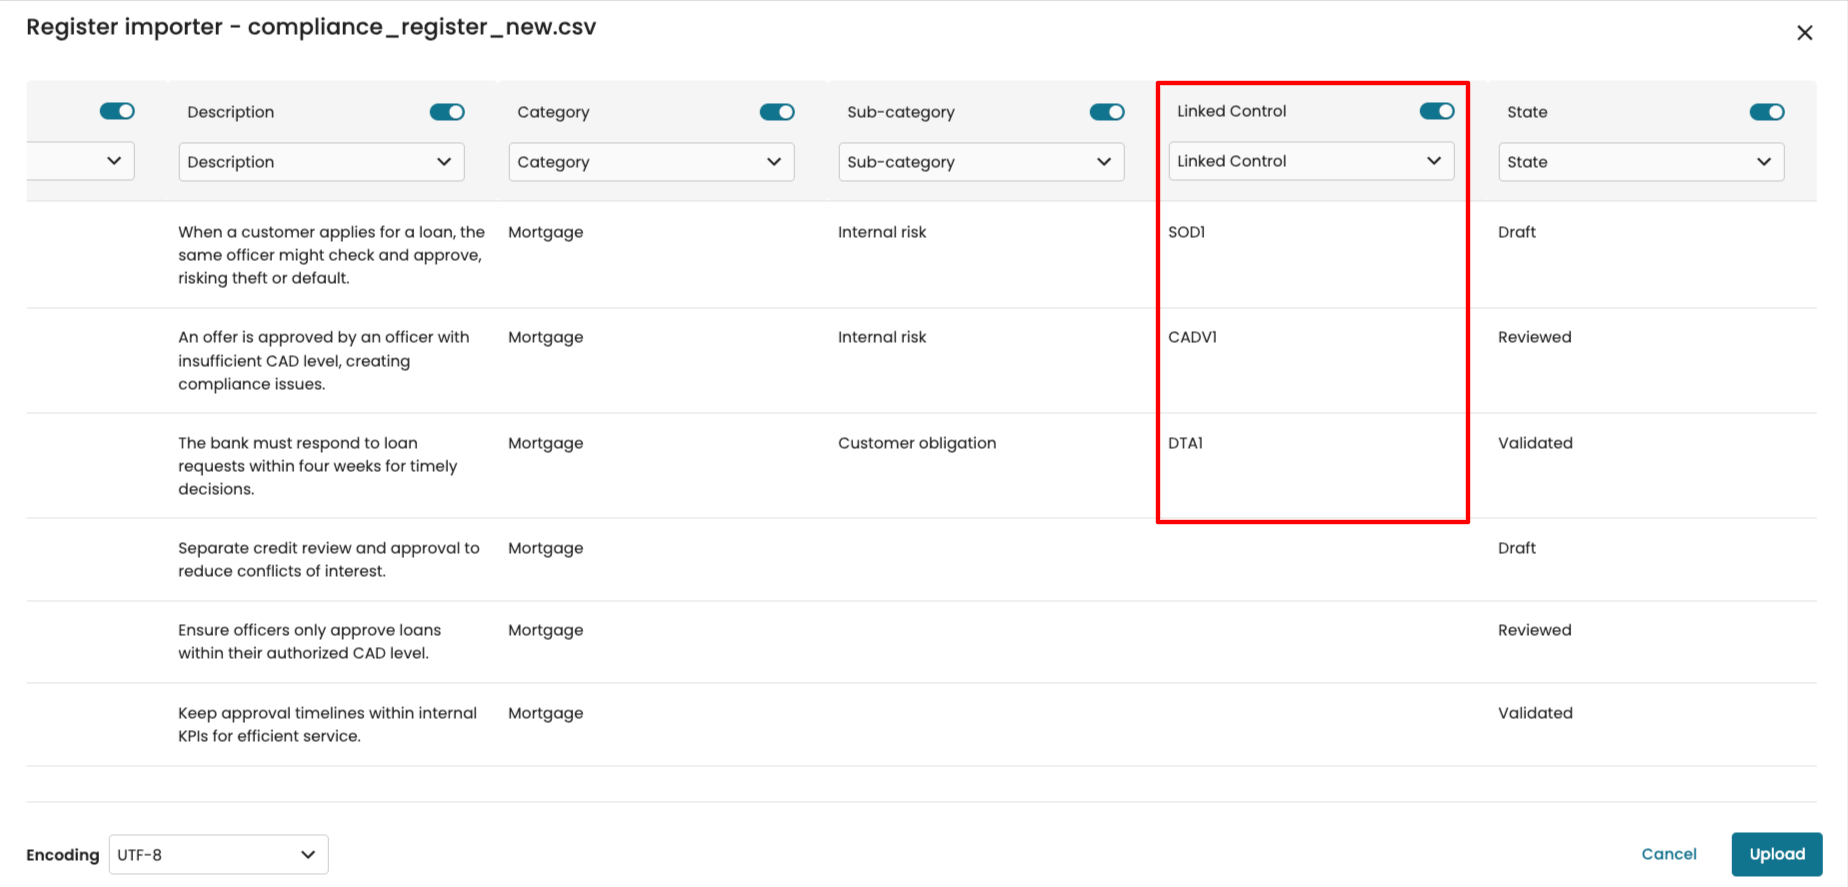
When ready to upload the register, click Upload.
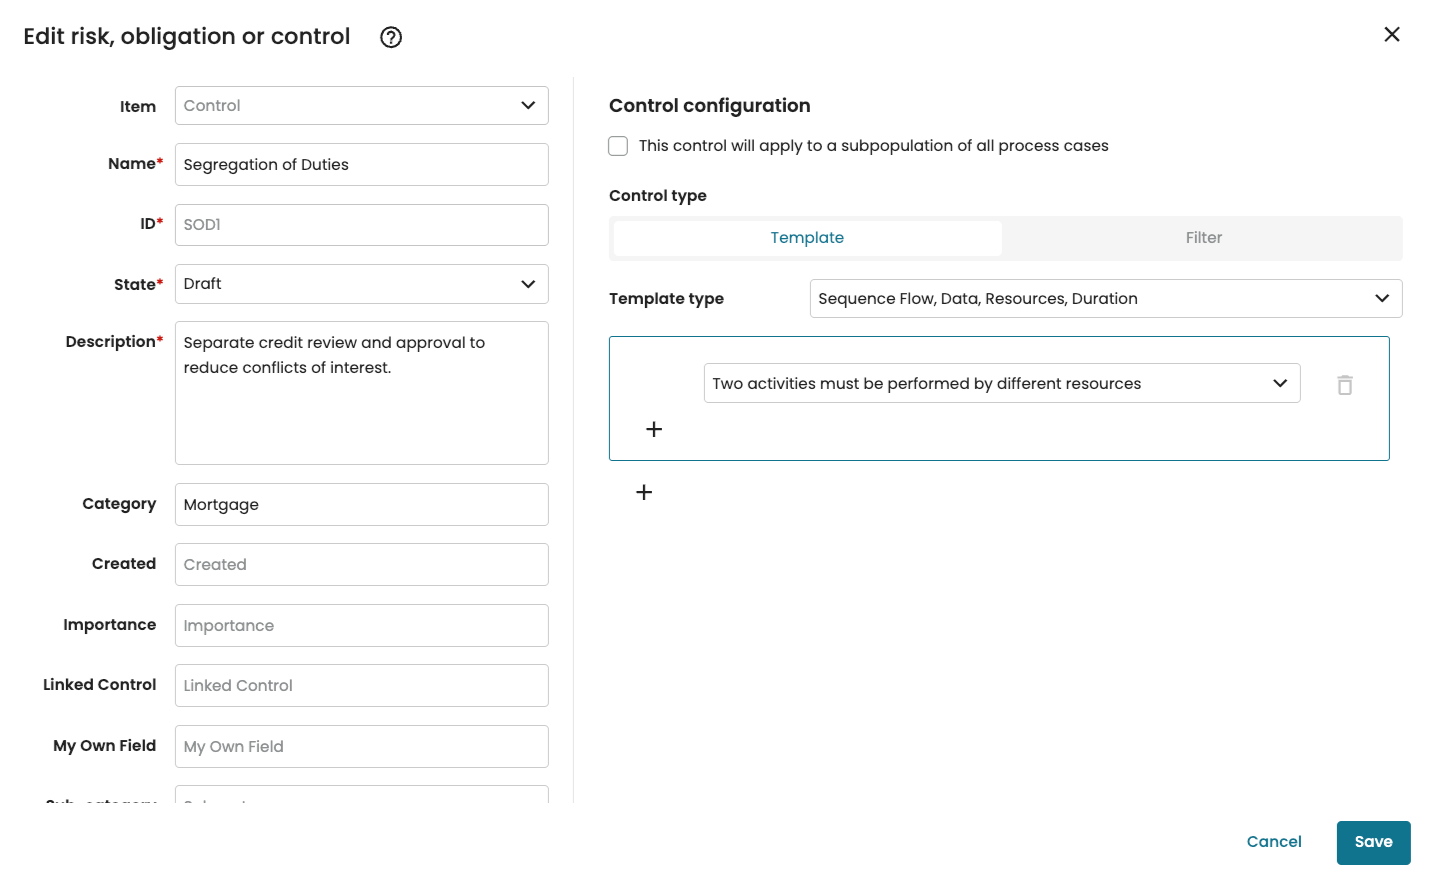
After the upload is completed, all the risks, obligations, and controls will be ready for use in the compliance center. While we could automatically link controls to risks and obligations during the upload, we still need to define the control templates for each control. Let us do that as we did in the previous example. Open each of the three controls and add the required control templates, as shown below.
Control SOD1
Control CADV1
Control DTA1

Having assigned the control templates, we can now instantiate the controls by creating compliance rules for the loan management log. Select one control at a time and assign it to the log by defining the compliance rules (as shown in the example above).
Control SOD1
Control CADV1
Control DTA1
To validate the effectiveness of our controls, we can create a dashboard, as we showed in example 1 above. For this scenario, let us add three tiles, a chart, and a table.

The dashboard shows that 300 cases out of 5,589 violated one control: 273 violated the CADV1 (CAD Validity) control, and 27 the DTA1 (Decision-to- approval) control. While no cases violated the SOD1 (Segregation of Duties) control or violated more than one control.
The final dashboard view will look as follows.

